跳转到主内容

当前版本的文档还未经巡查,您可以查看最新的已查核版本

你所需要的

  1. 这个步骤还没有翻译 帮忙翻译一下

    : 步骤 1 中的图像 1,3 : 步骤 1 中的图像 2,3 : 步骤 1 中的图像 3,3
    • Pry, with a metal probe, the black covers that are located by the pivoting joints of the phone.

    • Beneath the covers are screws.

  2. 这个步骤还没有翻译 帮忙翻译一下

    : 步骤 2 中的图像 1,1
    • Remove the screws using a Y0 screwdriver.

  3. 这个步骤还没有翻译 帮忙翻译一下

    : 步骤 3 中的图像 1,3 : 步骤 3 中的图像 2,3 : 步骤 3 中的图像 3,3
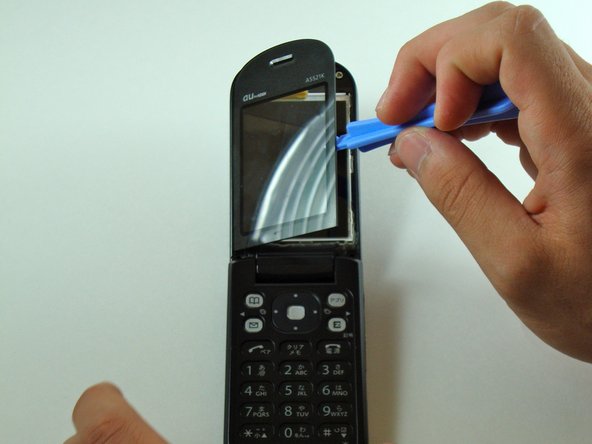
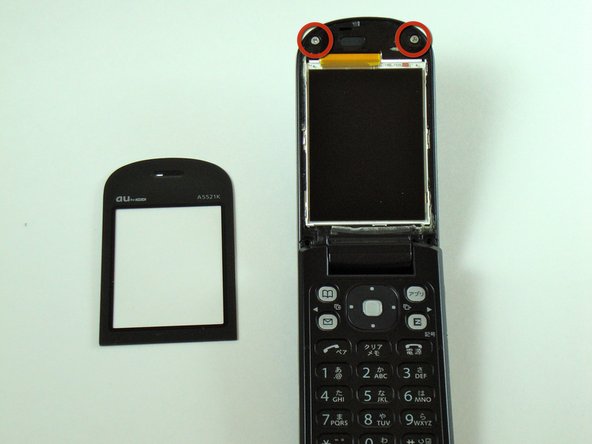
    • Use the iPod pry tool to remove the outer screen.

    • Two screws are now visible.

    • Be careful not to crack the screen upon removal. It is adhered strongly to the phone.

  4. 这个步骤还没有翻译 帮忙翻译一下

    : 步骤 4 中的图像 1,1
    • Use the Y0 screwdriver to remove the screws.

  5. 这个步骤还没有翻译 帮忙翻译一下

    : 步骤 5 中的图像 1,2 : 步骤 5 中的图像 2,2
    • Use the iPod pry tool to loosen the faceplate from the phone.

    • Slide the pry tool along the entire crease of the faceplate to completely detach it.

  6. 这个步骤还没有翻译 帮忙翻译一下

    : 步骤 6 中的图像 1,3 : 步骤 6 中的图像 2,3 : 步骤 6 中的图像 3,3
    • Separate the faceplate from the phone.

  7. 这个步骤还没有翻译 帮忙翻译一下

    : 步骤 7 中的图像 1,2 : 步骤 7 中的图像 2,2
    • Firmly grab the flexible circuit with tweezers to detach (or use your fingers if you can manage a firm grip).

  8. 这个步骤还没有翻译 帮忙翻译一下

    : 步骤 8 中的图像 1,3 : 步骤 8 中的图像 2,3 : 步骤 8 中的图像 3,3
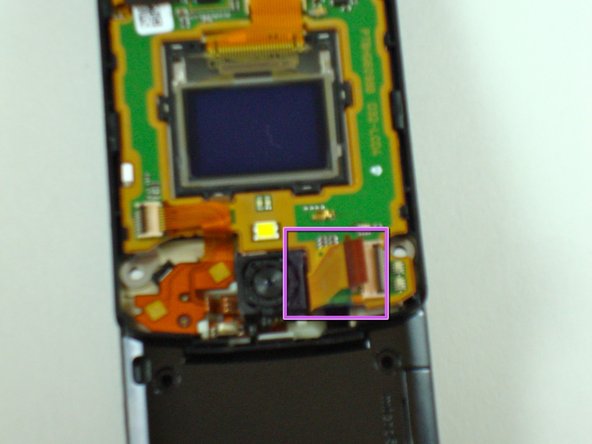
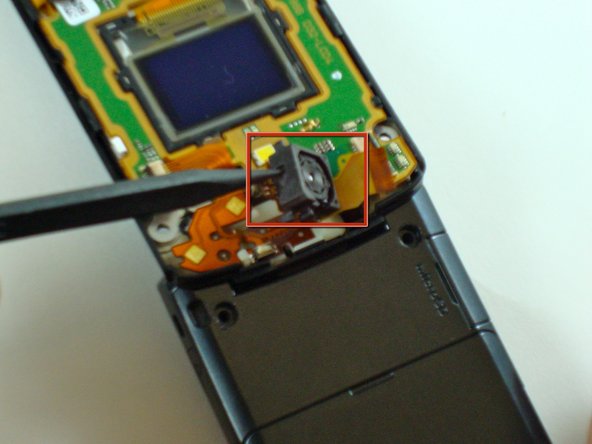
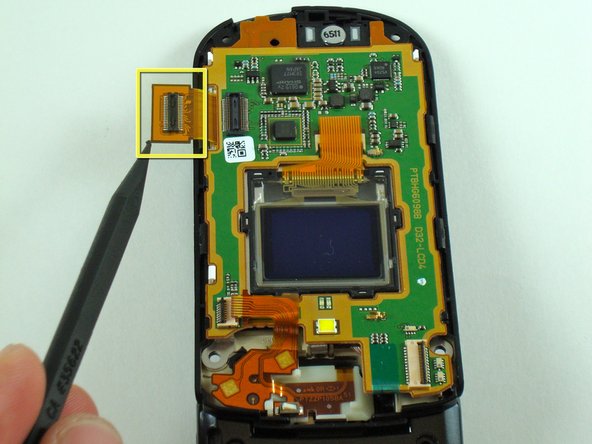
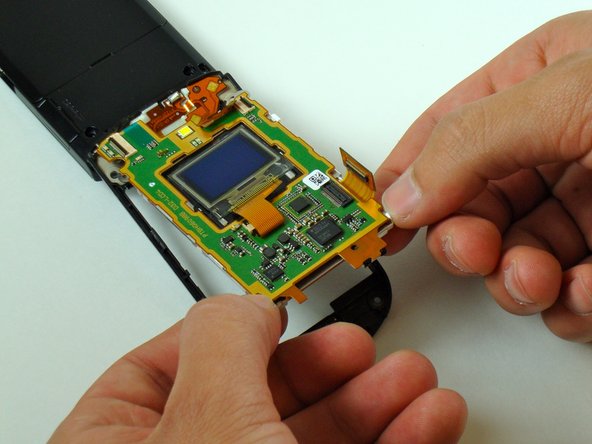
    • Carefully pry up the camera unit with a spudger.

    • Be careful not to damage the camera unit.

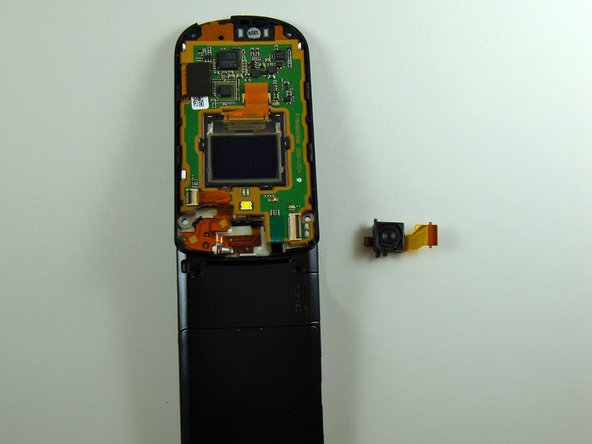
    • The camera should now be separated from the phone.

  9. 这个步骤还没有翻译 帮忙翻译一下

    : 步骤 9 中的图像 1,2 : 步骤 9 中的图像 2,2
    • Remove the flexible circuit shown using tweezers (or use your fingers if you can manage a firm grip).

  10. 这个步骤还没有翻译 帮忙翻译一下

    : 步骤 10 中的图像 1,2 : 步骤 10 中的图像 2,2
    • Unplug the circuit connector.

  11. 这个步骤还没有翻译 帮忙翻译一下

    : 步骤 11 中的图像 1,3 : 步骤 11 中的图像 2,3 : 步骤 11 中的图像 3,3
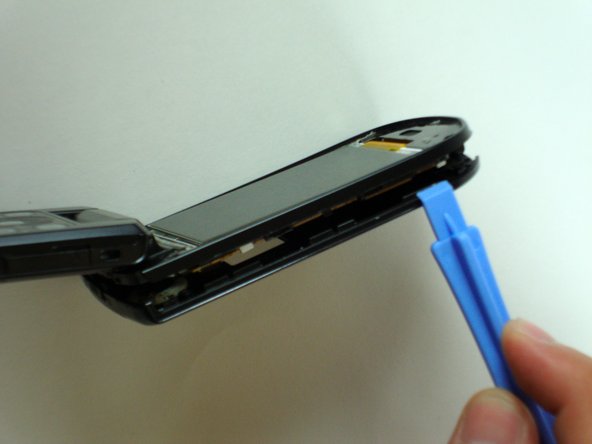
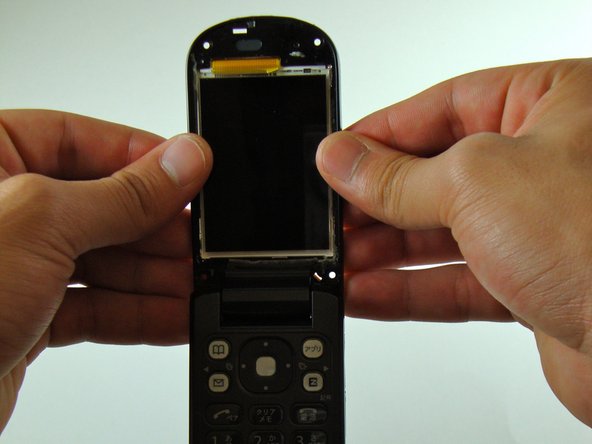
    • Grab the phone with both hands.

    • Turnover the phone so that the main screen faces you.

    • Firmly grasp the edges between your thumbs and fingers.

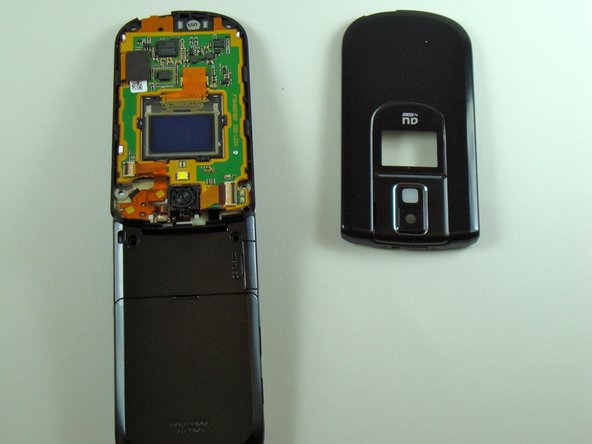
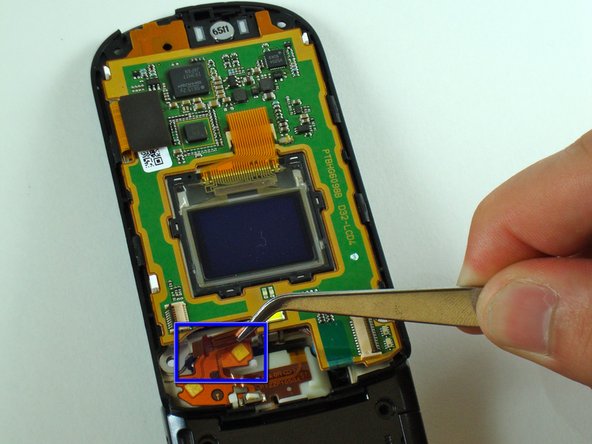
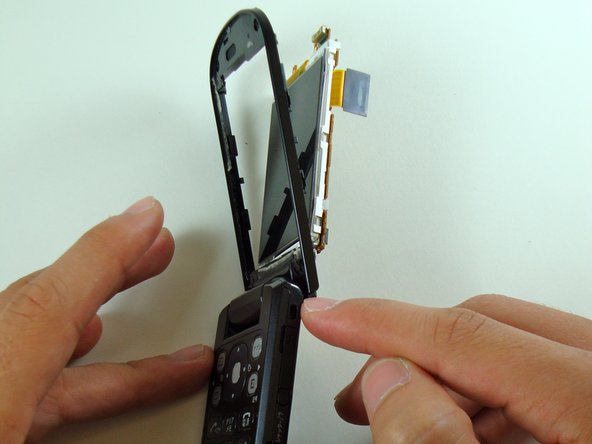
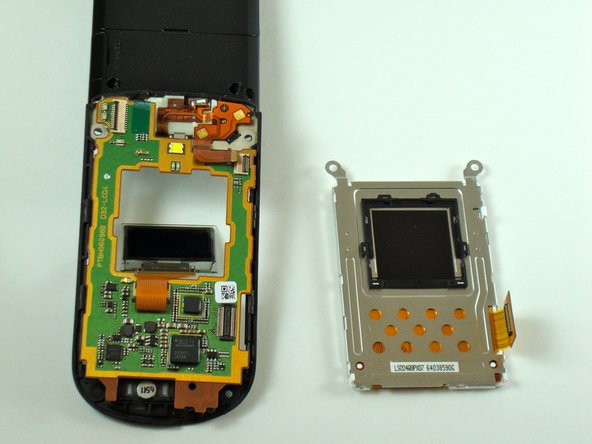
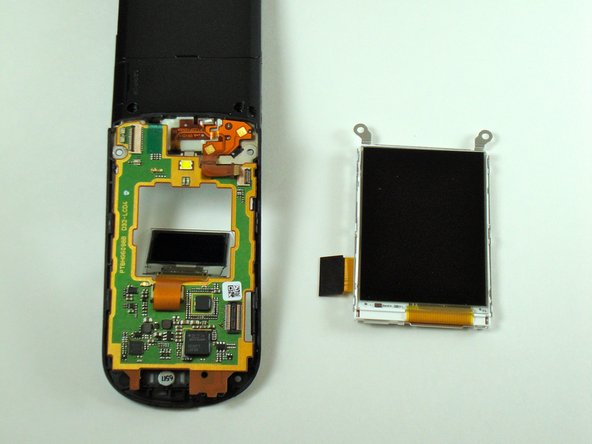
    • Carefully push in the LCD screen from the remainder of the phone.

    • Be careful not to break the LCD screen.

  12. 这个步骤还没有翻译 帮忙翻译一下

    : 步骤 12 中的图像 1,2 : 步骤 12 中的图像 2,2
    • The LCD screen and circuit board should now be partly detached from the frame.

  13. 这个步骤还没有翻译 帮忙翻译一下

    : 步骤 13 中的图像 1,2 : 步骤 13 中的图像 2,2
    • Turn over the phone.

    • Separate the circuit board from the back of the LCD screen.

  14. 这个步骤还没有翻译 帮忙翻译一下

    : 步骤 14 中的图像 1,3 : 步骤 14 中的图像 2,3 : 步骤 14 中的图像 3,3
    • Remove the LCD screen from the phone.

终点

Dominic Grisafe

于04/15/10注册

157 声望

创作了10篇指南

团队

Cal Poly, Team 28-25, Regan Spring 2010 Cal Poly, Team 28-25, Regan Spring 2010 的会员

CPSU-REGAN-S10S28G25

4 名成员

创作了20篇指南

0条评论

添加评论

浏览统计数据:

过去 24 小时: 1

过去 7 天: 6

过去 30 天: 23

总计 1,805