跳转到主内容

Disassembling Canon PowerShot SD700 Lens

你所需要的

  1. Disassembling Canon PowerShot SD700 Lens, Outside Case: 步骤 1 中的图像 1,1
    • Turn off the camera by pressing the power button above the LCD screen.

  2. Disassembling Canon PowerShot SD700 Lens: 步骤 2 中的图像 1,1
    • Remove the two, small screws on the bottom of the camera using a Phillip's #00 screwdriver.

  3. Disassembling Canon PowerShot SD700 Lens: 步骤 3 中的图像 1,1
    • Use a Phillips #00 screwdriver to remove the two, small screws on the right side of the camera.

  4. Disassembling Canon PowerShot SD700 Lens: 步骤 4 中的图像 1,1
    • Use a Phillips #00 screwdriver to remove the screw on the left of the camera under the A/V out Digital label.

  5. Disassembling Canon PowerShot SD700 Lens: 步骤 5 中的图像 1,1
    • Use a Phillips #00 screwdriver, remove the screw on the bottom of the camera near the battery and memory card slots.

    • This screw will be longer than the rest of the screws.

  6. Disassembling Canon PowerShot SD700 Lens: 步骤 6 中的图像 1,1
    • Remove the front, back, and side casings from the camera and set to the side.

  7. Disassembling Canon PowerShot SD700 Lens, LCD screen: 步骤 7 中的图像 1,1
    • Remove the two screws that connect the LCD and backlight to the main body of the camera.

  8. Disassembling Canon PowerShot SD700 Lens: 步骤 8 中的图像 1,3 Disassembling Canon PowerShot SD700 Lens: 步骤 8 中的图像 2,3 Disassembling Canon PowerShot SD700 Lens: 步骤 8 中的图像 3,3
    • Gently pry the LCD and the backlight from the main body of the camera.

    • Gently pry the LCD from the backlight.

    • The thin ribbon cable is for the backlight.

    • The thick ribbon cable is for the LCD screen.

  9. Disassembling Canon PowerShot SD700 Lens: 步骤 9 中的图像 1,1
    • Carefully lift the ZIF connector that covers the thick ribbon cable.

    • This ZIF connector is fragile. Use caution when lifting it from its down position.

    • Insert the new LCD and reassemble the camera.

  10. Disassembling Canon PowerShot SD700 Lens, Backlight: 步骤 10 中的图像 1,1
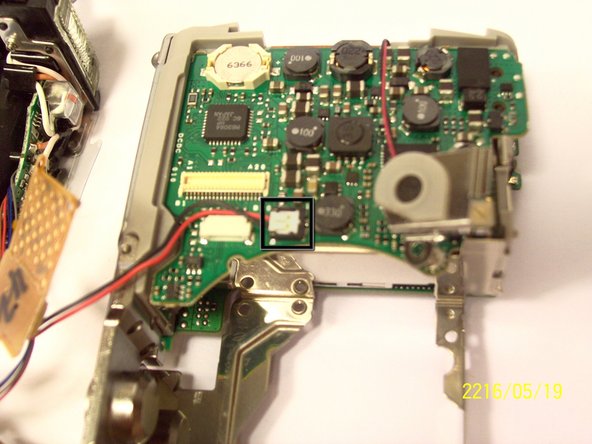
    • Unplug the ribbon from the housing on the circuitry.

    • Take the new ribbon and insert it into the housing.

    • Tweezers or a tool with a sharp point can be used.

  11. Disassembling Canon PowerShot SD700 Lens, Motherboard: 步骤 11 中的图像 1,1
    • Once the LCD and Backlight are detached, remove the larger screw marked in red in the picture as well as the four smaller sized screws marked in blue.

  12. Disassembling Canon PowerShot SD700 Lens: 步骤 12 中的图像 1,1
    • Remove the two screws near the the tri-pod mount with a Philips head screw driver.

  13. Disassembling Canon PowerShot SD700 Lens: 步骤 13 中的图像 1,1
    • Remove the screw next to the shutter with a Philip's head screw driver.

  14. Disassembling Canon PowerShot SD700 Lens: 步骤 14 中的图像 1,1
    • Remove the orange ribbon cable by lifting the ZIF connector attached to the ribbon with a flat head screw driver or spudger.

  15. Disassembling Canon PowerShot SD700 Lens: 步骤 15 中的图像 1,2 Disassembling Canon PowerShot SD700 Lens: 步骤 15 中的图像 2,2
    • Carefully lift the shutter along with the ribbon connected to it. This will remove the casing around the motherboard.

  16. Disassembling Canon PowerShot SD700 Lens: 步骤 16 中的图像 1,3 Disassembling Canon PowerShot SD700 Lens: 步骤 16 中的图像 2,3 Disassembling Canon PowerShot SD700 Lens: 步骤 16 中的图像 3,3
    • With the motherboard casing detached, remove the short orange ribbon by lifting the ZIF connector with a spudger or other plastic opening tools and slide the ribbon out. Detaching this ribbon will disconnect the side of the camera containing the motherboard from the rest of the camera.

  17. Disassembling Canon PowerShot SD700 Lens: 步骤 17 中的图像 1,2 Disassembling Canon PowerShot SD700 Lens: 步骤 17 中的图像 2,2
    • First remove the wires that are attached to the motherboard, as shown by the black box. You can detach them by simply pulling them out.

    • Next you can remove the film by lifting it gently from the motherboard.

  18. Disassembling Canon PowerShot SD700 Lens: 步骤 18 中的图像 1,1
    • Remove the last wires connected to the motherboard. You can remove it by gently lifting it upwards.

  19. Disassembling Canon PowerShot SD700 Lens: 步骤 19 中的图像 1,2 Disassembling Canon PowerShot SD700 Lens: 步骤 19 中的图像 2,2
    • Place a flathead screwdriver and gently lift the circuit attached, as shown on the picture.

  20. Disassembling Canon PowerShot SD700 Lens: 步骤 20 中的图像 1,2 Disassembling Canon PowerShot SD700 Lens: 步骤 20 中的图像 2,2
    • Remove the screw using a philip 00 screwdriver.

    • Once the screw is removed, gently lift the motherboard away from the case.

  21. Disassembling Canon PowerShot SD700 Lens: 步骤 21 中的图像 1,2 Disassembling Canon PowerShot SD700 Lens: 步骤 21 中的图像 2,2
    • Remove the screw as shown by the red circle.

    • Once the screw is removed, you can remove the board.

  22. Disassembling Canon PowerShot SD700 Lens, Lens: 步骤 22 中的图像 1,1
    • Once you have removed the lens from the main chassis, gently brush off any dirt, sand, or dust that may have accumulated in the crevices. Using a compressed air canister or a brush can help remove all the dirt.

结论

To reassemble your device, follow these instructions in reverse order.

2等其他人完成本指南。

Aaron Lee

于04/07/11注册

212 声望

创作了3篇指南

团队

Cal Poly, Team 9-71, Walters Spring 2011 Cal Poly, Team 9-71, Walters Spring 2011 的会员

CPSU-WALTERS-S11S9G71

4 名成员

创作了9篇指南

0条评论

添加评论

浏览统计数据:

过去 24 小时: 0

过去 7 天: 0

过去 30 天: 11

总计 4,734