跳转到主内容

当前版本的文档还未经巡查,您可以查看最新的已查核版本

你所需要的

  1. 这个步骤还没有翻译 帮忙翻译一下

    : 步骤 1 中的图像 1,2 : 步骤 1 中的图像 2,2
    • Remove the two 7.9 mm screws using a Phillips #1 screwdriver.

  2. 这个步骤还没有翻译 帮忙翻译一下

    : 步骤 2 中的图像 1,1
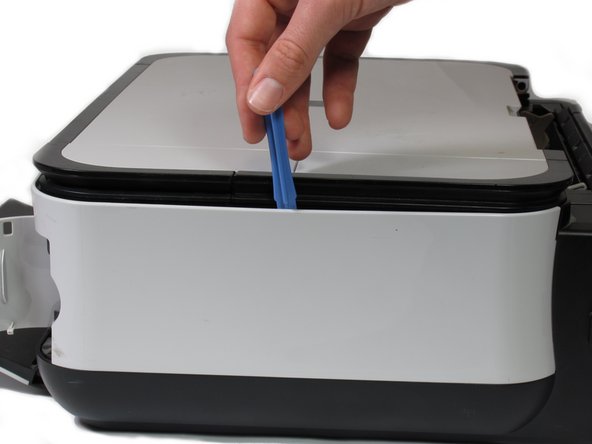
    • Lift up the back cover to remove it.

    • You may need to lift firmly as it requires quite a bit of force.

    "quite a bit of force" is almost an understatement, I found 2 clips along the bottom of that rear piece, one at the far left one around the middle (indicated by an arrow on the underside of the machine) - undoing these required much persistence with a screwdriver

    Perhaps Fuzz - 回复

    Thank you, Perhaps Fuzz. Thank you.

    Marji Zintz -

  3. 这个步骤还没有翻译 帮忙翻译一下

    : 步骤 3 中的图像 1,1
    • Open the front tray.

  4. 这个步骤还没有翻译 帮忙翻译一下

    : 步骤 4 中的图像 1,2 : 步骤 4 中的图像 2,2
    • Open the scanner compartment.

    • Make sure the blue lever locks into place to keep the compartment open.

  5. 这个步骤还没有翻译 帮忙翻译一下

    : 步骤 5 中的图像 1,2 : 步骤 5 中的图像 2,2
    • Remove the blue lever from its slot by pushing it back and twisting clockwise.

    • Close the scanner compartment and cover.

  6. 这个步骤还没有翻译 帮忙翻译一下

    : 步骤 6 中的图像 1,2 : 步骤 6 中的图像 2,2
    • Pry open the side cover with the plastic opening tool.

  7. 这个步骤还没有翻译 帮忙翻译一下

    : 步骤 7 中的图像 1,2 : 步骤 7 中的图像 2,2
    • Flip the printer over so that the bottom of the printer is facing you.

    • Use the plastic opening tool to remove the corner of the side panel from the plastic pin.

  8. 这个步骤还没有翻译 帮忙翻译一下

    : 步骤 8 中的图像 1,2 : 步骤 8 中的图像 2,2
    • Use the plastic opening tool to loosen the side panel from the bottom of the printer.

终点

6等其他人完成本指南。

Kevin Cole

于01/17/13注册

116 声望

撰写一个指南

团队

Cal Poly, Team 19-41, Regan Winter 2013 Cal Poly, Team 19-41, Regan Winter 2013 的会员

CPSU-REGAN-W13S19G41

4 名成员

创作了6篇指南

2条评论

Where is the rest of disassembly?

bill roberts - 回复

添加评论

浏览统计数据:

过去 24 小时: 0

过去 7 天: 4

过去 30 天: 24

总计 21,143