跳转到主内容

Disassembling Arnova 7K G3 Motherboard

你所需要的

  1. Disassembling Arnova 7K G3 Motherboard, Rear Cover: 步骤 1 中的图像 1,3 Disassembling Arnova 7K G3 Motherboard, Rear Cover: 步骤 1 中的图像 2,3 Disassembling Arnova 7K G3 Motherboard, Rear Cover: 步骤 1 中的图像 3,3
    • Remove four 5 mm Phillips #00 screws from each corner of the tablet.

  2. Disassembling Arnova 7K G3 Motherboard: 步骤 2 中的图像 1,2 Disassembling Arnova 7K G3 Motherboard: 步骤 2 中的图像 2,2
    • Place the iFixit opening tool in the notches between the cases and pull the covers apart.

  3. Disassembling Arnova 7K G3 Motherboard: 步骤 3 中的图像 1,1
    • Repeat step two until 3/4 of the rear cover is unlatched.

    • Proceed to remove the rear cover by gently pulling it apart by hand.

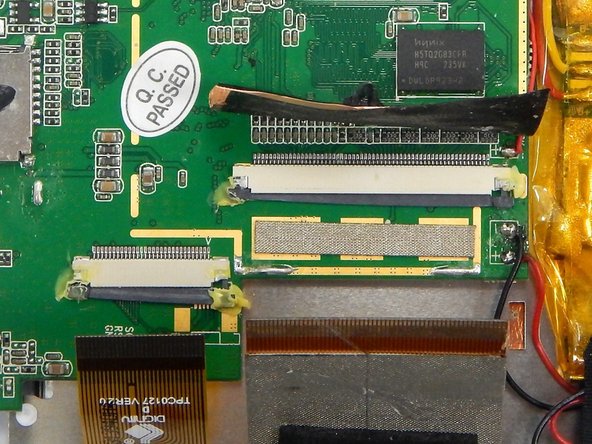
  4. Disassembling Arnova 7K G3 Motherboard, Disassembling Arnova 7K G3 Logic Board Ribbon Connectors: 步骤 4 中的图像 1,2 Disassembling Arnova 7K G3 Motherboard, Disassembling Arnova 7K G3 Logic Board Ribbon Connectors: 步骤 4 中的图像 2,2
    • Peel the copper tape covering the ribbon connector with a set of tweezers.

  5. Disassembling Arnova 7K G3 Motherboard: 步骤 5 中的图像 1,3 Disassembling Arnova 7K G3 Motherboard: 步骤 5 中的图像 2,3 Disassembling Arnova 7K G3 Motherboard: 步骤 5 中的图像 3,3
    • Locate the two gray pins on the ribbon connector.

    • Grab the first pin with tweezers and gently pull it towards the ribbon. Repeat the step.

    • Gently pull the ribbon cable out of the connection port.

  6. Disassembling Arnova 7K G3 Motherboard: 步骤 6 中的图像 1,3 Disassembling Arnova 7K G3 Motherboard: 步骤 6 中的图像 2,3 Disassembling Arnova 7K G3 Motherboard: 步骤 6 中的图像 3,3
    • Locate the ribbon connector two.

    • Locate the pins of ribbon connector two. Repeat step two for unlocking the pins.

    • Gently pull the ribbon out of the connection port.

  7. Disassembling Arnova 7K G3 Motherboard, Disassembling Arnova 7K G3 Motherboard: 步骤 7 中的图像 1,1
    • Remove the two Phillips #00 screws from the motherboard.

  8. Disassembling Arnova 7K G3 Motherboard: 步骤 8 中的图像 1,1
    • Gently lift up the motherboard and reorient it in a more efficient manner in order to locate the desired components.

结论

To reassemble your device, follow these instructions in reverse order.

Kue

于03/18/15注册

301 声望

创作了3篇指南

团队

Michigan Tech, Team 1-2, Lauer Spring 2015 Michigan Tech, Team 1-2, Lauer Spring 2015 的会员

MTU-LAUER-S15S1G2

2 名成员

创作了10篇指南

0条评论

添加评论

浏览统计数据:

过去 24 小时: 0

过去 7 天: 0

过去 30 天: 2

总计 404