跳转到主内容
加入维修社区 - 创建账户

Disassembling Arnova 7K G3 Logic Board Ribbon Connectors

你所需要的

    1. Disassembling Arnova 7K G3 Logic Board Ribbon Connectors, Rear Cover: 步骤 1 中的图像 1,3 Disassembling Arnova 7K G3 Logic Board Ribbon Connectors, Rear Cover: 步骤 1 中的图像 2,3 Disassembling Arnova 7K G3 Logic Board Ribbon Connectors, Rear Cover: 步骤 1 中的图像 3,3
      • Remove four 5 mm Phillips #00 screws from each corner of the tablet.

      询问修复机器人

      添加评论

    2. Disassembling Arnova 7K G3 Logic Board Ribbon Connectors: 步骤 2 中的图像 1,2 Disassembling Arnova 7K G3 Logic Board Ribbon Connectors: 步骤 2 中的图像 2,2
      • Place the iFixit opening tool in the notches between the cases and pull the covers apart.

      询问修复机器人

      添加评论

    3. Disassembling Arnova 7K G3 Logic Board Ribbon Connectors: 步骤 3 中的图像 1,1
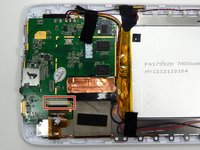
      • Repeat step two until 3/4 of the rear cover is unlatched.

      • Proceed to remove the rear cover by gently pulling it apart by hand.

      询问修复机器人

      添加评论

    1. Disassembling Arnova 7K G3 Logic Board Ribbon Connectors, Disassembling Arnova 7K G3 Logic Board Ribbon Connectors: 步骤 4 中的图像 1,2 Disassembling Arnova 7K G3 Logic Board Ribbon Connectors, Disassembling Arnova 7K G3 Logic Board Ribbon Connectors: 步骤 4 中的图像 2,2
      在这个步骤中使用的工具:
      Tweezers
      $4.99
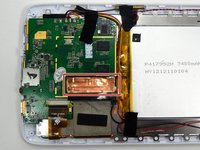
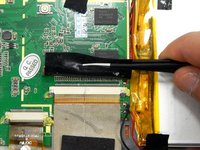
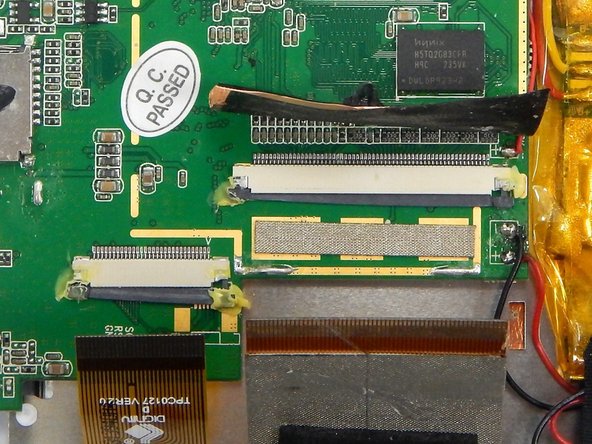
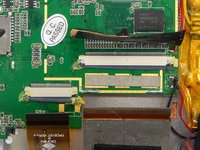
      • Peel the copper tape covering the ribbon connector with a set of tweezers.

      询问修复机器人

      添加评论

    2. Disassembling Arnova 7K G3 Logic Board Ribbon Connectors: 步骤 5 中的图像 1,3 Disassembling Arnova 7K G3 Logic Board Ribbon Connectors: 步骤 5 中的图像 2,3 Disassembling Arnova 7K G3 Logic Board Ribbon Connectors: 步骤 5 中的图像 3,3
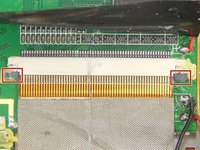
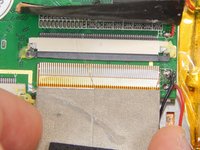
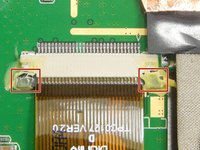
      • Locate the two gray pins on the ribbon connector.

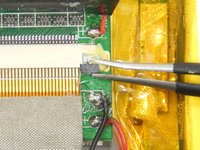
      • Grab the first pin with tweezers and gently pull it towards the ribbon. Repeat the step.

      • Gently pull the ribbon cable out of the connection port.

      询问修复机器人

      添加评论

    3. Disassembling Arnova 7K G3 Logic Board Ribbon Connectors: 步骤 6 中的图像 1,3 Disassembling Arnova 7K G3 Logic Board Ribbon Connectors: 步骤 6 中的图像 2,3 Disassembling Arnova 7K G3 Logic Board Ribbon Connectors: 步骤 6 中的图像 3,3
      • Locate the ribbon connector two.

      • Locate the pins of ribbon connector two. Repeat step two for unlocking the pins.

      • Gently pull the ribbon out of the connection port.

      询问修复机器人

      添加评论

结论

To reassemble your device, follow these instructions in reverse order.

取消:我没有完成这个指南。

Kue

于03/18/15注册

301 声望

创作了3篇指南

团队

Michigan Tech, Team 1-2, Lauer Spring 2015 Michigan Tech, Team 1-2, Lauer Spring 2015 的会员

MTU-LAUER-S15S1G2

2 名成员

创作了30篇指南

0指南评论

添加评论

浏览统计数据:

过去 24 小时: 0

过去 7 天: 4

过去 30 天: 18

总计 569