简介
This guide will show you the process of replacing your DigiLand Dl801W power button components. There are quite a few steps, so take your time and follow them carefully.
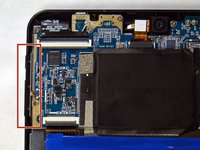
Note: Light soldering is required for successful repair of the power button components of the DigiLand Dl801W.
你所需要的
-
-
Hold the tablet in one hand (not your primary hand) so that the bottom edge of the tablet is facing you and the back of the tablet is facing up.
-
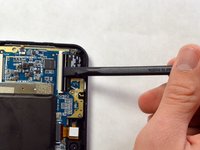
Using a blue plastic opening tool, gently insert the tool between the back panel and the main body.
-
Going around the edge of the tablet, gently pry open the back panel. As you go around, you will hear a click.
-
-


To reassemble your device, follow these instructions in reverse order.
团队

IUPUI, Team 3-4, Harley Fall 2015 IUPUI, Team 3-4, Harley Fall 2015 的会员
IUPUI-HARLEY-F15S3G4
4 名成员
创作了10篇指南