简介
Use this guide to replace the fan in the Dell XPS 13.
你所需要的
-
-
-
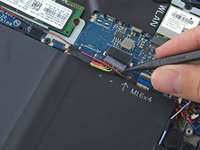
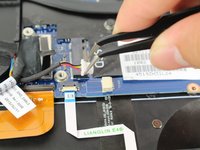
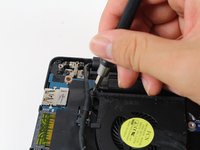
Pull the battery cable connector towards the battery to disconnect it from its socket.
-
If the connector is stubborn, push a little at one side, then the other, to "walk" it out of its socket.
-
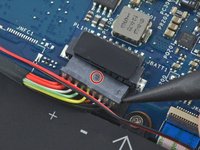
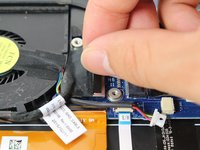
If you have trouble walking the connector out of the socket, use the point of a spudger to gently push on the connector indent to slide the connector out.
-
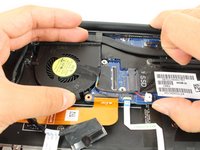
Open the display and press the power button for five seconds to drain any remaining charge from the system.
-


To reassemble your device, follow these instructions in reverse order.
To reassemble your device, follow these instructions in reverse order.
6等其他人完成本指南。
团队

Cal Poly, Team S21-G6, Livingston Spring 2017 Cal Poly, Team S21-G6, Livingston Spring 2017 的会员
CPSU-LIVINGSTON-S17S21G6
5 名成员
创作了30篇指南
3条评论
Great guide! The two hardest parts were getting the back cover off, and lifting the motherboard to remove the fan. Took me about 30 minutes in total.
It would be really easier if you remove the battery screws first… there are some steps that were not clear…
This repair took me about 45 min for a complete novice. “Walking out” the battery connector was only way I could unplug it. There was a retaining bracket overlaying the flat connector (step 8) that I needed to unscrew (2 screws, phillips) before it could be removed. Take care to replace the wire in the wire guides along the fan’s housing prior to reinsertion of the replacement fan. It cannot be done afterwards and the back panel will not be flush. Otherwise, this was an excellent guide and an easy repair.