跳转到主内容

Dell Vostro 3550 Disk Drive Tray Latch Replacement

你所需要的

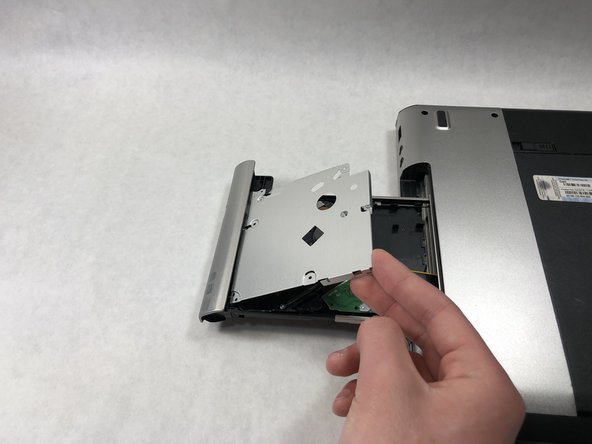
  1. Dell Vostro 3550 Disk Drive Tray Latch Replacement, Disk Drive Tray Latch Mechanism: 步骤 1 中的图像 1,3 Dell Vostro 3550 Disk Drive Tray Latch Replacement, Disk Drive Tray Latch Mechanism: 步骤 1 中的图像 2,3 Dell Vostro 3550 Disk Drive Tray Latch Replacement, Disk Drive Tray Latch Mechanism: 步骤 1 中的图像 3,3
    • Push a paperclip that is bent straight into the small pin hole on the right of the release button.

    • When 3/4" of the paperclip is inserted the tray will pop open.

    • Pull the disk tray out as far as it will extend.

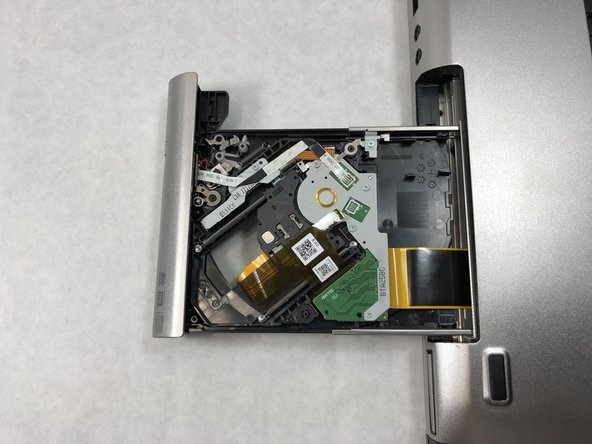
  2. Dell Vostro 3550 Disk Drive Tray Latch Replacement: 步骤 2 中的图像 1,3 Dell Vostro 3550 Disk Drive Tray Latch Replacement: 步骤 2 中的图像 2,3 Dell Vostro 3550 Disk Drive Tray Latch Replacement: 步骤 2 中的图像 3,3
    • Flip the laptop over and position it so the disk drive is in front of you.

    • Remove the five 5mm Phillips #0 screws fastening the top plate to the disk tray.

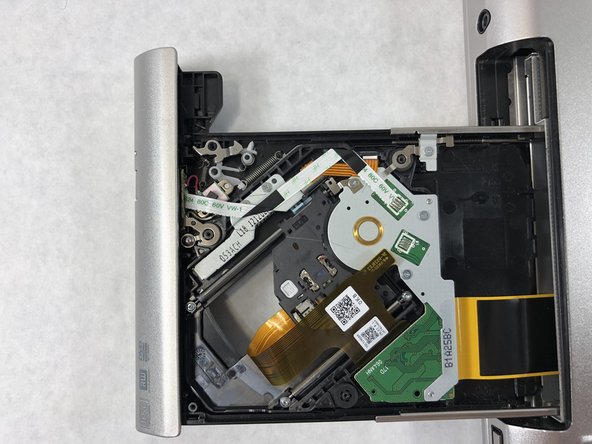
  3. Dell Vostro 3550 Disk Drive Tray Latch Replacement: 步骤 3 中的图像 1,3 Dell Vostro 3550 Disk Drive Tray Latch Replacement: 步骤 3 中的图像 2,3 Dell Vostro 3550 Disk Drive Tray Latch Replacement: 步骤 3 中的图像 3,3
    • Remove the top plate of the disk tray and place it off to the side.

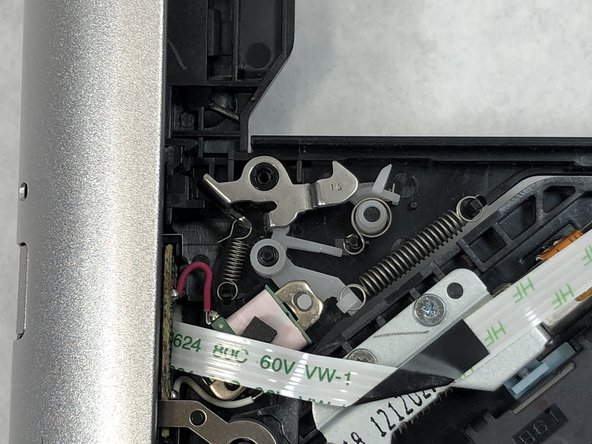
  4. Dell Vostro 3550 Disk Drive Tray Latch Replacement: 步骤 4 中的图像 1,3 Dell Vostro 3550 Disk Drive Tray Latch Replacement: 步骤 4 中的图像 2,3 Dell Vostro 3550 Disk Drive Tray Latch Replacement: 步骤 4 中的图像 3,3
    • Remove the single 5mm Phillips #0 screw securing the latch mechanism to the disk drive.

    • Pull the damaged latch away from the disk drive and replace with the new latch.

结论

To reassemble your device, follow these instructions in reverse order.

Dylan J. Souza

于03/22/19注册

781 声望

创作了5篇指南

团队

0条评论

添加评论

浏览统计数据:

过去 24 小时: 1

过去 7 天: 1

过去 30 天: 2

总计 239