跳转到主内容

Dell Vostro 1710 Hard Drive Replacement

你所需要的

  1. Dell Vostro 1710 Hard Drive Replacement, Battery: 步骤 1 中的图像 1,2 Dell Vostro 1710 Hard Drive Replacement, Battery: 步骤 1 中的图像 2,2
    • Make certain that the power to your laptop is off.

    • Press and slide the two buttons outwards and away from the battery.

  2. Dell Vostro 1710 Hard Drive Replacement: 步骤 2 中的图像 1,1
    • Slide the battery away and parallel from the laptop.

  3. Dell Vostro 1710 Hard Drive Replacement: 步骤 3 中的图像 1,1
    • Remove the battery from the slot.

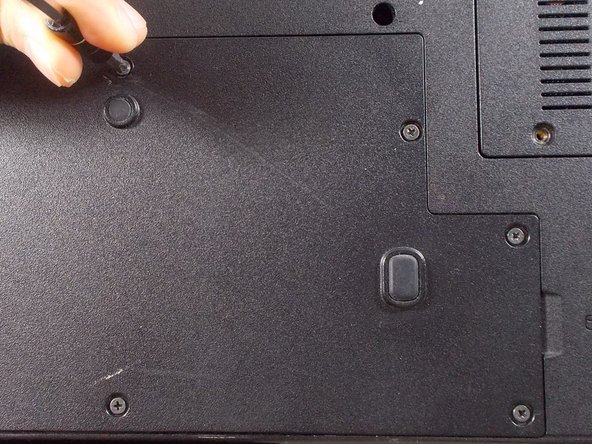
  4. Dell Vostro 1710 Hard Drive Replacement, Hard Drive: 步骤 4 中的图像 1,2 Dell Vostro 1710 Hard Drive Replacement, Hard Drive: 步骤 4 中的图像 2,2
    • Remove the following five Phillips #1 6mm screws.

  5. Dell Vostro 1710 Hard Drive Replacement: 步骤 5 中的图像 1,1
    • Lift back cover from the groove on the right side of the cover next to the symbol.

  6. Dell Vostro 1710 Hard Drive Replacement: 步骤 6 中的图像 1,2 Dell Vostro 1710 Hard Drive Replacement: 步骤 6 中的图像 2,2
    • Pull up on the blue tab that is attached to the ribbon cable to unplug it.

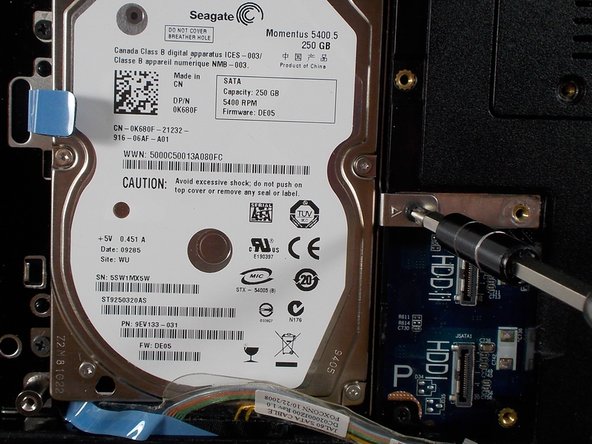
  7. Dell Vostro 1710 Hard Drive Replacement: 步骤 7 中的图像 1,2 Dell Vostro 1710 Hard Drive Replacement: 步骤 7 中的图像 2,2
    • Remove the three Philips #1 3mm screws.

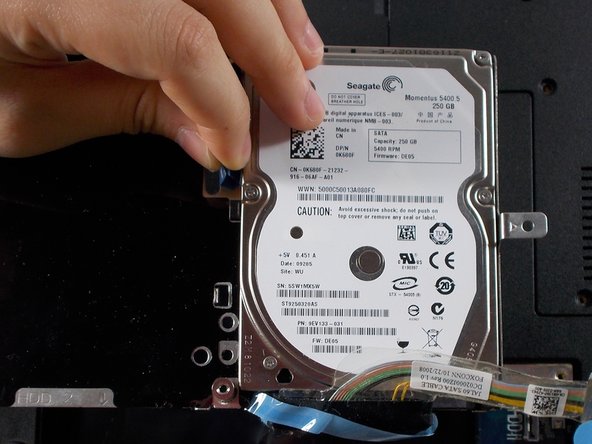
  8. Dell Vostro 1710 Hard Drive Replacement: 步骤 8 中的图像 1,2 Dell Vostro 1710 Hard Drive Replacement: 步骤 8 中的图像 2,2
    • Lift and remove the Hard Drive frame by pulling up on the blue tab.

  9. Dell Vostro 1710 Hard Drive Replacement: 步骤 9 中的图像 1,2 Dell Vostro 1710 Hard Drive Replacement: 步骤 9 中的图像 2,2
    • Remove the two 3mm screws with a Philips #1 screwdriver from the back side of the frame to remove the Hard drive.

结论

To reassemble your device, follow these instructions in reverse order.

另外一个人完成了本指南。

Jeremy Campeau

于03/20/18注册

347 声望

创作了3篇指南

团队

UMass Dartmouth, Team S3-G7, Peak Spring 2018 UMass Dartmouth, Team S3-G7, Peak Spring 2018 的会员

UMASSD-PEAK-S18S3G7

3 名成员

创作了8篇指南

0条评论

添加评论

浏览统计数据:

过去 24 小时: 1

过去 7 天: 8

过去 30 天: 9

总计 847