跳转到主内容

Dell Streak 10 Pro Rear Camera Replacement

你所需要的

  1. Dell Streak 10 Pro Rear Camera Replacement, Battery: 步骤 1 中的图像 1,3 Dell Streak 10 Pro Rear Camera Replacement, Battery: 步骤 1 中的图像 2,3 Dell Streak 10 Pro Rear Camera Replacement, Battery: 步骤 1 中的图像 3,3
    • Place the device flat on its screen.

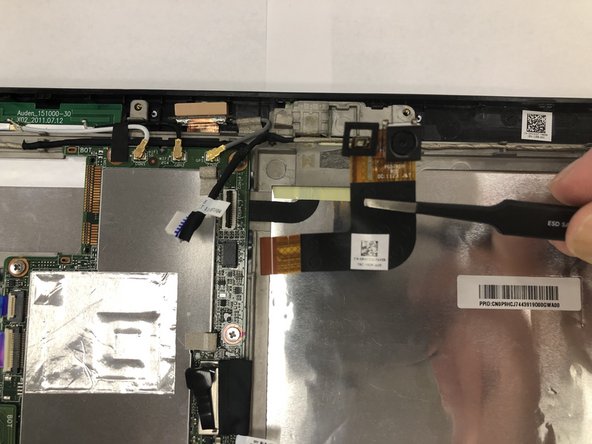
    • Using the plastic opening tools, pry open the top segment of the tablet where the camera is located.

    • Take the segment off and place it to the side.

  2. Dell Streak 10 Pro Rear Camera Replacement: 步骤 2 中的图像 1,2 Dell Streak 10 Pro Rear Camera Replacement: 步骤 2 中的图像 2,2
    • Remove four 4mm Phillips #0 screws.

  3. Dell Streak 10 Pro Rear Camera Replacement: 步骤 3 中的图像 1,2 Dell Streak 10 Pro Rear Camera Replacement: 步骤 3 中的图像 2,2
    • Using the plastic opening tool, lift off the entire back screen of the tablet.

  4. Dell Streak 10 Pro Rear Camera Replacement: 步骤 4 中的图像 1,3 Dell Streak 10 Pro Rear Camera Replacement: 步骤 4 中的图像 2,3 Dell Streak 10 Pro Rear Camera Replacement: 步骤 4 中的图像 3,3
    在这个步骤中使用的工具:
    Tweezers
    $4.99
    购买
    • Disconnect the no-fuss ribbon cable connector.

    • The best way is to safely pull the white connector straight out of the socket. Using the tweezers, pull out the white connector that contains the red, green, blue, and black cords connected to it.

    • Remove the battery by gently lifting it out of the device.

  5. Dell Streak 10 Pro Rear Camera Replacement, Rear Camera: 步骤 5 中的图像 1,2 Dell Streak 10 Pro Rear Camera Replacement, Rear Camera: 步骤 5 中的图像 2,2
    在这个步骤中使用的工具:
    Tweezers
    $4.99
    购买
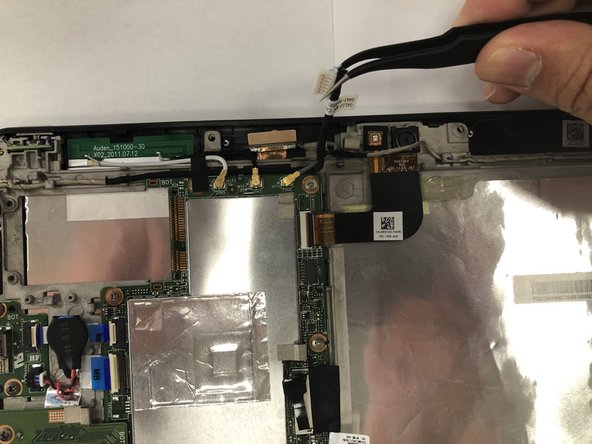
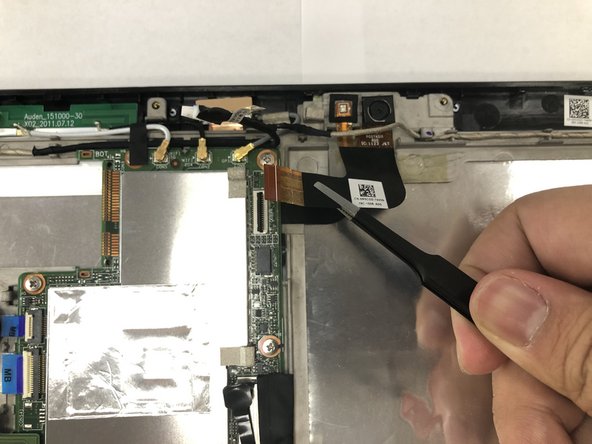
    • Disconnect the no-fuss ribbon cable connector. Using tweezers, carefully pull the connector straight out of the socket.

    • The white connector is attached to a black wire.

  6. Dell Streak 10 Pro Rear Camera Replacement: 步骤 6 中的图像 1,2 Dell Streak 10 Pro Rear Camera Replacement: 步骤 6 中的图像 2,2
    • Disconnect the delicate ribbon cable from the Zero Insertion Force (ZIF) Connector.

    • To disconnect the cable, use the tip of a spudger or your fingernail to flip up the small black locking flap. Then, you can safely pull the cable out.

  7. Dell Streak 10 Pro Rear Camera Replacement: 步骤 7 中的图像 1,2 Dell Streak 10 Pro Rear Camera Replacement: 步骤 7 中的图像 2,2
    • Using the tweezer, carefully wiggle off the camera attached to the base.

    • This may take a few minutes. Be gentle while applying pressure.

    • After it wiggles free, lift the camera away from the base of the tablet.

结论

To reassemble your device, follow these instructions in reverse order.

Kayji Arai

于02/05/19注册

211 声望

创作了2篇指南

团队

UC Davis, Team S20-G7, Lore Winter 2019 UC Davis, Team S20-G7, Lore Winter 2019 的会员

UCD-LORE-W19S20G7

2 名成员

创作了4篇指南

0条评论

添加评论

浏览统计数据:

过去 24 小时: 0

过去 7 天: 1

过去 30 天: 1

总计 87