跳转到主内容
Dell Precision 7560 Solid-State Drive (SSD) Replacement

Dell Precision 7560 Solid-State Drive (SSD) Replacement

Hector

Hector3 其他贡献者

最后更新于 June 6, 2023

10分钟
中等

This guide covers how to replace the solid-state drive (SSD) on a Dell Precision 7560 laptop. The SSD is responsible for storing data from your device permanently in memory. Before continuing to the guide, please make sure that the device's battery is removed. Please refer to our Dell Precision 7560 Battery replacement guide. This will prevent data from being lost and will prevent the risk of circuit fires.

你所需要的

配件

工具

查看更多...

  1. Dell Precision 7560 Solid-State Drive (SSD) Replacement, Battery: 步骤 1 中的图像 1,3 Dell Precision 7560 Solid-State Drive (SSD) Replacement, Battery: 步骤 1 中的图像 2,3 Dell Precision 7560 Solid-State Drive (SSD) Replacement, Battery: 步骤 1 中的图像 3,3
    • The screws holding the back cover in place can not be removed.

    • Use a Phillips #0 screwdriver to loosen the the eight 5 mm captive screws in the bottom cover.

    • Remove the back cover by lifting at the corners.

  2. Dell Precision 7560 Solid-State Drive (SSD) Replacement: 步骤 2 中的图像 1,3 Dell Precision 7560 Solid-State Drive (SSD) Replacement: 步骤 2 中的图像 2,3 Dell Precision 7560 Solid-State Drive (SSD) Replacement: 步骤 2 中的图像 3,3
    • Unscrew and remove the five 2 mm screws that secure the battery.

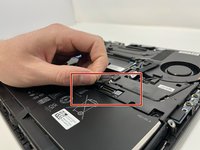
    • Locate the battery connector.

  3. Dell Precision 7560 Solid-State Drive (SSD) Replacement: 步骤 3 中的图像 1,3 Dell Precision 7560 Solid-State Drive (SSD) Replacement: 步骤 3 中的图像 2,3 Dell Precision 7560 Solid-State Drive (SSD) Replacement: 步骤 3 中的图像 3,3
    • Pull the connector towards you to disconnect it.

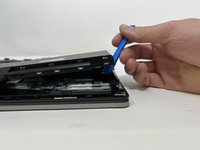
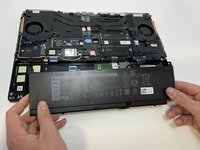
    • Use your fingers or a plastic opening tool to pry the battery up and remove it from the laptop.

  4. Dell Precision 7560 Solid-State Drive (SSD) Replacement, Solid-State Drive (SSD): 步骤 4 中的图像 1,2 Dell Precision 7560 Solid-State Drive (SSD) Replacement, Solid-State Drive (SSD): 步骤 4 中的图像 2,2
    • Unscrew and remove the two 3 mm screws that secure the solid-state drive.

  5. Dell Precision 7560 Solid-State Drive (SSD) Replacement: 步骤 5 中的图像 1,2 Dell Precision 7560 Solid-State Drive (SSD) Replacement: 步骤 5 中的图像 2,2
    • Remove the top cover of the Solid State Drive by lifting up from the corners.

    • Notice that the Solid State Drive is located underneath the cover.

    • Pull the Solid State Drive gently towards you from its exposed end to disconnect it.

    • With an appropriate replacement part, exchange the old SSD with a new one.

结论

To reassemble your device, follow these instructions in reverse order.

Hector

于02/14/23注册

261 声望

创作了2篇指南

团队

0指南评论

添加评论

浏览统计数据:

过去 24 小时: 1

过去 7 天: 7

过去 30 天: 47

总计 862