简介
This guide will breakdown the Dell Precision 5530 all the way to a mostly empty lower case. Does not cover details of removal of: power button and controller; keyboard controller; display; or front LED.
Note: this is simply one path to disassembly! Some of the parts can be removed in a different order, i.e. the keyboard does not need to be removed in order to remove the speakers (though the motherboard does).
Also note: It may be possible to remove the motherboard WITHOUT removing the heatsink, which avoids having to reapply thermal grease. I haven't checked this, but it seems likely.
Before starting, I recommend anti-static protection and a clean surface on which to work, as well as some way to differentiate between screws.
你所需要的
-
-
Turn off the machine, close the lid, and flip it over so it's laying upside down, hinge away from you.
-
Remove the ten (10) torx (T5) screws around the edges of the case.
-
Flip up the magnetic "lid" that says "Precision 5530" to expose the service tag and two Phillips (PH1) screws. Remove these.
-
Starting from the hinge side, slowly lift the rear case off. There are a few snaps, this is normal. There are no cables attached, so when it comes free, put it off to the side.
-
-
-
FIRST, unplug the battery from the motherboard (green square) by pulling the male plug towards the battery, NOT away from the motherboard. There should be a little resistance, but it should at least wiggle out.
-
Second, remove the seven Phillips screws around the edges of the battery (red circles) and carefully lift the battery out.
-
-
-
The two RAM sticks are right in the center of the machine.
-
Locate the two metal latches (green boxes) on either side of the RAM stick, Push both of these away from the RAM, which should pop the memory stick out of the slot. Repeat for the second stick, if applicable.
-
-
-
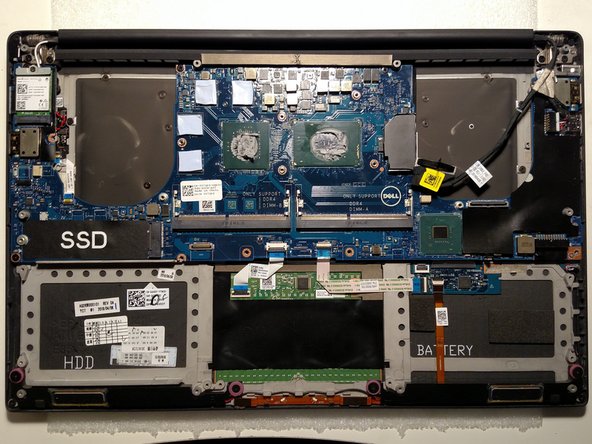
This machine does NOT have an HDD (this would be in the pink box), only an SSD (orange box). The SSD has been removed already in this image.
-
To remove the SSD, unscrew the single Phillips screw to the left of the drive (red circle). The drive should pop out smoothly.
-
-
-
-
First, remove the fan brace (orange box, image 1) by removing the two Phillips screws (red circles, image one).
-
Second, remove the five screws (red circles, image two) that hold the heatsink in place. Note that one of the screws is under a piece of tape.
-
-
-
There are two fans (orange boxes). Three Phillips screws (red circles) will remove them, one for the right fan and two for the left. (The second screw for the right fan was removed when the metal brace was removed.)
-
The display cable must be disconnected. To do so pull UP (meaning away from the motherboard) on the connector (highlighted in green). The connector has a pull tab that helps in this. Once the plug has been disconnected, the cable can be threaded out around the right fan socket.
-
-
-
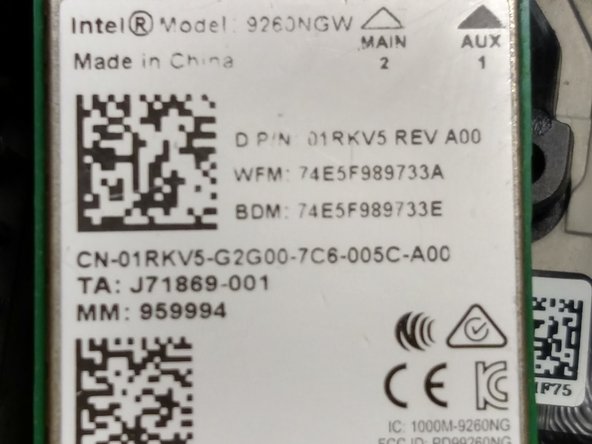
The WiFi card is on the top left of the machine (highlighted in orange) Remove the single Phillips screw (red circle) to remove the WiFi card and the small metal bracket.
-
-
-
There are five cables that must be removed. Two are standard plugs (highlighted in orange: the charging cable (top), and the speakers (bottom)) and three are locking ribbon cables (highlighted in pink (from left: power button, trackpad, keyboard)).
-
There are then four Phillips screws (red circles) that need to be removed.
-
Finally, the motherboard can be removed. USE CAUTION! Pull it up away from the machine slightly, and then slide it away from the hinge. It should come out easily.
-
-
-
Just a brief pause to appreciate the hardware inside this machine.
-
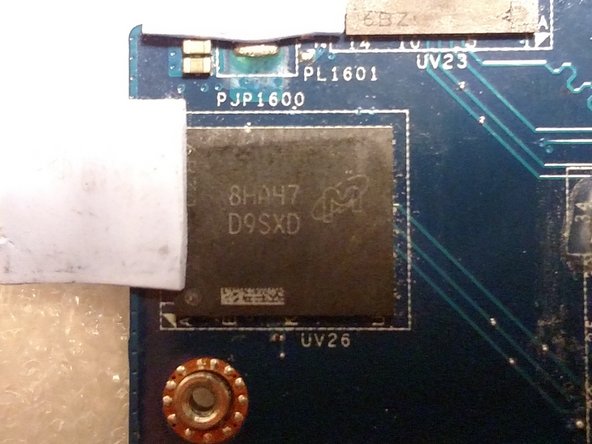
Image one is the left side of the motherboard. The big chip is the GPU, the nVidia Quadro
P4000P2000 (EDIT: thanks @Julianmustofa!). As noted by @Kisai, the taped over chips (image two) are likely GDDR memory chips for the GPU, 1GB each for a total of 4GB of GDDR memory (part number 8HA47 D9SXD with a stylized "M" printed on them). -
Image three is the CPU, in this case a Intel Core i7-8850H CPU at 2.60GHz. The large chip on the lower edge is possibly a memory controller or a north bridge like chip - there was no easily found part number.
-
There are obviously numerous other chips on the front and underside of the board, and perhaps in a future teardown, I'll break them all down.
-
-
-
First, the two black tape covers must be removed (highlighted in orange).
-
Neither is on super tight, and both can be done with only your hands.
-
For the larger one, it helps to start near the hinge, move down, and then move across. Be careful along the hinge edge! There are some cutouts that can easily tear.
-
Next, looking at image two, there are two locked ribbon cables (orange boxes) and 32 (thirty-two!!) tiny Phillips screws (red circles) to remove. Have fun!
-
The keyboard can then be simply lifted out of the case.
-
-
-
The trackpad controller (orange box) can be removed with two Phillips screws (red circles) and the removal of some grounding tape (silver, in pink box).
-
The trackpad (image 2, in orange) can be removed by pressing it out through the topside of the case (i.e. when the computer is opened).
-
-
-
The speakers (highlighted in orange) can be removed with four Phillips screws (red circles).
-
-
-
Highly likely that these bits are easy to remove.
-
Orange box: front LEDs. Remove the locking ribbon cable first.
-
Pink box: keyboard controller. There's likely a screw under the grounding tape on the right.
-
Green box: power button and controller.
-
Yellow boxes (left and right): hinge and display attachment points.
-
Removal of the display and replacement of display components is not covered here.
-


To reassemble your device, follow these instructions in reverse order.
Be aware that if you removed the heatsink, you MUST MUST MUST (MUST) reapply thermal paste! If you do not, your machine may be irreparably damaged when you first use it! If you're lucky, the CPU will go into over-temperature protection mode before this happens, but no guarantees!
Second thing to remember is to re-attach all grounding tape as it was originally attached! Don't forget this! If you're lucky, it'll just mean that the trackpad doesn't work properly. If not, you could damage or destroy the machine via static shock.
12等其他人完成本指南。