跳转到主内容
加入维修社区 - 创建账户

Dell Photo Printer 540 LCD Panel Replacement

你所需要的

    1. Dell Photo Printer 540 LCD Panel Replacement, Case: 步骤 1 中的图像 1,1
      • Rotate the photo printer so that the bottom of the case faces upward.

      询问修复机器人

      添加评论

    2. Dell Photo Printer 540 LCD Panel Replacement: 步骤 2 中的图像 1,1
      • Use a Phillips #2 screwdriver to remove the three 5.65 mm screws on the bottom panel of the case in a counter-clockwise fashion.

      询问修复机器人

      添加评论

    3. Dell Photo Printer 540 LCD Panel Replacement: 步骤 3 中的图像 1,1
      • Rotate the device so that it is upright again. Under the LCD Panel there is a 9.62 mm screw, unscrew using a Phillips #2 screwdriver.

      询问修复机器人

      添加评论

    4. Dell Photo Printer 540 LCD Panel Replacement: 步骤 4 中的图像 1,1
      • Remove the back panel of the case by pulling directly back.

      • Some carefully applied force may be required to remove this part.

      询问修复机器人

      添加评论

    5. Dell Photo Printer 540 LCD Panel Replacement: 步骤 5 中的图像 1,1
      • Rotate the photo printer so that the bottom panel faces up once again. Now lift off the bottom panel of the case to access all internal components.

      询问修复机器人

      添加评论

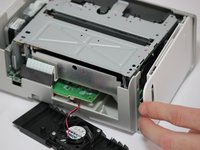
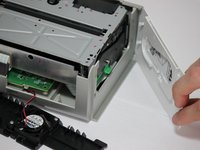
    6. Dell Photo Printer 540 LCD Panel Replacement: 步骤 6 中的图像 1,2 Dell Photo Printer 540 LCD Panel Replacement: 步骤 6 中的图像 2,2
      • Finally remove the side panel with the ink-cartridge door by holding the right side and pulling backwards with the left side.

      • Caution! The side panel is held in by tabs; don't break these.

      询问修复机器人

      添加评论

    1. Dell Photo Printer 540 LCD Panel Replacement, Cooling Fan: 步骤 7 中的图像 1,1
      • Carefully remove the inner components of the device by lifting the inner components up and out of the casing.

      询问修复机器人

      添加评论

    2. Dell Photo Printer 540 LCD Panel Replacement: 步骤 8 中的图像 1,1
      • Locate the red and black cable that is connecting the fan to the top of the logic board.

      询问修复机器人

      添加评论

    3. Dell Photo Printer 540 LCD Panel Replacement: 步骤 9 中的图像 1,1
      • Carefully, remove the red and black cable from the logic board by pulling gently in order to isolate the cooling fan from the device.

      询问修复机器人

      添加评论

    1. Dell Photo Printer 540 LCD Panel Replacement, LCD Panel: 步骤 10 中的图像 1,1
      • Locate the data ribbon that connects the LCD panel to the mother board.

      • Carefully unclip the ribbon from the mother board.

      • Separate top cover from bottom base and flip upright so that the LCD panel is facing up for the next step

      询问修复机器人

      添加评论

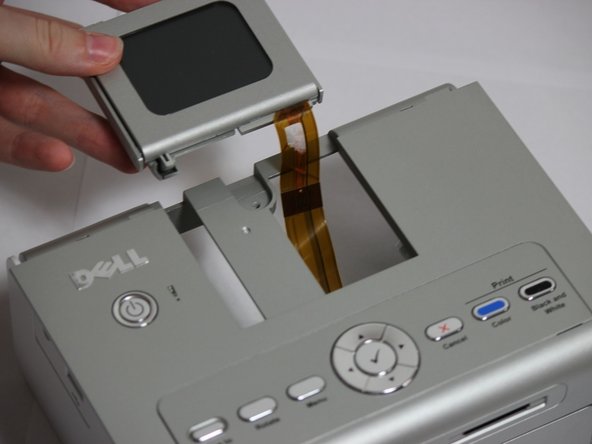
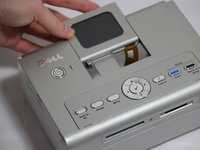
    2. Dell Photo Printer 540 LCD Panel Replacement: 步骤 11 中的图像 1,2 Dell Photo Printer 540 LCD Panel Replacement: 步骤 11 中的图像 2,2
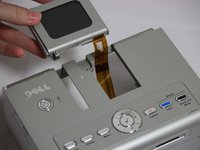
      • Slide the LCD panel out and away from the printer case.

      • Hold bottom of LCD panel and lift the screen 70 degrees. Set the screen face down for the next step

      询问修复机器人

      添加评论

    3. Dell Photo Printer 540 LCD Panel Replacement: 步骤 12 中的图像 1,1
      • Use a Phillips 00 screwdriver to remove the four 5.4 mm screws behind where the LCD screen is.

      询问修复机器人

      添加评论

    4. Dell Photo Printer 540 LCD Panel Replacement: 步骤 13 中的图像 1,1
      • You can now separate the individual pieces from each other, allowing the screen to be accessible to replace.

      询问修复机器人

      添加评论

结论

To reassemble your device, follow these instructions in reverse order.

取消:我没有完成这个指南。

Ashley Lopez

于04/04/12注册

1 声望

撰写一个指南

团队

Cal Poly, Team 14-7, Forte Spring 2012 Cal Poly, Team 14-7, Forte Spring 2012 的会员

CPSU-FORTE-S12S14G7

4 名成员

创作了18篇指南

0指南评论

添加评论

浏览统计数据:

过去 24 小时: 1

过去 7 天: 6

过去 30 天: 29

总计 853