简介
The keyboard docking component is the middle panel located between the keyboard and the internal components of the laptop. In order to replace components within the laptop , such as the motherboard, you will need to remove the panel. Use this guide for a step-by-step procedure.
你所需要的
-
-
-
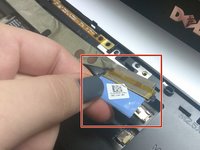
With your Phillips 1 screwdriver, unscrew the five M2.5x5-mm screws and the five M2.5x8-mm screws that lie underneath the keyboard panel.
-
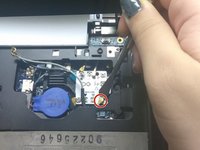
Be aware there are two deeply recessed screws on both sides to the rear of this panel. There are also two screws externally on the rear face either side of the battery that hold the monitor on and pass through this panel, support the screen when you remove these. There are also two screws above the hard drive bay that need to be removed.
-


To reassemble your device, follow these instructions in reverse order.
To reassemble your device, follow these instructions in reverse order.
团队

University of North Texas, Team S6-G5, Thompson Fall 2018 University of North Texas, Team S6-G5, Thompson Fall 2018 的会员
UNT-THOMPSON-F18S6G5
4 名成员
创作了5篇指南