跳转到主内容

本指南有最近更改,您可查看未经巡查的最新版本

Dell Latitude D820 Motherboard Replacement

你所需要的

  1. Dell Latitude D820 Motherboard Replacement, Motherboard: 步骤 1 中的图像 1,3 Dell Latitude D820 Motherboard Replacement, Motherboard: 步骤 1 中的图像 2,3 Dell Latitude D820 Motherboard Replacement, Motherboard: 步骤 1 中的图像 3,3
    • Perform a complete system backup and shutdown the computer.

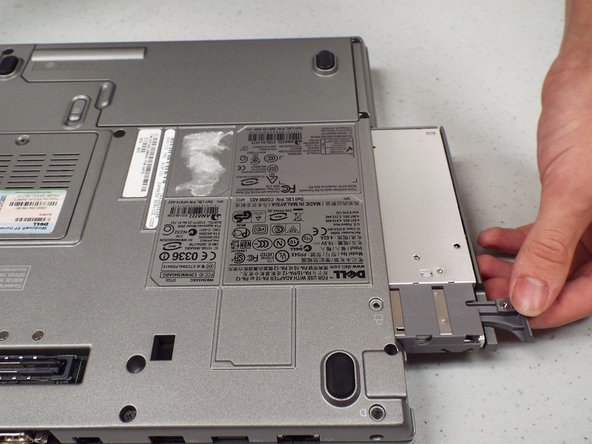
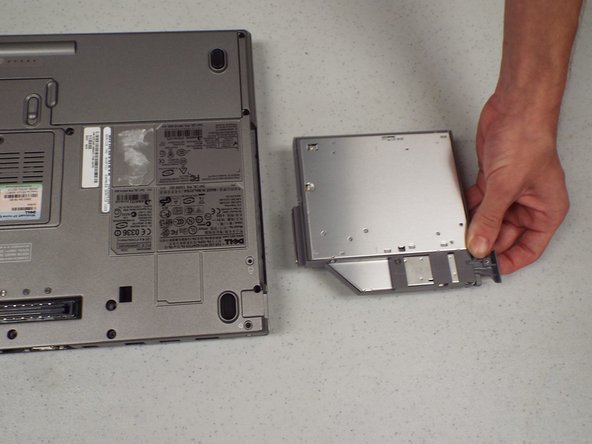
    • Unplug the charger and remove the battery.

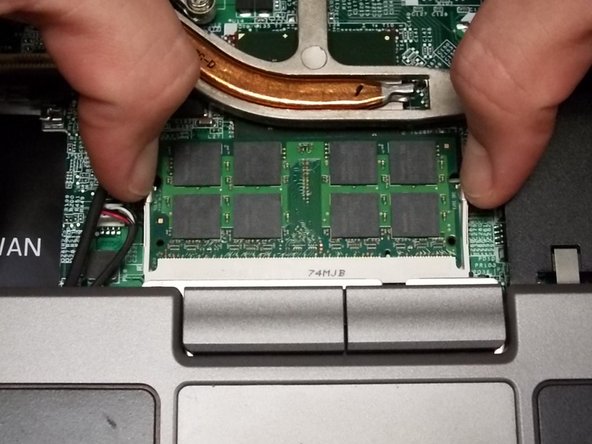
    • Remove the battery by sliding the lock tab (outlined in red) and use the other hand to remove the battery.

  2. Dell Latitude D820 Motherboard Replacement: 步骤 2 中的图像 1,1
    • Remove the hard drive

    • Locate and remove three phillips head screws. These screws measure 3.55mm in length and 2.93mm in width with a fine thread.

    • Remove the hard drive and set it aside trying not to touch anything but the grey plastic grip pad. Doing so may cause damage to your hard drive.

  3. Dell Latitude D820 Motherboard Replacement: 步骤 3 中的图像 1,3 Dell Latitude D820 Motherboard Replacement: 步骤 3 中的图像 2,3 Dell Latitude D820 Motherboard Replacement: 步骤 3 中的图像 3,3
    • Remove the CD/DVD Drive by pushing on the button under the drive.

    • There may be a little resistance pulling it out.

  4. Dell Latitude D820 Motherboard Replacement: 步骤 4 中的图像 1,1
    • Remove the 14 Phillips screws from the bottom of the laptop.

  5. Dell Latitude D820 Motherboard Replacement: 步骤 5 中的图像 1,2 Dell Latitude D820 Motherboard Replacement: 步骤 5 中的图像 2,2
    • Flip the laptop face up making sure the screen is opened all the way and is flat as shown in the first picture.

    • Using a Plastic Pry tool carefully pry off the keyboard bezel keeping in mind wires are attached so do not pull too far or hard.

  6. Dell Latitude D820 Motherboard Replacement: 步骤 6 中的图像 1,2 Dell Latitude D820 Motherboard Replacement: 步骤 6 中的图像 2,2
    • Now, remove the keyboard screws then the keyboard. There is a ribbon cable (wires) attached to bottom, be careful not to tear it.

    • Remove the ribbon from the laptop motherboard, this will allow you to set the keyboard aside.

  7. Dell Latitude D820 Motherboard Replacement: 步骤 7 中的图像 1,3 Dell Latitude D820 Motherboard Replacement: 步骤 7 中的图像 2,3 Dell Latitude D820 Motherboard Replacement: 步骤 7 中的图像 3,3
    • Remove the memory chip under the keyboard by pulling the two tabs away from each other as shown in second picture. (Yes there is one on the bottom as well)

  8. Dell Latitude D820 Motherboard Replacement: 步骤 8 中的图像 1,1
    • Disconnect the wireless card from the bottom-corner.

    • Push the retaining tab and lift the card out.

    • Do this for the ethernet card which is in the same spot.

  9. Dell Latitude D820 Motherboard Replacement: 步骤 9 中的图像 1,1
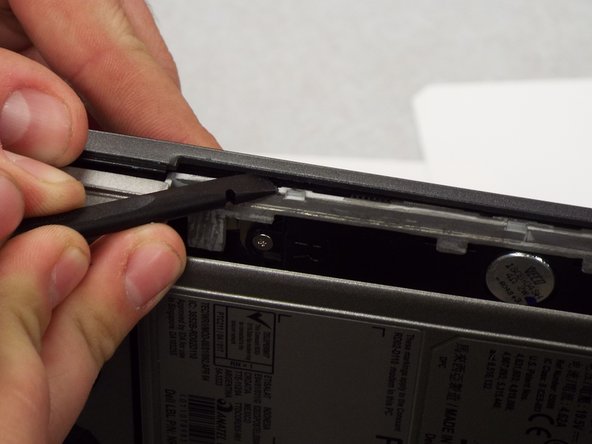
    • Remove the cable that connects the speaker (small rectangle) to the frame by pulling straight out. The cable is located to the left of DDR2 DIMM A.

    • Remove the cable that connects the track pad (large rectangle) to frame by pulling straight out. The cable is also located to the left of DDR2 DIMM A.

  10. Dell Latitude D820 Motherboard Replacement: 步骤 10 中的图像 1,3 Dell Latitude D820 Motherboard Replacement: 步骤 10 中的图像 2,3 Dell Latitude D820 Motherboard Replacement: 步骤 10 中的图像 3,3
    • Remove 3 Screws that hold the upper case to the mother board.

    • Remove the upper casing from the bottom casing.

    • *note– when prying shell from laptop – gently pry open 3 tabs by the CD-ROM with spudger.

  11. Dell Latitude D820 Motherboard Replacement: 步骤 11 中的图像 1,3 Dell Latitude D820 Motherboard Replacement: 步骤 11 中的图像 2,3 Dell Latitude D820 Motherboard Replacement: 步骤 11 中的图像 3,3
    • Remove 2 screws for fan removal – both 5.6 mm length x 2.31 mm width – remove the fan power cable.

    • Unscrew 6 spring loaded screws from Heat Sink. These are permanently attached to heat sink and will not come off.

  12. Dell Latitude D820 Motherboard Replacement: 步骤 12 中的图像 1,3 Dell Latitude D820 Motherboard Replacement: 步骤 12 中的图像 2,3 Dell Latitude D820 Motherboard Replacement: 步骤 12 中的图像 3,3
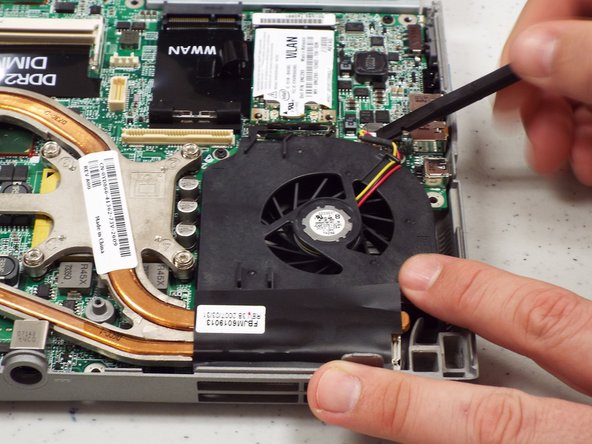
    • There are 7 screws that need to be removed around edge of Motherboard. 4 of the screws are 3.73mm length x 1.90mm width

    • 3 of the screws are 3.80mm length x 1.89mm width. One of these is near top left of Dell MCIA. The other is near top left of WWAN. An there is one underneath the Black WWAN label.

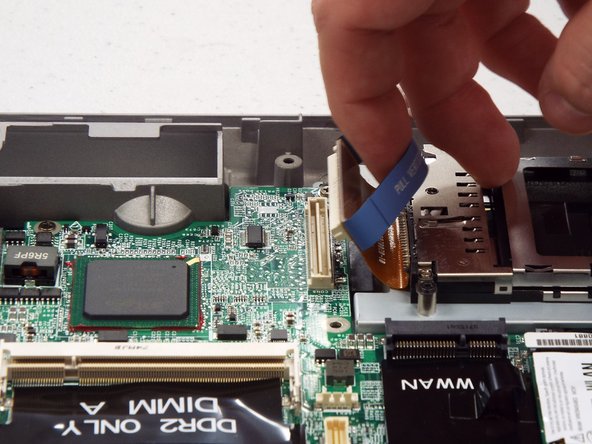
    • Remove the PCMCIA connector from the motherboard.

    • Turn the laptop on the side and remove 2 female hex screws from video card and 2 posts from serial port using socket driver (3/16 socket) All hex screws are 10.23mm x 2.66mm size

结论

To reassemble your device, follow these instructions in reverse order.

14等其他人完成本指南。

Henry

于09/02/14注册

1,431 声望

创作了4篇指南

团队

Pasco Hernando, Team 1-2, Prince Fall 2014 Pasco Hernando, Team 1-2, Prince Fall 2014 的会员

PHSC-PRINCE-F14S1G2

10 名成员

创作了7篇指南

2条评论

I'm so glad I found this. I'm gonna ATTEMPT to fix ours when we get everything in. I have this saved so I can easily find it. I will let you know how it goes after I'm done. GREAT BIG HUGE THANKS again and wish me luck. :D

pambi43 - 回复

i used this to replace the thermal paste its really easy to follow simple steps

C:\THE \DOS\ BOSS - 回复

添加评论

浏览统计数据:

过去 24 小时: 1

过去 7 天: 3

过去 30 天: 16

总计 6,564