跳转到主内容

Dell Latitude 9410 2-in-1 Motherboard Replacement

你所需要的

  1. Dell Latitude 9410 2-in-1 Motherboard Replacement, Base Panel: 步骤 1 中的图像 1,1
    • Ensure that the laptop is unplugged and powered off before beginning.

    • Place the laptop upside down on a flat surface.

  2. Dell Latitude 9410 2-in-1 Motherboard Replacement: 步骤 2 中的图像 1,2 Dell Latitude 9410 2-in-1 Motherboard Replacement: 步骤 2 中的图像 2,2
    • Use a Phillips #00 screwdriver to loosen the ten captive screws.

    • The screws are permanently fastened to the base panel; do not attempt to remove them.

  3. Dell Latitude 9410 2-in-1 Motherboard Replacement: 步骤 3 中的图像 1,3 Dell Latitude 9410 2-in-1 Motherboard Replacement: 步骤 3 中的图像 2,3 Dell Latitude 9410 2-in-1 Motherboard Replacement: 步骤 3 中的图像 3,3
    • Carefully lift off the back panel.

  4. Dell Latitude 9410 2-in-1 Motherboard Replacement, Battery: 步骤 4 中的图像 1,2 Dell Latitude 9410 2-in-1 Motherboard Replacement, Battery: 步骤 4 中的图像 2,2
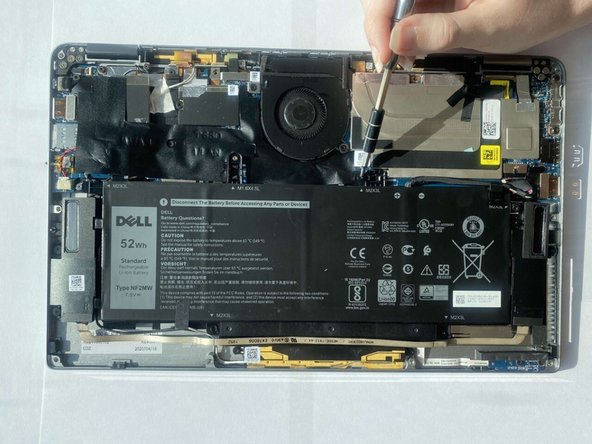
    • Use a Philips #00 screwdriver to remove the five 3mm screws that secure the battery.

  5. Dell Latitude 9410 2-in-1 Motherboard Replacement: 步骤 5 中的图像 1,3 Dell Latitude 9410 2-in-1 Motherboard Replacement: 步骤 5 中的图像 2,3 Dell Latitude 9410 2-in-1 Motherboard Replacement: 步骤 5 中的图像 3,3
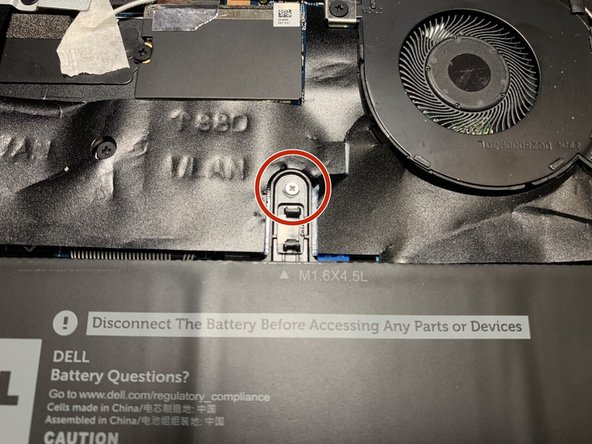
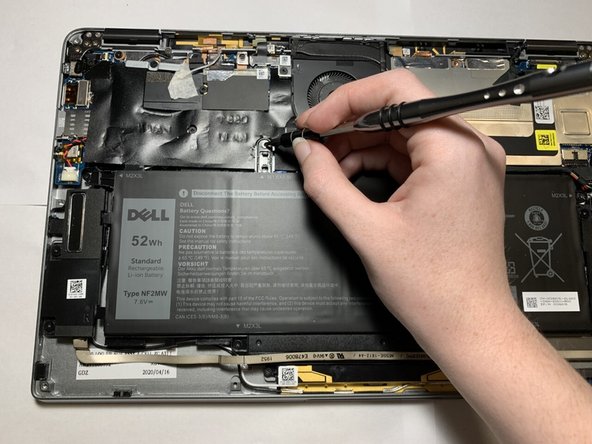
    • Use a Philips #00 screwdriver to remove one 4.5 mm screw.

  6. Dell Latitude 9410 2-in-1 Motherboard Replacement: 步骤 6 中的图像 1,2 Dell Latitude 9410 2-in-1 Motherboard Replacement: 步骤 6 中的图像 2,2
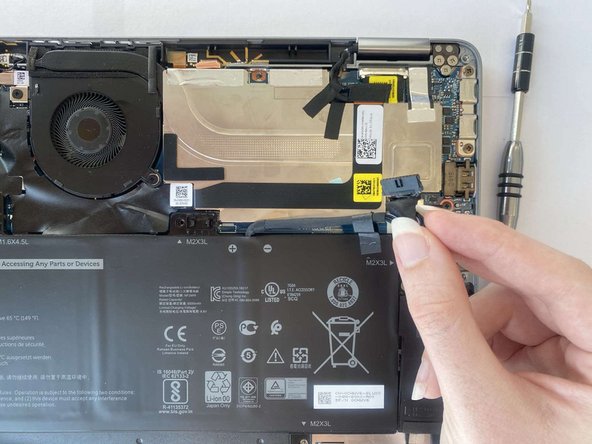
    • Grip the battery cable near the plug and pull it straight out, in the direction of the cable.

  7. Dell Latitude 9410 2-in-1 Motherboard Replacement: 步骤 7 中的图像 1,2 Dell Latitude 9410 2-in-1 Motherboard Replacement: 步骤 7 中的图像 2,2
    在这个步骤中使用的工具:
    Tweezers
    $4.99
    购买
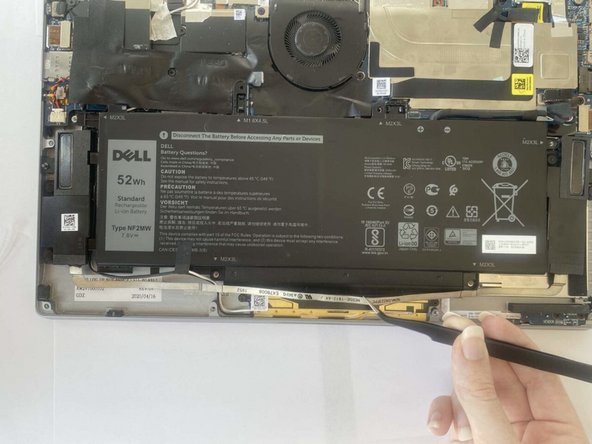
    • Use tweezers to gently move the speaker ribbon cable away from the bottom of the battery.

    • The ribbon cable is thin and fragile; handle it carefully.

    • The ribbon cable only needs to be moved so that the battery can be removed; do not completely remove the ribbon cable.

  8. Dell Latitude 9410 2-in-1 Motherboard Replacement: 步骤 8 中的图像 1,2 Dell Latitude 9410 2-in-1 Motherboard Replacement: 步骤 8 中的图像 2,2
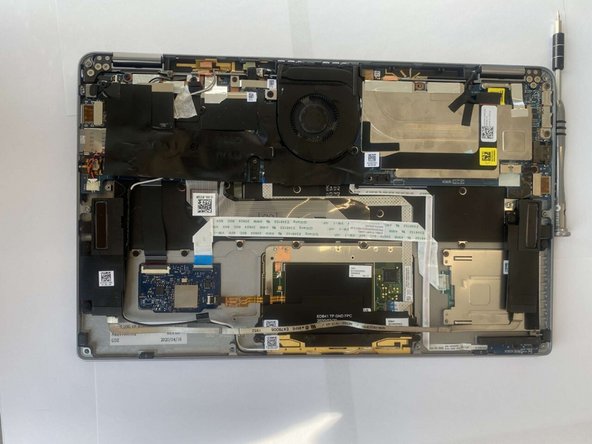
    • Lift the battery out with two hands.

  9. Dell Latitude 9410 2-in-1 Motherboard Replacement, Motherboard: 步骤 9 中的图像 1,1
    • Use a Philips #00 screwdriver to remove the two 2 mm screws that secure the fan.

  10. Dell Latitude 9410 2-in-1 Motherboard Replacement: 步骤 10 中的图像 1,1
    • Disconnect the two ribbon cables connected to the motherboard by lifting the black ZIF tab and pulling the ribbon cables free.

  11. Dell Latitude 9410 2-in-1 Motherboard Replacement: 步骤 11 中的图像 1,1
    • Disconnect the two Wi-Fi card cables by prying them up and away from the press-fit connector.

  12. Dell Latitude 9410 2-in-1 Motherboard Replacement: 步骤 12 中的图像 1,1
    • Disconnect the small black wire from the mother board by pulling in the direction of the cable.

    • Disconnect the black and red wire from the motherboard, also by pulling the direction of the cable.

  13. Dell Latitude 9410 2-in-1 Motherboard Replacement: 步骤 13 中的图像 1,1
    • Use a Philips #00 screwdriver to remove the eight 3 mm screws that secure the motherboard.

结论

To reassemble your device, follow these instructions in reverse order.

另外一个人完成了本指南。

0条评论

添加评论

浏览统计数据:

过去 24 小时: 2

过去 7 天: 3

过去 30 天: 13

总计 350