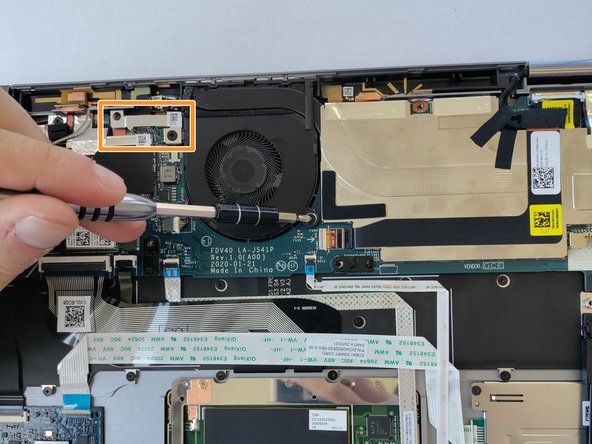
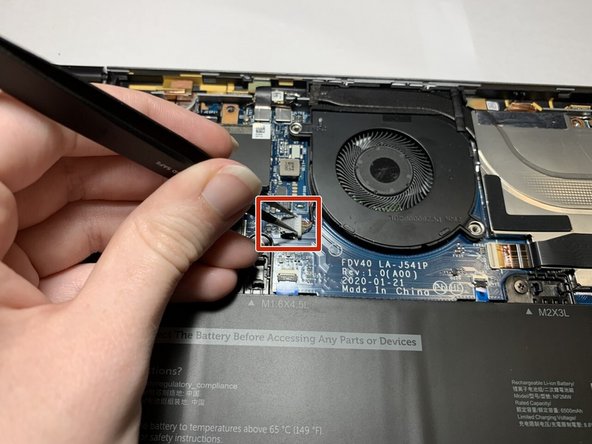
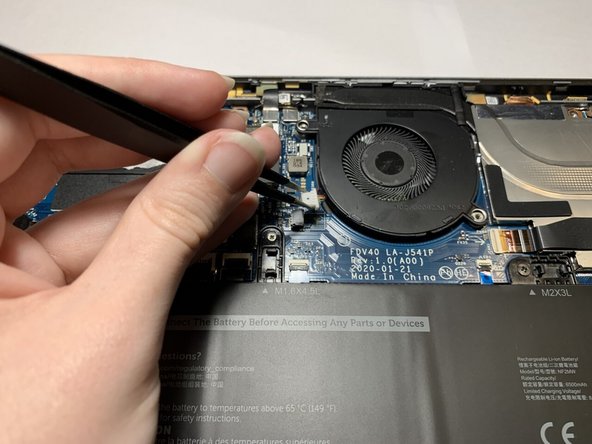
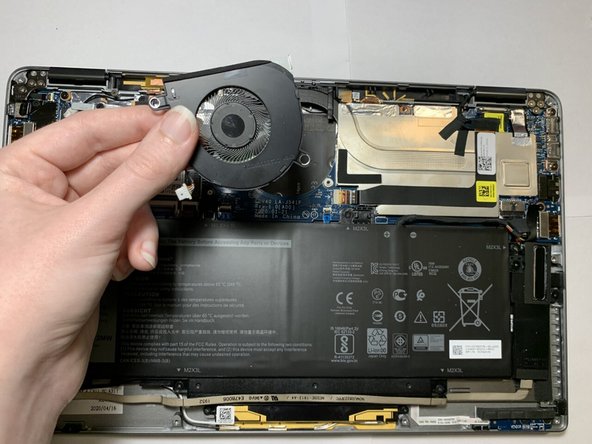
跳转到主内容

Dell Latitude 9410 2-in-1 Fan Replacement

你所需要的

  1. Dell Latitude 9410 2-in-1 Fan Replacement, Base Panel: 步骤 1 中的图像 1,1
    • Ensure that the laptop is unplugged and powered off before beginning.

    • Place the laptop upside down on a flat surface.

  2. Dell Latitude 9410 2-in-1 Fan Replacement: 步骤 2 中的图像 1,2 Dell Latitude 9410 2-in-1 Fan Replacement: 步骤 2 中的图像 2,2
    • Use a Phillips #00 screwdriver to loosen the ten captive screws.

    • The screws are permanently fastened to the base panel; do not attempt to remove them.

  3. Dell Latitude 9410 2-in-1 Fan Replacement: 步骤 3 中的图像 1,3 Dell Latitude 9410 2-in-1 Fan Replacement: 步骤 3 中的图像 2,3 Dell Latitude 9410 2-in-1 Fan Replacement: 步骤 3 中的图像 3,3
    • Carefully lift off the back panel.

  4. Dell Latitude 9410 2-in-1 Fan Replacement, Fan: 步骤 4 中的图像 1,3 Dell Latitude 9410 2-in-1 Fan Replacement, Fan: 步骤 4 中的图像 2,3 Dell Latitude 9410 2-in-1 Fan Replacement, Fan: 步骤 4 中的图像 3,3
    • Carefully peel back and remove the black tape around the top left corner of the motherboard.

  5. Dell Latitude 9410 2-in-1 Fan Replacement: 步骤 5 中的图像 1,2 Dell Latitude 9410 2-in-1 Fan Replacement: 步骤 5 中的图像 2,2
    • Use a Philips #00 screwdriver to remove the two 2 mm screws.

    • After the screws are removed, lift off the silver bracket, toward the top left of the fan.

  6. Dell Latitude 9410 2-in-1 Fan Replacement: 步骤 6 中的图像 1,2 Dell Latitude 9410 2-in-1 Fan Replacement: 步骤 6 中的图像 2,2
    在这个步骤中使用的工具:
    Tweezers
    $4.99
    购买
    • Grip both sides of the fan connector plug with tweezers, and pull directly backwards, toward the cables, until the plug disconnects.

  7. Dell Latitude 9410 2-in-1 Fan Replacement: 步骤 7 中的图像 1,2 Dell Latitude 9410 2-in-1 Fan Replacement: 步骤 7 中的图像 2,2
    • Lift the fan up and out.

结论

To reassemble your device, follow these instructions in reverse order.

0条评论

添加评论

浏览统计数据:

过去 24 小时: 2

过去 7 天: 5

过去 30 天: 20

总计 411