跳转到主内容

Dell Latitude 10-ST2e Rear Facing Camera Replacement

你所需要的

  1. Dell Latitude 10-ST2e Rear Facing Camera Replacement, Motherboard: 步骤 1 中的图像 1,3 Dell Latitude 10-ST2e Rear Facing Camera Replacement, Motherboard: 步骤 1 中的图像 2,3 Dell Latitude 10-ST2e Rear Facing Camera Replacement, Motherboard: 步骤 1 中的图像 3,3
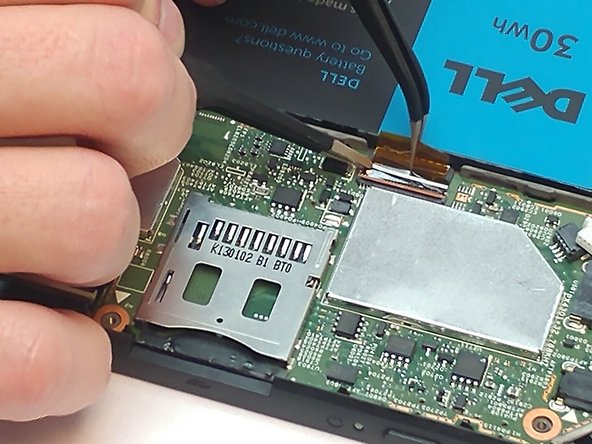
    • Using the blue opening tool, separate the back plastic cover from the device. Start in a corner, and work your way around the tablet.

  2. Dell Latitude 10-ST2e Rear Facing Camera Replacement: 步骤 2 中的图像 1,2 Dell Latitude 10-ST2e Rear Facing Camera Replacement: 步骤 2 中的图像 2,2
    • Remove the four 4.0mm black screws on the perimeter of the device using a JIS #00 screwdriver

  3. Dell Latitude 10-ST2e Rear Facing Camera Replacement: 步骤 3 中的图像 1,2 Dell Latitude 10-ST2e Rear Facing Camera Replacement: 步骤 3 中的图像 2,2
    • Remove the two 4.0mm silver screws using the JIS #00 screwdriver.

  4. Dell Latitude 10-ST2e Rear Facing Camera Replacement: 步骤 4 中的图像 1,1
    在这个步骤中使用的工具:
    Tweezers
    $4.99
    购买
    • Disconnect the connection of the front camera clamp by releasing the clamp with tweezers.

    • Pull up on the connection from the motherboard.

    • Avoid damaging the connection.

  5. Dell Latitude 10-ST2e Rear Facing Camera Replacement: 步骤 5 中的图像 1,3 Dell Latitude 10-ST2e Rear Facing Camera Replacement: 步骤 5 中的图像 2,3 Dell Latitude 10-ST2e Rear Facing Camera Replacement: 步骤 5 中的图像 3,3
    • Using an opening tool, lift upwards on the white clamp, and pull the blue tab out of the connection with tweezers.

  6. Dell Latitude 10-ST2e Rear Facing Camera Replacement: 步骤 6 中的图像 1,2 Dell Latitude 10-ST2e Rear Facing Camera Replacement: 步骤 6 中的图像 2,2
    • Using tweezers, disconnect the white and black wires from the bottom of the motherboard.

    • Pull upwards while holding the brass connections. Do not pull on the wires.

  7. Dell Latitude 10-ST2e Rear Facing Camera Replacement: 步骤 7 中的图像 1,3 Dell Latitude 10-ST2e Rear Facing Camera Replacement: 步骤 7 中的图像 2,3 Dell Latitude 10-ST2e Rear Facing Camera Replacement: 步骤 7 中的图像 3,3
    • Disconnect the two clamps, one orange and one white, using tweezers next to the battery.

  8. Dell Latitude 10-ST2e Rear Facing Camera Replacement: 步骤 8 中的图像 1,1
    • Remove the four 7.0mm screws securing the battery with a JIS #00 screwdriver.

  9. Dell Latitude 10-ST2e Rear Facing Camera Replacement: 步骤 9 中的图像 1,2 Dell Latitude 10-ST2e Rear Facing Camera Replacement: 步骤 9 中的图像 2,2
    • With the blue opening tool, gently lift up and remove the battery from the tablet.

    • Do not damage, puncture, cut, or bend the battery, as this may cause bodily harm.

  10. Dell Latitude 10-ST2e Rear Facing Camera Replacement: 步骤 10 中的图像 1,3 Dell Latitude 10-ST2e Rear Facing Camera Replacement: 步骤 10 中的图像 2,3 Dell Latitude 10-ST2e Rear Facing Camera Replacement: 步骤 10 中的图像 3,3
    • Rotate the motherboard upwards from the tablet using tweezers, but do not remove completely from the device. As you lift, disconnect the black and red wire located underneath the motherboard before removing it completely from the tablet.

  11. Dell Latitude 10-ST2e Rear Facing Camera Replacement, Rear Facing Camera: 步骤 11 中的图像 1,3 Dell Latitude 10-ST2e Rear Facing Camera Replacement, Rear Facing Camera: 步骤 11 中的图像 2,3 Dell Latitude 10-ST2e Rear Facing Camera Replacement, Rear Facing Camera: 步骤 11 中的图像 3,3
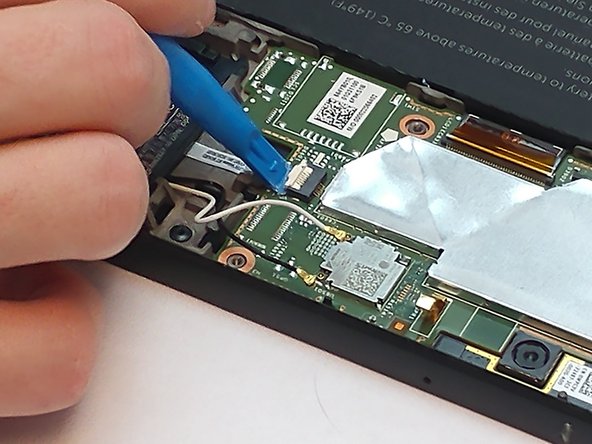
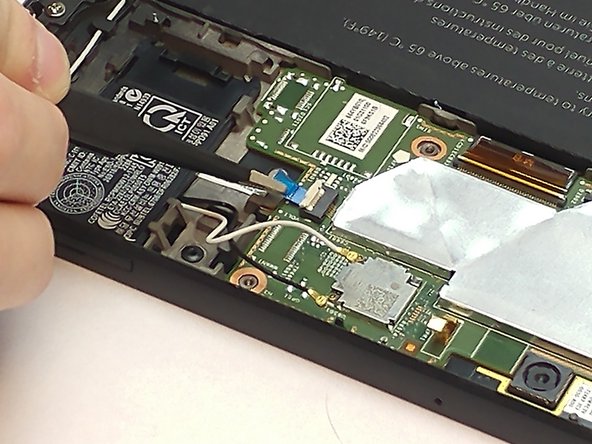
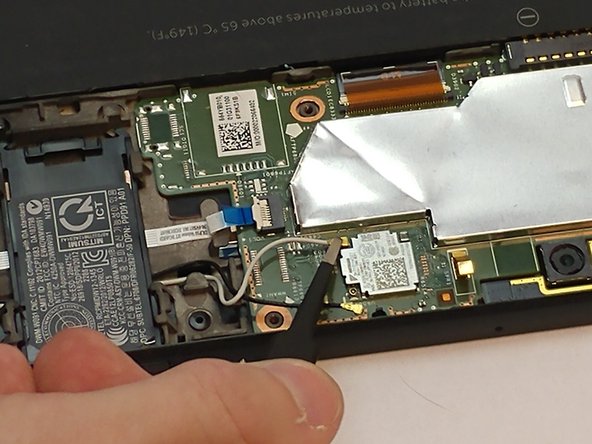
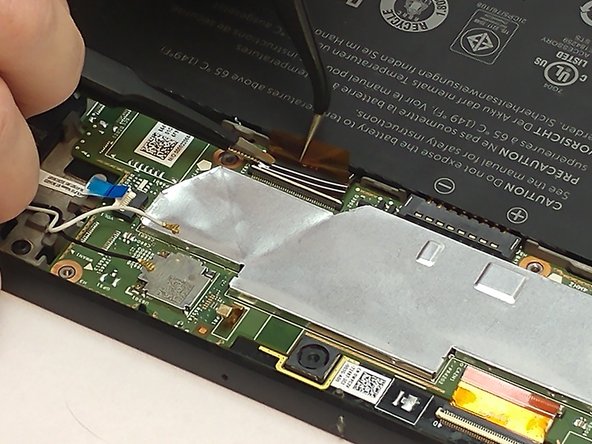
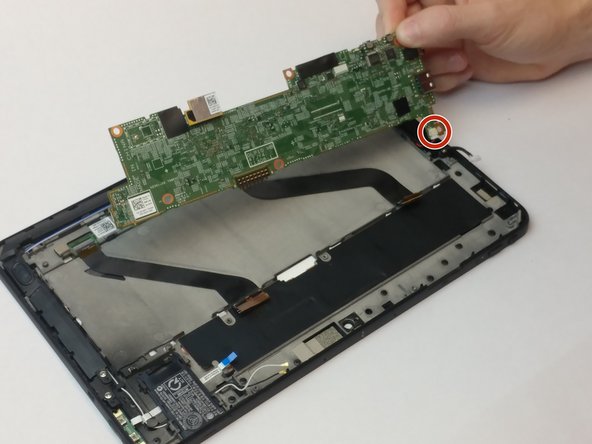
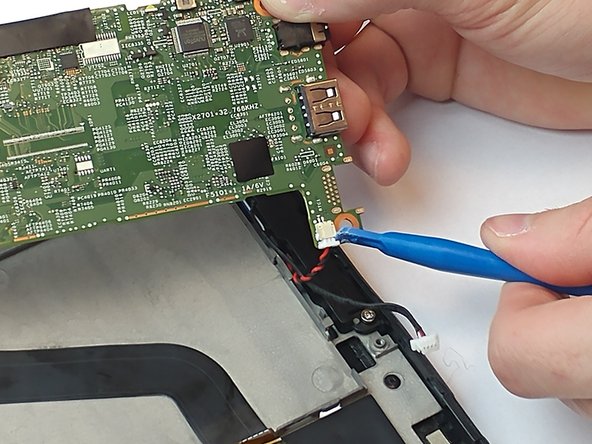
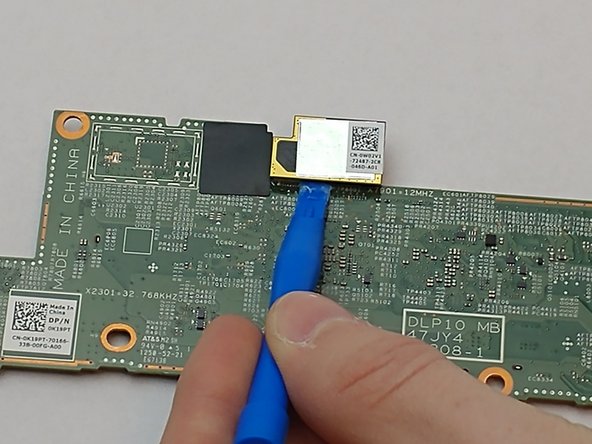
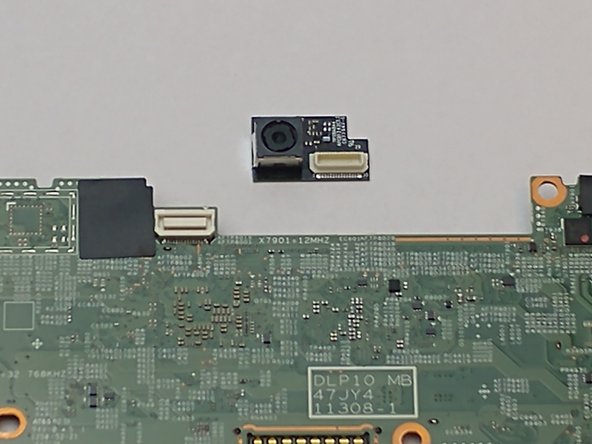
    • Once the motherboard is removed, place on a flat surface facing down. Use the plastic opening tool to disconnect and remove the camera from the motherboard.

结论

To reassemble your device, follow these instructions in reverse order.

另外一个人完成了本指南。

Jan Camacho

于09/27/17注册

140 声望

撰写一个指南

团队

USF Tampa, Team S16-G4, Eyestone Fall 2017 USF Tampa, Team S16-G4, Eyestone Fall 2017 的会员

USFT-EYESTONE-F17S16G4

4 名成员

创作了13篇指南

0条评论

添加评论

浏览统计数据:

过去 24 小时: 2

过去 7 天: 3

过去 30 天: 6

总计 247