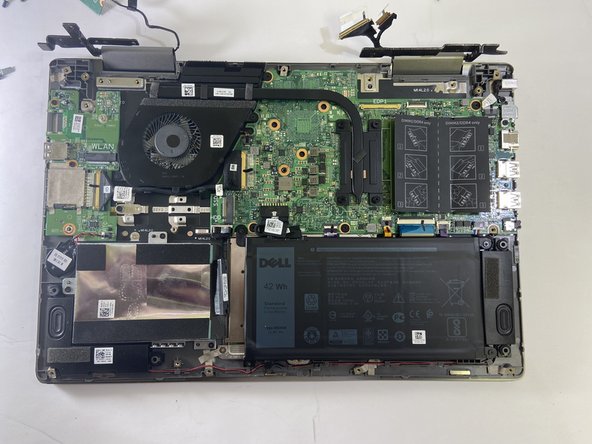
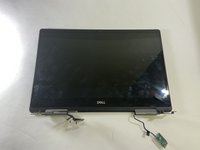
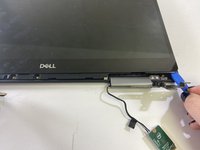
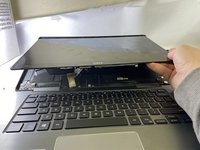
跳转到主内容

Dell Inspiron 7573 2-in-1 Hinge Replacement

你所需要的

  1. Dell Inspiron 7573 2-in-1 Hinge Replacement, Battery: 步骤 1 中的图像 1,2 Dell Inspiron 7573 2-in-1 Hinge Replacement, Battery: 步骤 1 中的图像 2,2
    • Make sure computer is off before you begin.

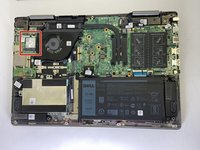
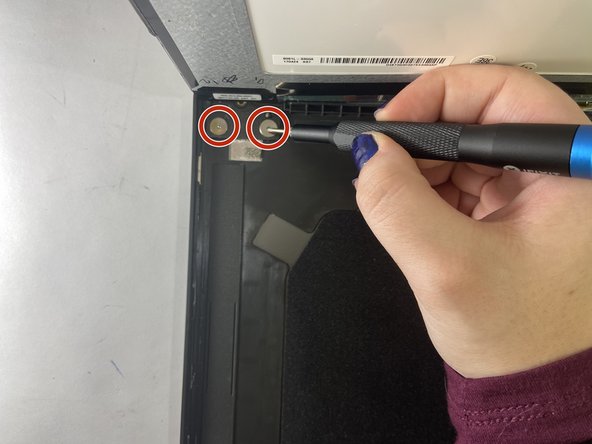
    • Remove the four 5 mm screws from the bottom edge of the laptop using a Phillips #00 screwdriver.

    • Loosen the remaining six captive screws from the bottom cover with a Phillips #00 screwdriver.

  2. Dell Inspiron 7573 2-in-1 Hinge Replacement: 步骤 2 中的图像 1,3 Dell Inspiron 7573 2-in-1 Hinge Replacement: 步骤 2 中的图像 2,3 Dell Inspiron 7573 2-in-1 Hinge Replacement: 步骤 2 中的图像 3,3
    • Using a spudger, pry off the bottom cover by gently prying from corner to corner in order to disengage the plastic clips.

    • Lift off the bottom cover.

    • After the base cover is removed, your laptop should look similar as depicted in the images provided.

  3. Dell Inspiron 7573 2-in-1 Hinge Replacement: 步骤 3 中的图像 1,1
    • Remove the four 3 mm screws holding the battery in place with a Phillips #00 screwdriver.

  4. Dell Inspiron 7573 2-in-1 Hinge Replacement: 步骤 4 中的图像 1,3 Dell Inspiron 7573 2-in-1 Hinge Replacement: 步骤 4 中的图像 2,3 Dell Inspiron 7573 2-in-1 Hinge Replacement: 步骤 4 中的图像 3,3
    • Using the pull tab, disconnect the battery cable from the system board.

    • Lift the battery out from the laptop case.

  5. Dell Inspiron 7573 2-in-1 Hinge Replacement, Wi-Fi Card: 步骤 5 中的图像 1,3 Dell Inspiron 7573 2-in-1 Hinge Replacement, Wi-Fi Card: 步骤 5 中的图像 2,3 Dell Inspiron 7573 2-in-1 Hinge Replacement, Wi-Fi Card: 步骤 5 中的图像 3,3
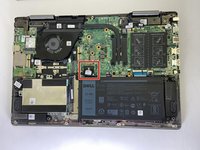
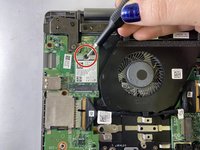
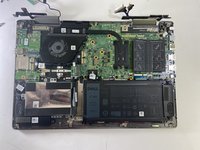
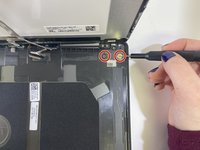
    • Using a Phillips #00 screwdriver, remove the 3 mm screw that secures the wireless-card bracket and wireless card to the I/O board.

    • Lift the wireless-card bracket off of the wireless card.

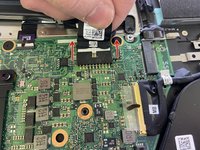
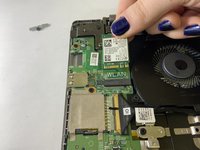
    • Disconnect the white and black antenna cables from the wireless card.

    • Slide and remove the wireless card from the wireless card slot.

  6. Dell Inspiron 7573 2-in-1 Hinge Replacement, Hinges: 步骤 6 中的图像 1,3 Dell Inspiron 7573 2-in-1 Hinge Replacement, Hinges: 步骤 6 中的图像 2,3 Dell Inspiron 7573 2-in-1 Hinge Replacement, Hinges: 步骤 6 中的图像 3,3
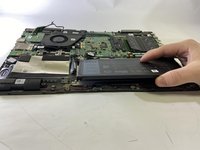
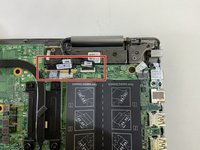
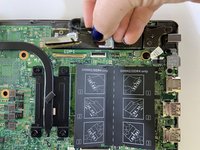
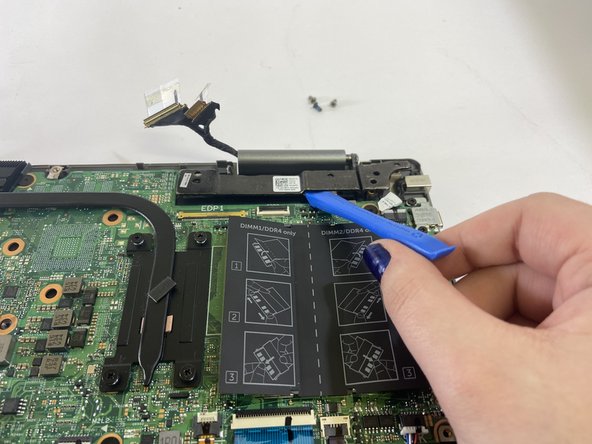
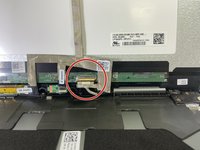
    • Peel off the tapes that secure the display cable and touch-screen board cable to the system board.

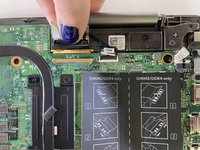
    • Open the latches and disconnect the display cable and the touch-screen board cable from the system board.

  7. Dell Inspiron 7573 2-in-1 Hinge Replacement: 步骤 7 中的图像 1,3 Dell Inspiron 7573 2-in-1 Hinge Replacement: 步骤 7 中的图像 2,3 Dell Inspiron 7573 2-in-1 Hinge Replacement: 步骤 7 中的图像 3,3
    • Remove the seven 2 mm screws that secure the display assembly hinges to the palm-rest assembly with a Phillips #00 screwdriver.

    • Use a plastic opening tool to gently lift up the hinges if they are difficult to move.

  8. Dell Inspiron 7573 2-in-1 Hinge Replacement: 步骤 8 中的图像 1,3 Dell Inspiron 7573 2-in-1 Hinge Replacement: 步骤 8 中的图像 2,3 Dell Inspiron 7573 2-in-1 Hinge Replacement: 步骤 8 中的图像 3,3
    • Separate the display assembly from the main laptop body.

    • Use a spudger to gently remove the plastic lining at the bottom of the screen.

    • Once the plastic lining has been removed, use the spudger to gently lift up on the screen.

  9. Dell Inspiron 7573 2-in-1 Hinge Replacement: 步骤 9 中的图像 1,3 Dell Inspiron 7573 2-in-1 Hinge Replacement: 步骤 9 中的图像 2,3 Dell Inspiron 7573 2-in-1 Hinge Replacement: 步骤 9 中的图像 3,3
    • Gently lift the screen from the bottom edge to reveal the connectors beneath.

    • Disconnect it by pulling in a downward motion.

  10. Dell Inspiron 7573 2-in-1 Hinge Replacement: 步骤 10 中的图像 1,2 Dell Inspiron 7573 2-in-1 Hinge Replacement: 步骤 10 中的图像 2,2
    • Remove four 2 mm Phillips #00 screws behind the screen display.

  11. Dell Inspiron 7573 2-in-1 Hinge Replacement: 步骤 11 中的图像 1,1
    • Remove the hinges from the screen display and I/O board.

    • If your replacement hinges did not come with cables included, be sure to gently pull the cables out from the hinges before you dispose of them. It may be useful to jot down how the cables were configured to help as you reroute them.

结论

To reassemble your device, follow these instructions in reverse order.

Kylie Freese

于09/27/21注册

405 声望

创作了3篇指南

团队

Casper College, Team 1-2, Lareau Fall 2021 Casper College, Team 1-2, Lareau Fall 2021 的会员

CASC-LAREAU-F21S1G2

3 名成员

创作了4篇指南

0条评论

添加评论

浏览统计数据:

过去 24 小时: 2

过去 7 天: 8

过去 30 天: 21

总计 1,291