跳转到主内容

Dell Inspiron 17-7746 Wireless Card Replacement

你所需要的

  1. Dell Inspiron 17-7746 Wireless Card Replacement, Battery: 步骤 1 中的图像 1,1
    • Disconnect the laptop from the AC adapter and turn off the laptop.

  2. Dell Inspiron 17-7746 Wireless Card Replacement: 步骤 2 中的图像 1,1
    • Place the laptop so the bottom faces up.

  3. Dell Inspiron 17-7746 Wireless Card Replacement: 步骤 3 中的图像 1,3 Dell Inspiron 17-7746 Wireless Card Replacement: 步骤 3 中的图像 2,3 Dell Inspiron 17-7746 Wireless Card Replacement: 步骤 3 中的图像 3,3
    • Remove the silver 15mm PH 1 screw that holds the plastic cover in place over the battery.

    • Remove the 8mm PH 1 screw that holds the plastic cover in place over the battery.

    • Keep the screws together because the length of the screws will matter when you reassemble.

  4. Dell Inspiron 17-7746 Wireless Card Replacement: 步骤 4 中的图像 1,1
    • Using the metal jimmy, pry up the first half of the cover.

  5. Dell Inspiron 17-7746 Wireless Card Replacement: 步骤 5 中的图像 1,1
    • Apply pressure with your fingertips on top of the cover and drag toward the front of the laptop. This will make the plate slide off exposing the hard drive.

  6. Dell Inspiron 17-7746 Wireless Card Replacement: 步骤 6 中的图像 1,2 Dell Inspiron 17-7746 Wireless Card Replacement: 步骤 6 中的图像 2,2
    • Remove the two black PH1 6mm screws that anchor the battery.

  7. Dell Inspiron 17-7746 Wireless Card Replacement: 步骤 7 中的图像 1,1
    • Grab the black tab on the battery with index finger and thumb.

    • If the Tab is broken or missing, use the plastic spudger to pry the battery out far enough to grab the battery by hand.

    • Avoid applying too much pressure on the battery with the plastic spudger. It might puncture the battery.

  8. Dell Inspiron 17-7746 Wireless Card Replacement: 步骤 8 中的图像 1,1
    • Pull upwards, removing the battery from the laptop.

    • Ensure replacement battery has no bulging or has no cracks and lies flat in its location.

  9. Dell Inspiron 17-7746 Wireless Card Replacement, Wireless Card: 步骤 9 中的图像 1,3 Dell Inspiron 17-7746 Wireless Card Replacement, Wireless Card: 步骤 9 中的图像 2,3 Dell Inspiron 17-7746 Wireless Card Replacement, Wireless Card: 步骤 9 中的图像 3,3
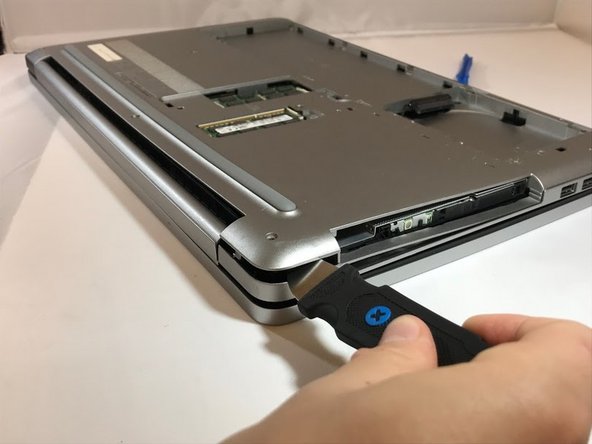
    • Remove the three black 6mm PH1 screws that anchor the hard drive.

    • This screw hole will be empty because the 15mm silver screw that holds the plastic cover will anchor the hard drive down when completely reassembled.

  10. Dell Inspiron 17-7746 Wireless Card Replacement: 步骤 10 中的图像 1,2 Dell Inspiron 17-7746 Wireless Card Replacement: 步骤 10 中的图像 2,2
    • Using your hands, gently lift the hard drive out of its slot.

    • Disconnect the Seta Cable attaching the hard drive to the laptop by gently wiggling loose the connector from the hard drive using your hands.

  11. Dell Inspiron 17-7746 Wireless Card Replacement: 步骤 11 中的图像 1,1
    • Pry up the plate covering the RAM, using the metal jimmy.

  12. Dell Inspiron 17-7746 Wireless Card Replacement: 步骤 12 中的图像 1,2 Dell Inspiron 17-7746 Wireless Card Replacement: 步骤 12 中的图像 2,2
    • Remove all eleven (11) PH1 screws.

  13. Dell Inspiron 17-7746 Wireless Card Replacement: 步骤 13 中的图像 1,3 Dell Inspiron 17-7746 Wireless Card Replacement: 步骤 13 中的图像 2,3 Dell Inspiron 17-7746 Wireless Card Replacement: 步骤 13 中的图像 3,3
    • As part of removing all screws the CD ROM screw is also removed using the plastic spudger.

    • Using the tip of the plastic spudger, push the metal tab towards the outer edge of the laptop. This pushes the CD ROM out.

    • Using your fingers, pull out the CD ROM.

  14. Dell Inspiron 17-7746 Wireless Card Replacement: 步骤 14 中的图像 1,2 Dell Inspiron 17-7746 Wireless Card Replacement: 步骤 14 中的图像 2,2
    • Turn the laptop over and open it up, exposing the keyboard.

  15. Dell Inspiron 17-7746 Wireless Card Replacement: 步骤 15 中的图像 1,3 Dell Inspiron 17-7746 Wireless Card Replacement: 步骤 15 中的图像 2,3 Dell Inspiron 17-7746 Wireless Card Replacement: 步骤 15 中的图像 3,3
    • Using the plastic spudger tool, place the tip of the spudger into the small notches at the top of the keyboard and push in the notch to release the top portion of the keyboard. Repeat on all notches.

    • Push all five tabs back to lift the keyboard.

    • Starting from the left to right makes it easier to remove the keyboard.

  16. Dell Inspiron 17-7746 Wireless Card Replacement: 步骤 16 中的图像 1,2 Dell Inspiron 17-7746 Wireless Card Replacement: 步骤 16 中的图像 2,2
    • Using the plastic spudger, lift the top part of the keyboard and gently lift the keyboard out.

    • Top of the keyboard is where the clips were holding the keyboard in place of the laptop.

    • There are flat ribbon cables that connect the keyboard, avoid breaking these cables.

    • Using your hands, gently remove the narrow flat ribbon cable from the motherboard port by gently pulling the cable.

  17. Dell Inspiron 17-7746 Wireless Card Replacement: 步骤 17 中的图像 1,1
    • Using your hands, gently remove the wide flat ribbon cable from the motherboard port by gently pulling the cable.

  18. Dell Inspiron 17-7746 Wireless Card Replacement: 步骤 18 中的图像 1,1
    • Remove the 15mm PH 1 screw holding the bottom plate in place.

  19. Dell Inspiron 17-7746 Wireless Card Replacement: 步骤 19 中的图像 1,2 Dell Inspiron 17-7746 Wireless Card Replacement: 步骤 19 中的图像 2,2
    • Close the laptop and flip it over exposing the bottom surface. Use the metal jimmy and blue opening tool, gently pry the bottom cover off. Repeat this process around the entire perimeter of the laptop.

  20. Dell Inspiron 17-7746 Wireless Card Replacement: 步骤 20 中的图像 1,1
    • Gently pick up the bottom cover, exposing all other components of the device.

    • If the cover is not coming off easily or seems to not be lifting off. Look for any screws you may have missed.

  21. Dell Inspiron 17-7746 Wireless Card Replacement: 步骤 21 中的图像 1,2 Dell Inspiron 17-7746 Wireless Card Replacement: 步骤 21 中的图像 2,2
    • The wireless card is near the left hinge of the laptop and has two little connectors attached to it. Gently lift the left black connector off the board and then lift the board out of the laptop.

    • Repeat the same process with the white connector.

  22. Dell Inspiron 17-7746 Wireless Card Replacement: 步骤 22 中的图像 1,1
    • Replace the wireless card and reconnect the black and white cables.

    • Black cable goes to the connector on the wireless card labeled as "1."

    • White cable goes to the connector on the wireless card labeled as "2."

结论

To reassemble your device, follow these instructions in reverse order.

0条评论

添加评论

浏览统计数据:

过去 24 小时: 1

过去 7 天: 1

过去 30 天: 6

总计 748