跳转到主内容

Dell Inspiron 17-5755 Hard Drive Replacement

你所需要的

  1. Dell Inspiron 17-5755 Hard Drive Replacement, Battery: 步骤 1 中的图像 1,1
    • Make sure the computer has been shut down, and isn't plugged into an outlet before attempting to remove the battery.

  2. Dell Inspiron 17-5755 Hard Drive Replacement: 步骤 2 中的图像 1,2 Dell Inspiron 17-5755 Hard Drive Replacement: 步骤 2 中的图像 2,2
    • Find the battery release latch on the bottom side of the computer.

    • Slide the latch to the left until you hear a "click". This indicates that the battery has been released.

  3. Dell Inspiron 17-5755 Hard Drive Replacement: 步骤 3 中的图像 1,1
    • Safely remove the battery from the laptop.

  4. Dell Inspiron 17-5755 Hard Drive Replacement, Hard Drive: 步骤 4 中的图像 1,3 Dell Inspiron 17-5755 Hard Drive Replacement, Hard Drive: 步骤 4 中的图像 2,3 Dell Inspiron 17-5755 Hard Drive Replacement, Hard Drive: 步骤 4 中的图像 3,3
    • Turn over your laptop and locate the two screws which secure the base cover.

    • Use a Phillips #0 screwdriver to unscrew the 8mm screws which secure the base cover.

  5. Dell Inspiron 17-5755 Hard Drive Replacement: 步骤 5 中的图像 1,2 Dell Inspiron 17-5755 Hard Drive Replacement: 步骤 5 中的图像 2,2
    • Locate the tabs that hold the base cover to the laptop and use a plastic opening tool to gently release the base cover.

  6. Dell Inspiron 17-5755 Hard Drive Replacement: 步骤 6 中的图像 1,3 Dell Inspiron 17-5755 Hard Drive Replacement: 步骤 6 中的图像 2,3 Dell Inspiron 17-5755 Hard Drive Replacement: 步骤 6 中的图像 3,3
    • Now with the base cover removed, you may lift it off of the laptop and continue.

  7. Dell Inspiron 17-5755 Hard Drive Replacement: 步骤 7 中的图像 1,3 Dell Inspiron 17-5755 Hard Drive Replacement: 步骤 7 中的图像 2,3 Dell Inspiron 17-5755 Hard Drive Replacement: 步骤 7 中的图像 3,3
    • Locate the hard drive cable, and disconnect it from the laptop by lifting the latch which secures the cable.

  8. Dell Inspiron 17-5755 Hard Drive Replacement: 步骤 8 中的图像 1,1
    • Use a Phillips #0 screwdriver to remove the four 8mm screws which secure the hard drive assembly to the laptop.

  9. Dell Inspiron 17-5755 Hard Drive Replacement: 步骤 9 中的图像 1,3 Dell Inspiron 17-5755 Hard Drive Replacement: 步骤 9 中的图像 2,3 Dell Inspiron 17-5755 Hard Drive Replacement: 步骤 9 中的图像 3,3
    • Carefully remove the hard drive and its assembly from the laptop.

  10. Dell Inspiron 17-5755 Hard Drive Replacement: 步骤 10 中的图像 1,3 Dell Inspiron 17-5755 Hard Drive Replacement: 步骤 10 中的图像 2,3 Dell Inspiron 17-5755 Hard Drive Replacement: 步骤 10 中的图像 3,3
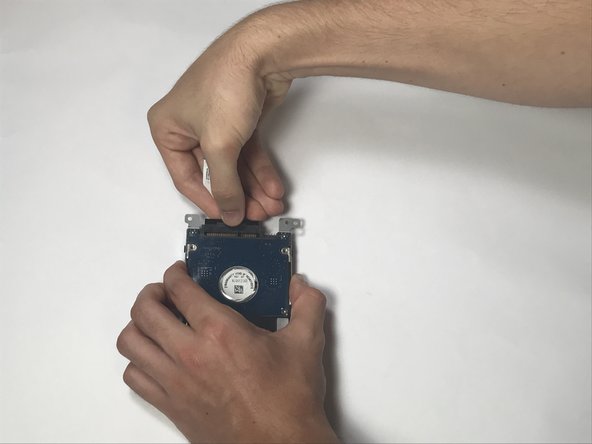
    • Remove the interposer by grabbing the black portion of the assembly, and pulling it away from the hard drive.

    • Be sure to not remove the interposer by pulling on the cable attached to it.

  11. Dell Inspiron 17-5755 Hard Drive Replacement: 步骤 11 中的图像 1,1
    • Use a Phillips #0 screwdriver to remove the four 4mm screws on either side of the hard drive assembly.

    • These screws are very small. Make sure not to misplace them.

  12. Dell Inspiron 17-5755 Hard Drive Replacement: 步骤 12 中的图像 1,3 Dell Inspiron 17-5755 Hard Drive Replacement: 步骤 12 中的图像 2,3 Dell Inspiron 17-5755 Hard Drive Replacement: 步骤 12 中的图像 3,3
    • Safely remove the hard drive assembly from the hard drive to complete the process.

结论

To reassemble your device, follow these instructions in reverse order.

2等其他人完成本指南。

Jeff

于02/15/17注册

385 声望

创作了3篇指南

团队

USF Tampa, Team S6-G1, Lacy Spring 2017 USF Tampa, Team S6-G1, Lacy Spring 2017 的会员

USFT-LACY-S17S6G1

3 名成员

创作了5篇指南

2条评论

My question is, the hard drive is this a 7mm, 12mm or 15mm drive bay? I want to put a 4tb in my laptop but those are 15mm size and I can’t find what the size limit of the bay is.

Rachael Strange - 回复

I want to put a 4tb harddrive in my laptop.

Those only come in 15mm.

will this drive bay hold 15mm sized drives?

Rachael Strange - 回复

添加评论

浏览统计数据:

过去 24 小时: 1

过去 7 天: 5

过去 30 天: 11

总计 2,559