当前版本的文档还未经巡查,您可以查看最新的已查核版本。
-
-
-
Insert the flat end of a spudger into the slot on the right side of the central control cover and pry it up.
-
Carefully pull the central control cover up along its edges.
-
Do not attempt to completely remove the cover, as it is still attached via a ribbon cable.
-
-
Peel back the silver tape securing the ribbon cable to the cover.
-
Pull the small brown latch on the ribbon cable connector out.
-
Disconnect the ribbon cable to completely free the central control cover.
-
-
Remove the two 5.75 mm Phillips #1 screws securing the keyboard to the laptop.
-
Gently slide the keyboard towards the display until the tabs on its front side are free.
-
Do not force the keyboard too far forward or attempt to remove it yet, as there is still a ribbon cable connected to it.
-
-
Use a spudger to gently lift the ribbon cable retaining flap.
-
Disconnect the ribbon cable.
-
Shift the keyboard sideways enough to free one side from it's retaining tab. Then lift the keyboard away from the laptop.
-
-
-
Remove/loosen the eight 4.80 mm Phillips #1 screws securing the bottom panel.
-
The screws may only need to be loosened, as they are generally retained by plastic washers.
-
Remove the bottom panel.
-
-
-
-
-
-
-
Remove the four 3.45 mm Phillips #1 screws securing the display assembly to the laptop chassis.
-
Support the display assembly as you remove these screws to prevent damage to the screw and hole threads.
-
Remove the display assembly from the laptop.
-
-
-
-
-
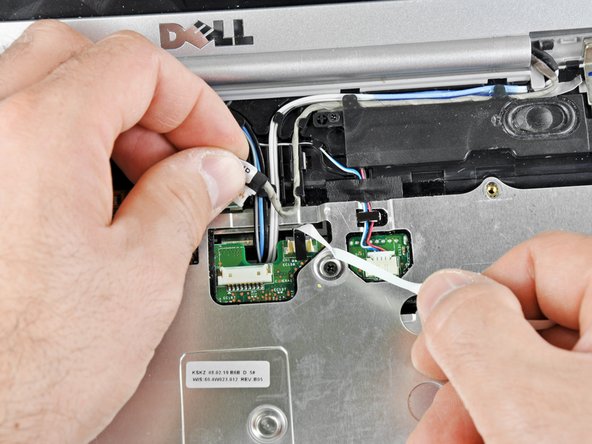
Release the ribbon cable in the upper left corner of the laptop from its retaining tabs.
-
Use a spudger to unplug the speaker connector at the top center of the laptop.
-
De-route the speaker wires from their retaining tabs.
-
-
Use the flat end of a spudger to begin lifting the upper case at its front edge.
-
Lift the front edge of the case up until it comes free.
-
Work slowly and be sure not to get any cables caught in the upper case holes and guides.
嵌入本指南
选择一个尺寸并复制下面的代码,将本指南作为一个小插件嵌入到你的网站/论坛中。
预览