跳转到主内容

Dell Inspiron 15-7548 Power Port Replacement

你所需要的

  1. Dell Inspiron 15-7548  Power Port Replacement, Back Panel: 步骤 1 中的图像 1,2 Dell Inspiron 15-7548  Power Port Replacement, Back Panel: 步骤 1 中的图像 2,2
    • Remove the six 6 mm screws from the back panel with a Phillips #1 screwdriver.

    • Loosen the four captive screws at the bottom using a Phillips #1 screwdriver.

    • The four screws on the bottom are captive screws and cannot be removed.

  2. Dell Inspiron 15-7548  Power Port Replacement: 步骤 2 中的图像 1,2 Dell Inspiron 15-7548  Power Port Replacement: 步骤 2 中的图像 2,2
    • Pry out the back panel using the flat head side of the spudger.

    • Do not insert the spudger more than half an inch when separating the bottom and right side of the back panel.

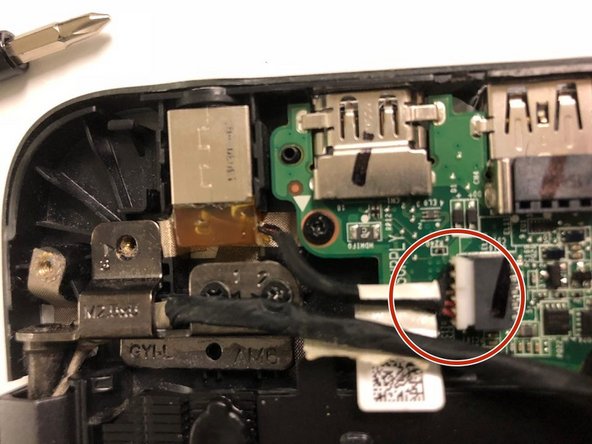
  3. Dell Inspiron 15-7548  Power Port Replacement, Power Port: 步骤 3 中的图像 1,2 Dell Inspiron 15-7548  Power Port Replacement, Power Port: 步骤 3 中的图像 2,2
    • Grab the wires and lightly pull to remove the power port from the motherboard.

结论

To reassemble your device, follow these instructions in reverse order.

另外一个人完成了本指南。

0条评论

添加评论

浏览统计数据:

过去 24 小时: 0

过去 7 天: 3

过去 30 天: 5

总计 382