跳转到主内容

Dell Inspiron 15-5567 I/O Board/Cable Replacement

你所需要的

  1. Dell Inspiron 15-5567 I/O Board/Cable Replacement, Back Cover: 步骤 1 中的图像 1,3 Dell Inspiron 15-5567 I/O Board/Cable Replacement, Back Cover: 步骤 1 中的图像 2,3 Dell Inspiron 15-5567 I/O Board/Cable Replacement, Back Cover: 步骤 1 中的图像 3,3
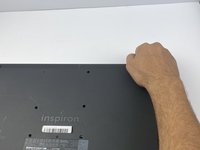
    • Orient the laptop with the back cover facing upward and the INSPIRON engraving reads legible (not flipped).

    • Remove 13 M2.5x8mm screws using a Philips #0 screwdriver.

    • Remove two M2x4mm screws using the same screwdriver.

  2. Dell Inspiron 15-5567 I/O Board/Cable Replacement: 步骤 2 中的图像 1,2 Dell Inspiron 15-5567 I/O Board/Cable Replacement: 步骤 2 中的图像 2,2
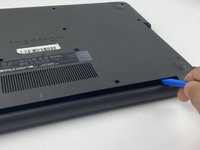
    • Insert the blue plastic opening tool into the crease of the CD driver, and pop it open.

    • Slide the rest of it out with your hand.

  3. Dell Inspiron 15-5567 I/O Board/Cable Replacement: 步骤 3 中的图像 1,3 Dell Inspiron 15-5567 I/O Board/Cable Replacement: 步骤 3 中的图像 2,3 Dell Inspiron 15-5567 I/O Board/Cable Replacement: 步骤 3 中的图像 3,3
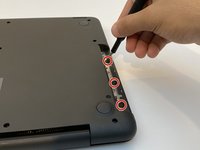
    • Remove three M2x2mm screws underneath the CD driver with the same Philips #0 screwdriver.

    • Place the blue plastic opening tool in the crease of the cover and push it upward to open the back cover.

    • Grab the corners of the cover firmly and lift it up.

    • Some parts are weaker than others; open it gently from corners.

  4. Dell Inspiron 15-5567 I/O Board/Cable Replacement, I/O Board/Cable: 步骤 4 中的图像 1,3 Dell Inspiron 15-5567 I/O Board/Cable Replacement, I/O Board/Cable: 步骤 4 中的图像 2,3 Dell Inspiron 15-5567 I/O Board/Cable Replacement, I/O Board/Cable: 步骤 4 中的图像 3,3
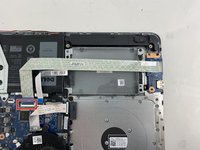
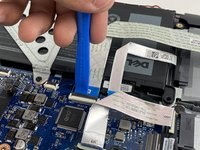
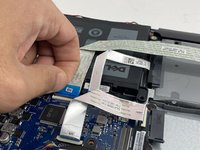
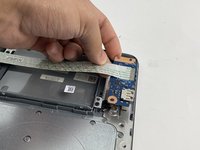
    • Open the latch for the cable using the blue opening tool by placing it under the latch (like in the second picture) and lifting it upward.

    • Disconnect the cable by pulling the blue tab.

  5. Dell Inspiron 15-5567 I/O Board/Cable Replacement: 步骤 5 中的图像 1,3 Dell Inspiron 15-5567 I/O Board/Cable Replacement: 步骤 5 中的图像 2,3 Dell Inspiron 15-5567 I/O Board/Cable Replacement: 步骤 5 中的图像 3,3
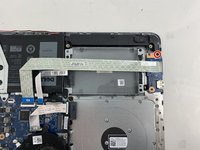
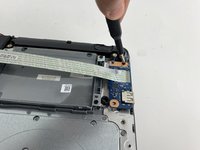
    • Remove one M2.5x5mm screw securing the board using a Philips #0.

    • Lift the board gently and remove it.

结论

To reassemble your device, follow these instructions in reverse order.

另外一个人完成了本指南。

0条评论

添加评论

浏览统计数据:

过去 24 小时: 2

过去 7 天: 11

过去 30 天: 18

总计 676