跳转到主内容

Dell Inspiron 15 7579 Fan Replacement

你所需要的

  1. Dell Inspiron 15 7579 Fan Replacement, Back Panel: 步骤 1 中的图像 1,1
    • Remove the ten 7.9 mm screws with the Phillips PH0 screwdriver.

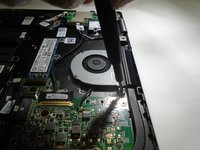
  2. Dell Inspiron 15 7579 Fan Replacement: 步骤 2 中的图像 1,2 Dell Inspiron 15 7579 Fan Replacement: 步骤 2 中的图像 2,2
    • Insert metal spudger into a gap in between the back panel and the back of the screen.

    • Pry off the back panel using the metal spudger as a lever, and remove the back panel by lifting the rest off by hand.

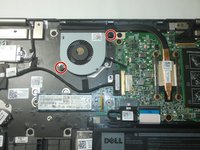
  3. Dell Inspiron 15 7579 Fan Replacement, Fan: 步骤 3 中的图像 1,2 Dell Inspiron 15 7579 Fan Replacement, Fan: 步骤 3 中的图像 2,2
    • Remove the two 7.9 mm screws from the fan with a Phillips #0 screwdriver.

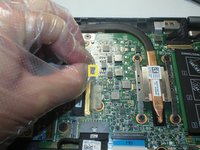
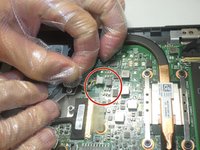
  4. Dell Inspiron 15 7579 Fan Replacement: 步骤 4 中的图像 1,2 Dell Inspiron 15 7579 Fan Replacement: 步骤 4 中的图像 2,2
    • Unplug the wires from the port.

    • Be sure to pull from the plastic connector, not the wires.

  5. Dell Inspiron 15 7579 Fan Replacement: 步骤 5 中的图像 1,1
    • Carefully lift the fan out of the computer.

结论

To reassemble your device, follow these instructions in reverse order.

0条评论

添加评论

浏览统计数据:

过去 24 小时: 0

过去 7 天: 2

过去 30 天: 7

总计 221