你所需要的
-
-
Remove nine screws from the bottom case.
-
Loosen the single captive screw on the base cover.
-
-
-
-
There are 3 slots on the top of the keyboard where you will have to use a thin tool, such as a small flathead screwdriver to push the tabs so the keyboard will pop out.
-
You will have to flip a small tab up where the ribbon connector goes into the insert, so the connector can be released and the keyboard can be removed.
-
-
-
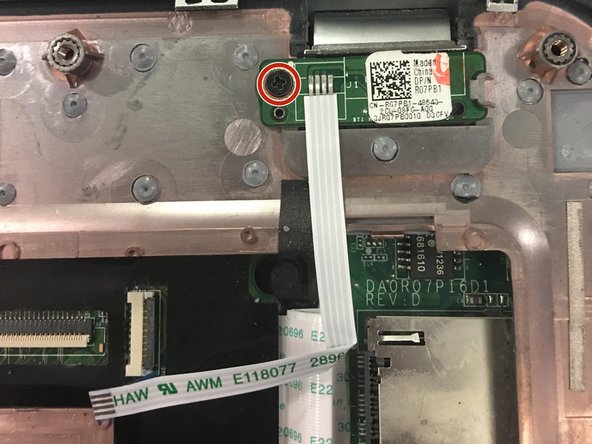
Unscrew the highlighted screw and slide out the power button assembly.
-
Separate the palm rest from the base of the device using the blue separating tool. Before separating the palm rest from the device make sure to release all visible ribbon connectors.
-
Flip the palm rest over and you will notice the power button assembly in the top right corner of the palm rest.
-


To reassemble your device, follow these instructions in reverse order.
To reassemble your device, follow these instructions in reverse order.
团队

UMass Dartmouth, Team S5-G6, Botvin Spring 2017 UMass Dartmouth, Team S5-G6, Botvin Spring 2017 的会员
UMASSD-BOTVIN-S17S5G6
3 名成员
创作了4篇指南