跳转到主内容

Dell Inspiron 13-7352 Hinge Replacement

你所需要的

  1. Dell Inspiron 13-7352 Hinge Replacement, Battery: 步骤 1 中的图像 1,3 Dell Inspiron 13-7352 Hinge Replacement, Battery: 步骤 1 中的图像 2,3 Dell Inspiron 13-7352 Hinge Replacement, Battery: 步骤 1 中的图像 3,3
    • Before you begin, be sure to turn off your laptop and unplug it from the outlet.

    • Use a Phillips screwdriver to remove the ten 7.5mm screws that securing the back panel.

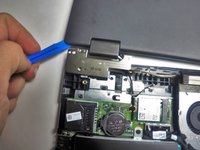
    • Use the plastic opening tool to pry up and loosen the back panel.

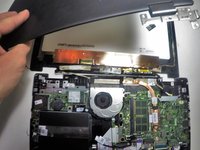
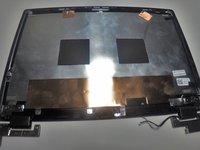
    • Remove the back panel.

  2. Dell Inspiron 13-7352 Hinge Replacement: 步骤 2 中的图像 1,2 Dell Inspiron 13-7352 Hinge Replacement: 步骤 2 中的图像 2,2
    • Use a Phillips screwdriver to remove the two 3 mm screws securing the battery.

    • Unclip the hard drive wire from the battery.

  3. Dell Inspiron 13-7352 Hinge Replacement: 步骤 3 中的图像 1,1
    • Gently remove the battery from the rest of the device.

  4. Dell Inspiron 13-7352 Hinge Replacement, Hinge: 步骤 4 中的图像 1,3 Dell Inspiron 13-7352 Hinge Replacement, Hinge: 步骤 4 中的图像 2,3 Dell Inspiron 13-7352 Hinge Replacement, Hinge: 步骤 4 中的图像 3,3
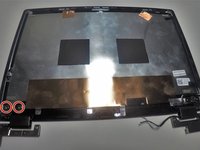
    • Remove the three 8mm screws with the Phillips #0 head connected to each of the hinges.

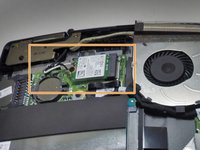
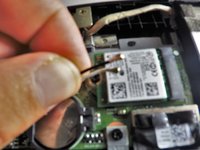
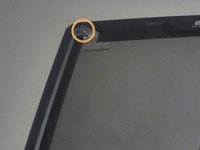
    • Take out the antenna cables from the routing guide on the hinge cover by pulling them from their original position

  5. Dell Inspiron 13-7352 Hinge Replacement: 步骤 5 中的图像 1,1
    • Lay the screen flat on a smooth flat surface to release the hinges.

  6. Dell Inspiron 13-7352 Hinge Replacement: 步骤 6 中的图像 1,3 Dell Inspiron 13-7352 Hinge Replacement: 步骤 6 中的图像 2,3 Dell Inspiron 13-7352 Hinge Replacement: 步骤 6 中的图像 3,3
    • Use the plastic opening tool around the edges of the screen to separate the screen back from the display until the backing is loose enough to pull apart with your hands.

    • The second image should be the result of removing the back of the screen.

  7. Dell Inspiron 13-7352 Hinge Replacement: 步骤 7 中的图像 1,2 Dell Inspiron 13-7352 Hinge Replacement: 步骤 7 中的图像 2,2
    • Locate the hinge or hinges that need to be replaced and remove the two, or four, 3mm screws with the Phillips #0 head.

    • Remove the single, (or both, depending on if you are replacing one or both hinges) 6mm screw(s) from the top of the hinge with the Phillips #0 head.

  8. Dell Inspiron 13-7352 Hinge Replacement: 步骤 8 中的图像 1,1
    • Grasp the hinge from the edge as shown and separate the hinge from the display.

结论

To reassemble your device, follow these instructions in reverse order.

2等其他人完成本指南。

Mikinna Martin

于09/25/15注册

458 声望

创作了2篇指南

团队

0条评论

添加评论

浏览统计数据:

过去 24 小时: 0

过去 7 天: 4

过去 30 天: 15

总计 6,840