跳转到主内容

Dell Axim X30 Screen Replacement

你所需要的

  1. Dell Axim X30 Screen Replacement, Screen: 步骤 1 中的图像 1,3 Dell Axim X30 Screen Replacement, Screen: 步骤 1 中的图像 2,3 Dell Axim X30 Screen Replacement, Screen: 步骤 1 中的图像 3,3
    • Remove the four rubber feet with your fingers.

  2. Dell Axim X30 Screen Replacement: 步骤 2 中的图像 1,2 Dell Axim X30 Screen Replacement: 步骤 2 中的图像 2,2
    • Trigger battery release by inserting a nylon spudger into the battery release tab.

    • Slide tab and pull upwards on the battery to remove. Use the finger slots near the battery.

  3. Dell Axim X30 Screen Replacement: 步骤 3 中的图像 1,1
    • Remove the four 12.7mm screws under rubber feet with a JIS #0 screwdriver.

  4. Dell Axim X30 Screen Replacement: 步骤 4 中的图像 1,1
    • Remove back panel with a plastic opening tool. Follow the edge of the device around the entire perimeter.

    • The back panel should just pop off.

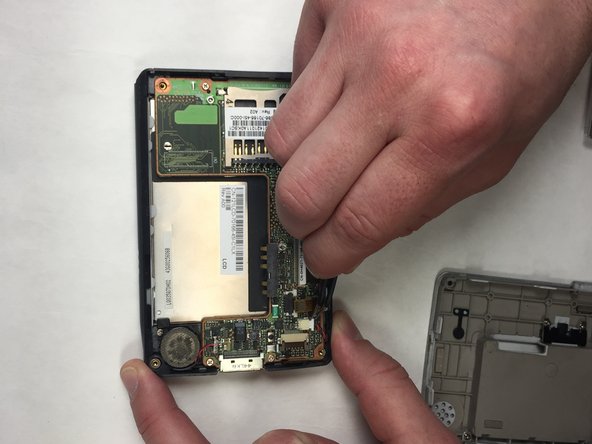
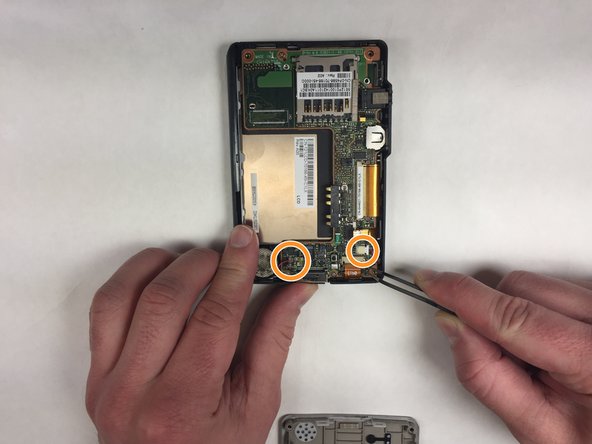
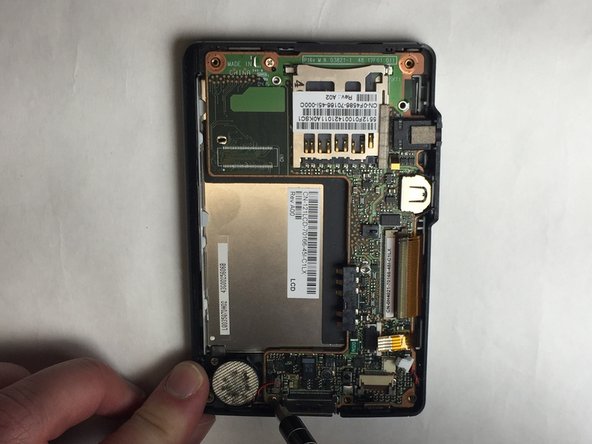
  5. Dell Axim X30 Screen Replacement: 步骤 5 中的图像 1,3 Dell Axim X30 Screen Replacement: 步骤 5 中的图像 2,3 Dell Axim X30 Screen Replacement: 步骤 5 中的图像 3,3
    • Disconnect ribbon cables.

    • You may need to use a little force to disconnect them.

    • Disconnect red and white wired connector for speaker and motherboard battery.

  6. Dell Axim X30 Screen Replacement: 步骤 6 中的图像 1,2 Dell Axim X30 Screen Replacement: 步骤 6 中的图像 2,2
    • Remove three 12.7mm JIS #0 screws.

  7. Dell Axim X30 Screen Replacement: 步骤 7 中的图像 1,1
    • Carefully remove motherboard.

  8. Dell Axim X30 Screen Replacement: 步骤 8 中的图像 1,2 Dell Axim X30 Screen Replacement: 步骤 8 中的图像 2,2
    • Remove the two 9.6 mm screws by the speaker and green battery with a JIS #0 screwdriver.

  9. Dell Axim X30 Screen Replacement: 步骤 9 中的图像 1,2 Dell Axim X30 Screen Replacement: 步骤 9 中的图像 2,2
    • Remove black plastic board.

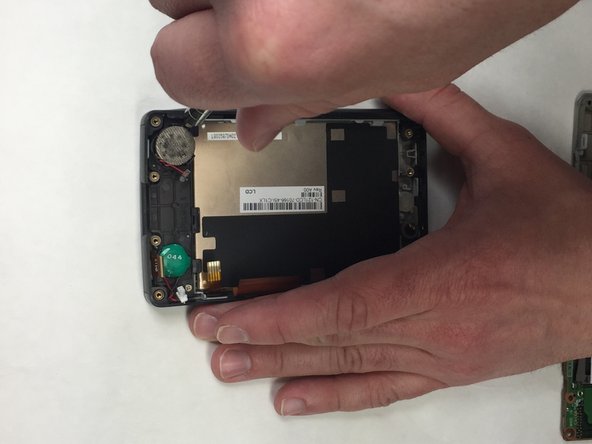
  10. Dell Axim X30 Screen Replacement: 步骤 10 中的图像 1,2 Dell Axim X30 Screen Replacement: 步骤 10 中的图像 2,2
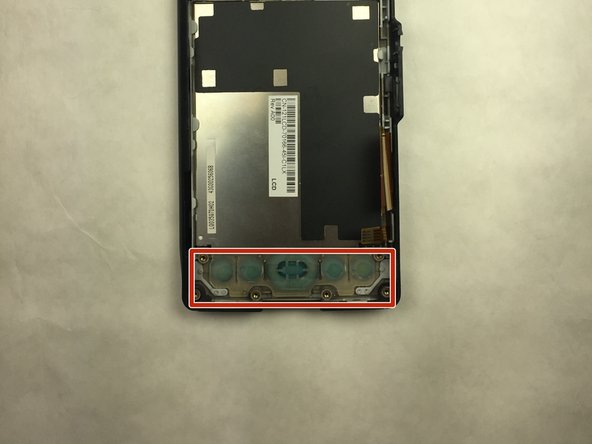
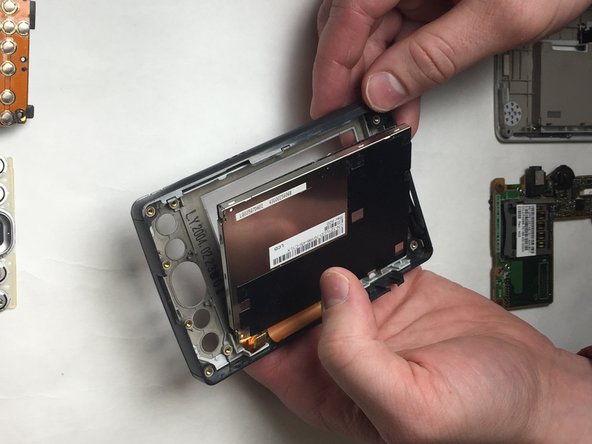
    • Gently apply pressure on the right plastic frame by plastic clip marked on the picture.

    • Apply pressure to the bottom of the screen and press it towards you.

    • Remove screen from plastic case.

结论

To reassemble your device, follow these instructions in reverse order.

Peter Reilly

于03/28/18注册

196 声望

撰写一个指南

团队

IUPUI, Team S2-G5, Harley Spring 2018 IUPUI, Team S2-G5, Harley Spring 2018 的会员

IUPUI-HARLEY-S18S2G5

3 名成员

创作了2篇指南

0条评论

添加评论

浏览统计数据:

过去 24 小时: 1

过去 7 天: 3

过去 30 天: 14

总计 765