跳转到主内容

De'Longhi EC155 Water Pump Replacement

你所需要的

  1. De'Longhi EC155 Water Pump Replacement, Water Reservoir: 步骤 1 中的图像 1,2 De'Longhi EC155 Water Pump Replacement, Water Reservoir: 步骤 1 中的图像 2,2
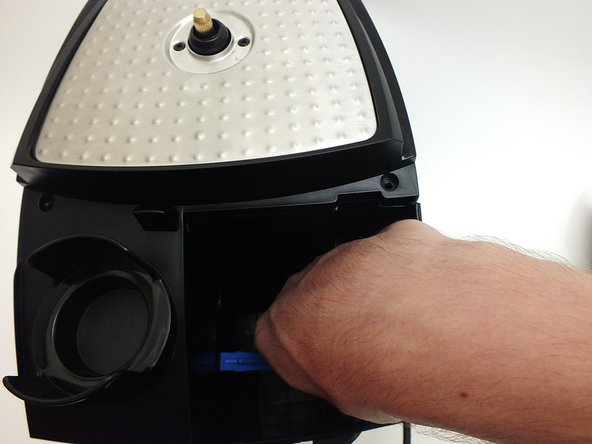
    • Flip open the top panel to reveal water reservoir.

    • Grab the water reservoir by the handle and lift out.

  2. De'Longhi EC155 Water Pump Replacement, Bottom Panel: 步骤 2 中的图像 1,2 De'Longhi EC155 Water Pump Replacement, Bottom Panel: 步骤 2 中的图像 2,2
    • Flip the device on its head.

    • Using the Phillips #2 screwdriver, unscrew the four 12 mm screws found at each corner of the bottom panel.

    • Lift the panel off or flip the device over and let the panel drop out.

  3. De'Longhi EC155 Water Pump Replacement, Top Panel: 步骤 3 中的图像 1,1
    • Before flipping the device, removed the black container and grill.

    • Flip the device on its head, front end facing you.

    • Using the Phillips #2 unscrew the two 52 mm screws found underneath the top portion of the device.

  4. De'Longhi EC155 Water Pump Replacement: 步骤 4 中的图像 1,1
    • Flip the device back to its proper orientation.

    • Using the Phillips #2 screwdriver remove the two 52 mm screws found on the lip next to the reservoir.

  5. De'Longhi EC155 Water Pump Replacement: 步骤 5 中的图像 1,2 De'Longhi EC155 Water Pump Replacement: 步骤 5 中的图像 2,2
    • Insert the two plastic opening tools beneath the top knob.

    • Use the two plastic opening tools as leverage to lift the top knob off.

  6. De'Longhi EC155 Water Pump Replacement: 步骤 6 中的图像 1,1
    • Grasp the lid firmly with both hands.

    • Pull mightily with both hands away from the device.

    • If you hear a slight snapping sound, it is supposed to do that.

  7. De'Longhi EC155 Water Pump Replacement: 步骤 7 中的图像 1,2 De'Longhi EC155 Water Pump Replacement: 步骤 7 中的图像 2,2
    • Use a plastic opening tool to push in the slot on the back panel while lifting.

    • Similarly, reach into where the reservoir used to be and insert a plastic spudger underneath the inside panel.

    • We recommend to not use your fingers for this step because there is a chance they will be pinched.

  8. De'Longhi EC155 Water Pump Replacement: 步骤 8 中的图像 1,2 De'Longhi EC155 Water Pump Replacement: 步骤 8 中的图像 2,2
    • You are now ready to lift the top off.

    • Place one hand near the back, the other at the front, and lift.

    • You may want to lift the front and back individually by pulling one a little off the part before the other. Afterwards, lifting the top off entirely will be easier.

  9. De'Longhi EC155 Water Pump Replacement, Water Valve: 步骤 9 中的图像 1,2 De'Longhi EC155 Water Pump Replacement, Water Valve: 步骤 9 中的图像 2,2
    • Flip the device and remove one end of the tube from the water reservoir hole.

  10. De'Longhi EC155 Water Pump Replacement: 步骤 10 中的图像 1,2 De'Longhi EC155 Water Pump Replacement: 步骤 10 中的图像 2,2
    • Pull the tube through the chamber with the water pump so it comes out of the top end.

    • Twist the valve counterclockwise while pulling gently.

  11. De'Longhi EC155 Water Pump Replacement, Core: 步骤 11 中的图像 1,1
    • Twist the frother clockwise while pulling gently.

  12. De'Longhi EC155 Water Pump Replacement: 步骤 12 中的图像 1,2 De'Longhi EC155 Water Pump Replacement: 步骤 12 中的图像 2,2
    • Remove the four 16mm screws with a T20 Screw head.

  13. De'Longhi EC155 Water Pump Replacement: 步骤 13 中的图像 1,3 De'Longhi EC155 Water Pump Replacement: 步骤 13 中的图像 2,3 De'Longhi EC155 Water Pump Replacement: 步骤 13 中的图像 3,3
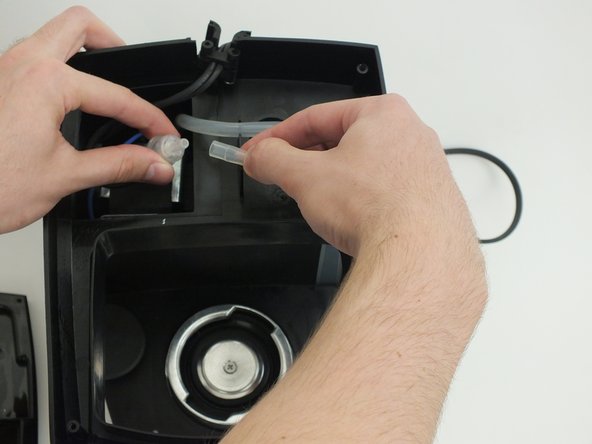
    • Remove each clip from the valve and core using the precision angled tweezers.

  14. De'Longhi EC155 Water Pump Replacement: 步骤 14 中的图像 1,2 De'Longhi EC155 Water Pump Replacement: 步骤 14 中的图像 2,2
    • Pull out each LED with one quick tug.

    • Similarly, remove each set of wires from the setting tuner with one quick tug.

  15. De'Longhi EC155 Water Pump Replacement: 步骤 15 中的图像 1,2 De'Longhi EC155 Water Pump Replacement: 步骤 15 中的图像 2,2
    • Flip the device and remove one end of the tube from the reservoir hole.

    • Completely remove the other tube from both the reservoir hole and filter to the water pump.

  16. De'Longhi EC155 Water Pump Replacement: 步骤 16 中的图像 1,2 De'Longhi EC155 Water Pump Replacement: 步骤 16 中的图像 2,2
    • Pull the tube through the chamber with the water pump so it comes out of the top end.

    • Twist the valve counter-clockwise while pulling gently.

  17. De'Longhi EC155 Water Pump Replacement: 步骤 17 中的图像 1,1
    • Tilt the core towards the front while lifting from the back.

    • If the core is proving difficult to remove, a wire might be caught somewhere, likely near the water pump. We recommend shaking slightly as you lift since the frothing tube is at an odd angle.

    • We also recommend that you remove the valve before removing the core so that there is less obstructing movement. But the core can be removed without removing the valve.

  18. De'Longhi EC155 Water Pump Replacement, Water Pump: 步骤 18 中的图像 1,2 De'Longhi EC155 Water Pump Replacement, Water Pump: 步骤 18 中的图像 2,2
    • Remove both sets of wires from the black box.

    • Remove the filter attached to the bottom of the pump.

  19. De'Longhi EC155 Water Pump Replacement: 步骤 19 中的图像 1,2 De'Longhi EC155 Water Pump Replacement: 步骤 19 中的图像 2,2
    • Pull off the black foam from the bottom.

    • Pull off the black foam from the top.

结论

To reassemble your device, follow these instructions in reverse order.

6等其他人完成本指南。

David Griffith

于10/01/15注册

1,471 声望

创作了9篇指南

团队

Cal Poly, Team 4-2, Maness Fall 2015 Cal Poly, Team 4-2, Maness Fall 2015 的会员

CPSU-MANESS-F15S4G2

4 名成员

创作了25篇指南

4条评论

I was trying to remove the valve. I am not sure what axis to turn it on. Also how do I know if the valve is bad or the pump, or both?

Drake Dorosh - 回复

Just get both parts. I think the valve is only a few dollars. The only moving part is the pump and that is by far the most likely problem.

shadowym -

Are you still taking feedback?

Bill Sargent - 回复

Die Schrauben auf der Bodenplatte sind nicht wie angegeben Kreuzschrauben sondern Safety Tamper Proof Star 6 Point.

https://www.amazon.de/gp/product/B07DFKT...

Bernhard Landauer - 回复

添加评论

浏览统计数据:

过去 24 小时: 1

过去 7 天: 10

过去 30 天: 71

总计 14,461