跳转到主内容

你所需要的

这个拆解是不是维修指南。 要维修你的的Datatronics Discovery 2400CM,请使用我们的维修手册

  1. Datatronics Discovery 2400CM Teardown, remove front cover: 步骤 1 中的图像 1,3 Datatronics Discovery 2400CM Teardown, remove front cover: 步骤 1 中的图像 2,3 Datatronics Discovery 2400CM Teardown, remove front cover: 步骤 1 中的图像 3,3
    • The front is attached to the body with 2 latches.

    • Using the spudger, open a latch on one side.

    • Open the latch on the other side next to detach the front.

  2. Datatronics Discovery 2400CM Teardown, remove back cover: 步骤 2 中的图像 1,2 Datatronics Discovery 2400CM Teardown, remove back cover: 步骤 2 中的图像 2,2
    • The back cover is attached to the body the same way as the front.

    • Open both latches to detach to back cover.

  3. Datatronics Discovery 2400CM Teardown, remove board from housing: 步骤 3 中的图像 1,3 Datatronics Discovery 2400CM Teardown, remove board from housing: 步骤 3 中的图像 2,3 Datatronics Discovery 2400CM Teardown, remove board from housing: 步骤 3 中的图像 3,3
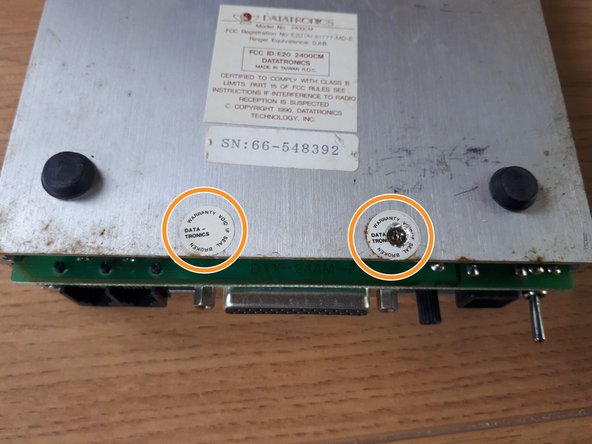
    • The board is attached to the body with 2 screws. The screws are hidden under "warranty voidance" stickers.

    • Remove the stickers so you can unscrew the screws.

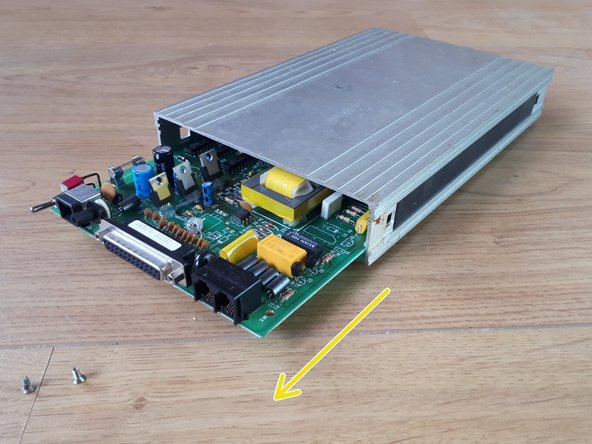
    • Slide the board from the body.

  4. Datatronics Discovery 2400CM Teardown, overview: 步骤 4 中的图像 1,3 Datatronics Discovery 2400CM Teardown, overview: 步骤 4 中的图像 2,3 Datatronics Discovery 2400CM Teardown, overview: 步骤 4 中的图像 3,3
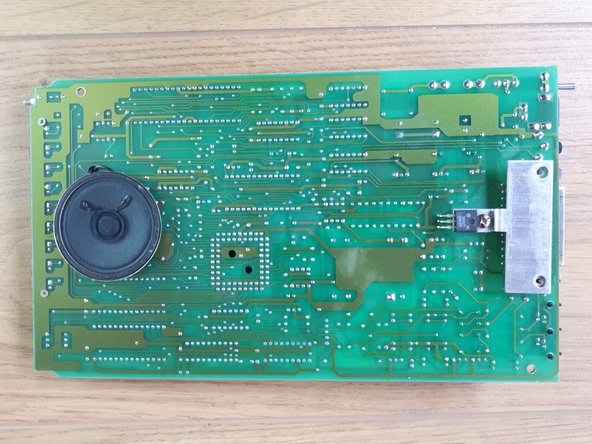
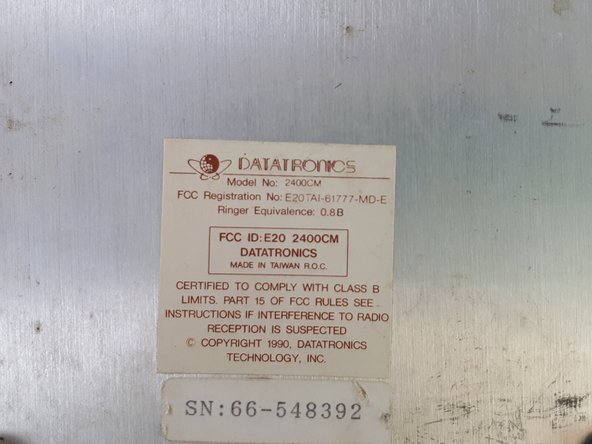
    • Overview of the front and back of the board, as well as a detailed view of the label.

knipwim

于09/01/18注册

8,527 声望

创作了30篇指南

0条评论

添加评论

浏览统计数据:

过去 24 小时: 1

过去 7 天: 7

过去 30 天: 13

总计 908