跳转到主内容

DBPOWER RD-810 Power Supply Circuit Replacement

你所需要的

  1. DBPOWER RD-810 Power Supply Circuit Replacement, Top Cover: 步骤 1 中的图像 1,2 DBPOWER RD-810 Power Supply Circuit Replacement, Top Cover: 步骤 1 中的图像 2,2
    • Make sure the projector is unplugged before starting

    • Place the projector upside down to access the screws on the bottom.

    • Remove the five 7mm long screws using a #3 Phillips screwdriver at least 2 inches long.

  2. DBPOWER RD-810 Power Supply Circuit Replacement: 步骤 2 中的图像 1,1
    • Flip the projector over and then remove the cover by lifting it up.

  3. DBPOWER RD-810 Power Supply Circuit Replacement, Motherboard and LED Bulb: 步骤 3 中的图像 1,3 DBPOWER RD-810 Power Supply Circuit Replacement, Motherboard and LED Bulb: 步骤 3 中的图像 2,3 DBPOWER RD-810 Power Supply Circuit Replacement, Motherboard and LED Bulb: 步骤 3 中的图像 3,3
    • Remove the three 6mm PH2 phillips head screws.

    • Disconnect the ribbon cable by flipping up the latch on the connector and then pull the ribbon out.

  4. DBPOWER RD-810 Power Supply Circuit Replacement: 步骤 4 中的图像 1,3 DBPOWER RD-810 Power Supply Circuit Replacement: 步骤 4 中的图像 2,3 DBPOWER RD-810 Power Supply Circuit Replacement: 步骤 4 中的图像 3,3
    • Disconnect the three wire connectors. Grasp both sides of the connector and pull apart.

    • Keep the connector parallel to the mother board to avoid breaking the solder connection.

    • Lift the motherboard up and place it out of the way.

  5. DBPOWER RD-810 Power Supply Circuit Replacement: 步骤 5 中的图像 1,3 DBPOWER RD-810 Power Supply Circuit Replacement: 步骤 5 中的图像 2,3 DBPOWER RD-810 Power Supply Circuit Replacement: 步骤 5 中的图像 3,3
    • Remove the five 7mm PH2 phillips head screws on the black plate and lift the plate out.

    • Lift the aluminum heat sink up to remove it from the projector.

    • The motherboard is already removed in this step.

  6. DBPOWER RD-810 Power Supply Circuit Replacement, Power Supply Circuit: 步骤 6 中的图像 1,3 DBPOWER RD-810 Power Supply Circuit Replacement, Power Supply Circuit: 步骤 6 中的图像 2,3 DBPOWER RD-810 Power Supply Circuit Replacement, Power Supply Circuit: 步骤 6 中的图像 3,3
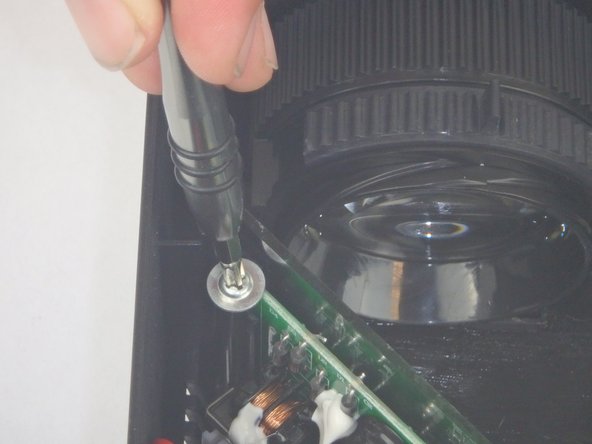
    • Remove the two 9mm PH2 phillips head screws.

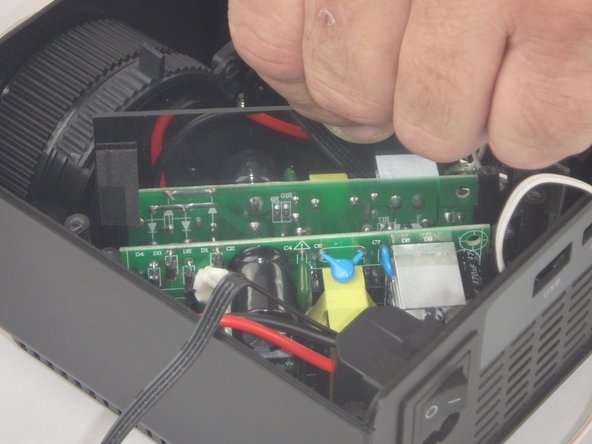
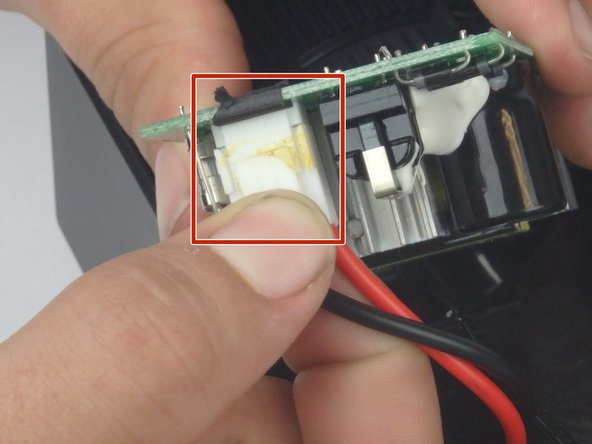
    • Lift the mirror behind the power supply circuit out to gain access to the circuit board.

  7. DBPOWER RD-810 Power Supply Circuit Replacement: 步骤 7 中的图像 1,2 DBPOWER RD-810 Power Supply Circuit Replacement: 步骤 7 中的图像 2,2
    • Lift the power supply circuit board out of the projector.

    • Disconnect the cable connector by pulling the two sides of the connector apart.

    • Keep the connector parallel to the circuit board to avoid breaking the solder connection.

结论

To reassemble your device, follow these instructions in reverse order.

另外一个人完成了本指南。

John Russell

于02/14/18注册

914 声望

创作了9篇指南

团队

USF Tampa, Team S5-G3, Eyestone Spring 2018 USF Tampa, Team S5-G3, Eyestone Spring 2018 的会员

USFT-EYESTONE-S18S5G3

3 名成员

创作了9篇指南

0条评论

添加评论

浏览统计数据:

过去 24 小时: 0

过去 7 天: 0

过去 30 天: 1

总计 380