跳转到主内容

D-Link DCS-825L Back Casing Replacement

你所需要的

  1. D-Link DCS-825L Back Casing Replacement, Accent Ring: 步骤 1 中的图像 1,1
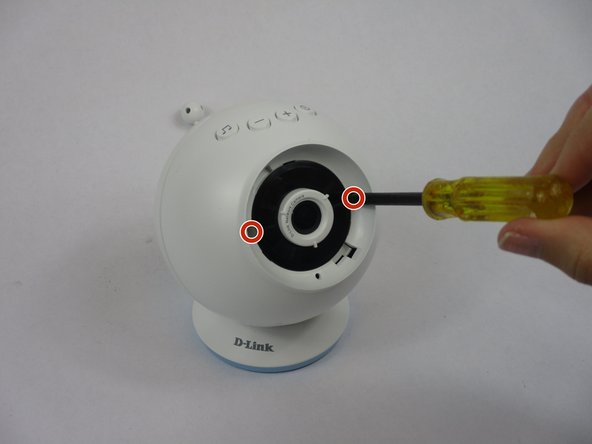
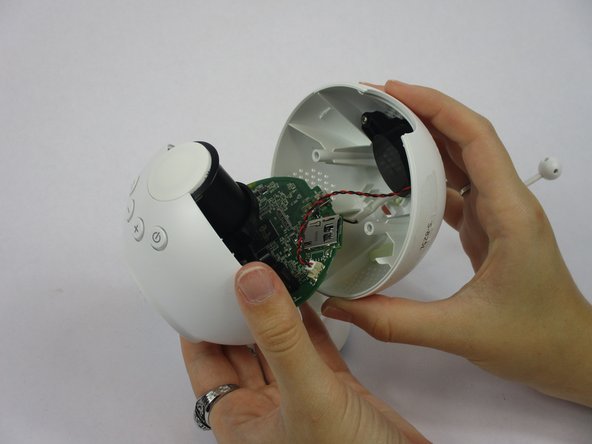
    • Grasp the side of the accent ring. There is a notch that your thumb will be able to grab ahold of.

  2. D-Link DCS-825L Back Casing Replacement: 步骤 2 中的图像 1,1
    • Twist the accent ring until it pops off. You may need to use both hands if the accent ring is stuck.

  3. D-Link DCS-825L Back Casing Replacement: 步骤 3 中的图像 1,1
    • Replace your accent ring with whichever color you choose.

  4. D-Link DCS-825L Back Casing Replacement, Back Casing: 步骤 4 中的图像 1,2 D-Link DCS-825L Back Casing Replacement, Back Casing: 步骤 4 中的图像 2,2
    • Remove one Phillips #2 screw from each side of the camera lens.

  5. D-Link DCS-825L Back Casing Replacement: 步骤 5 中的图像 1,3 D-Link DCS-825L Back Casing Replacement: 步骤 5 中的图像 2,3 D-Link DCS-825L Back Casing Replacement: 步骤 5 中的图像 3,3
    • Pull the Wi-Fi Baby Camera open.

    • It should be easily done after the screws are removed.

  6. D-Link DCS-825L Back Casing Replacement: 步骤 6 中的图像 1,2 D-Link DCS-825L Back Casing Replacement: 步骤 6 中的图像 2,2
    • Take your tweezers and gently pull the white tip out from its plug that is connected to a red and black twisted wire.

  7. D-Link DCS-825L Back Casing Replacement: 步骤 7 中的图像 1,3 D-Link DCS-825L Back Casing Replacement: 步骤 7 中的图像 2,3 D-Link DCS-825L Back Casing Replacement: 步骤 7 中的图像 3,3
    • Take your tweezers and gently pull the white tip that is on the end of the white wire (the antenna) out from its plug in.

结论

To reassemble your device, follow these instructions in reverse order.

April Ulrich

于10/09/18注册

205 声望

创作了2篇指南

团队

USF Tampa, Team S1-G5, Leahy Fall 2018 USF Tampa, Team S1-G5, Leahy Fall 2018 的会员

USFT-LEAHY-F18S1G5

4 名成员

创作了4篇指南

0条评论

添加评论

浏览统计数据:

过去 24 小时: 0

过去 7 天: 1

过去 30 天: 3

总计 383