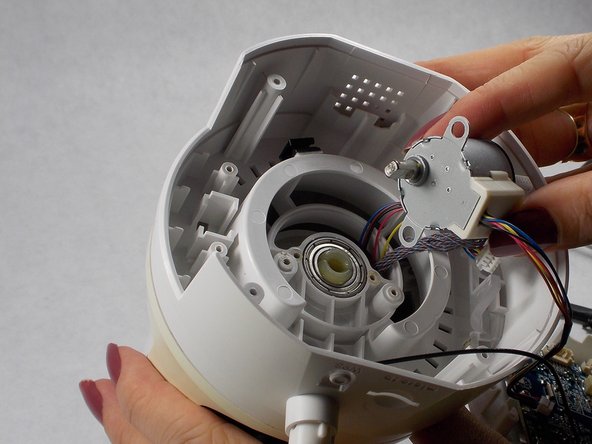
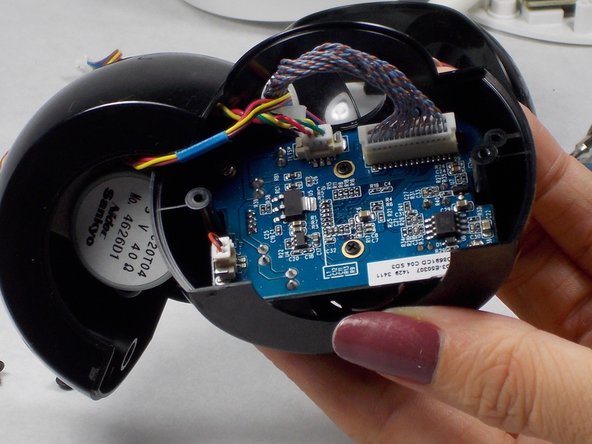
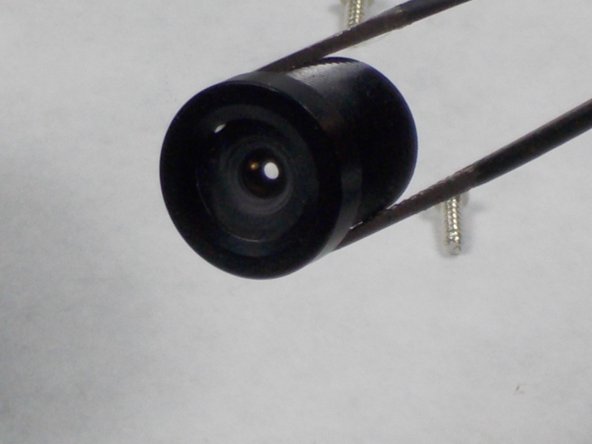
跳转到主内容

D-Link DCS-5222L Lens Replacement

你所需要的

  1. D-Link DCS-5222L Lens Replacement, Lens: 步骤 1 中的图像 1,3 D-Link DCS-5222L Lens Replacement, Lens: 步骤 1 中的图像 2,3 D-Link DCS-5222L Lens Replacement, Lens: 步骤 1 中的图像 3,3
    在这个步骤中使用的工具:
    Tweezers
    $4.99
    购买
    • Remove the four rubber feet with tweezers to access the screws.

    • Remove all four 7mm screws by using a #1 Phillips screwdriver.

    • Then, with your hands, pull off the lower part of the camera body.

  2. D-Link DCS-5222L Lens Replacement: 步骤 2 中的图像 1,3 D-Link DCS-5222L Lens Replacement: 步骤 2 中的图像 2,3 D-Link DCS-5222L Lens Replacement: 步骤 2 中的图像 3,3
    • On the base motherboard, there are five connecting cables. Disconnect all of them from the motherboard gently using safety tweezers.

    • Do not cut or damage the cables.

    • Disconnecting the antenna cable from motherboard is not necessary.

  3. D-Link DCS-5222L Lens Replacement: 步骤 3 中的图像 1,3 D-Link DCS-5222L Lens Replacement: 步骤 3 中的图像 2,3 D-Link DCS-5222L Lens Replacement: 步骤 3 中的图像 3,3
    • Remove the two 7mm screws holding the motor using a #1 Phillips screwdriver.

    • Pull off the motor and lift away the midbody of the camera using your hands.

  4. D-Link DCS-5222L Lens Replacement: 步骤 4 中的图像 1,2 D-Link DCS-5222L Lens Replacement: 步骤 4 中的图像 2,2
    • Separate the black camera shroud from the upper body by prying loose the tabs with a plastic opening tool or spudger.

    • Use your hands to wiggle the shroud free.

  5. D-Link DCS-5222L Lens Replacement: 步骤 5 中的图像 1,3 D-Link DCS-5222L Lens Replacement: 步骤 5 中的图像 2,3 D-Link DCS-5222L Lens Replacement: 步骤 5 中的图像 3,3
    • Use a #1 Phillips screwdriver to unscrew the four 5mm screws on both sides of the black camera housing to separate it from white body.

    • Unscrew the two 7mm #1 Phillips screws on both sides of the camera housing to open it.

  6. D-Link DCS-5222L Lens Replacement: 步骤 6 中的图像 1,3 D-Link DCS-5222L Lens Replacement: 步骤 6 中的图像 2,3 D-Link DCS-5222L Lens Replacement: 步骤 6 中的图像 3,3
    • Gently disconnect the three cables from the small motherboard using safety tweezers.

    • Use a #0 Phillips screwdriver to remove the two black 2mm screws and a #1 Phillips screwdriver to remove the 2 silver 6mm screws.

    • Separate the board from the black housing.

  7. D-Link DCS-5222L Lens Replacement: 步骤 7 中的图像 1,3 D-Link DCS-5222L Lens Replacement: 步骤 7 中的图像 2,3 D-Link DCS-5222L Lens Replacement: 步骤 7 中的图像 3,3
    • Using your fingers, remove the focus adjustment ring.

    • Twist the lens to unscrew it from the camera module.

    • Replace the broken lens with new one and reassemble all parts of the camera respectively.

结论

To reassemble your device, follow these instructions in reverse order.

另外一个人完成了本指南。

Atefeh Rahmani

于10/27/18注册

172 声望

撰写一个指南

团队

UMass Dartmouth, Team S2-G5, Peak Fall 2018 UMass Dartmouth, Team S2-G5, Peak Fall 2018 的会员

UMASSD-PEAK-F18S2G5

3 名成员

创作了10篇指南

0条评论

添加评论

浏览统计数据:

过去 24 小时: 1

过去 7 天: 11

过去 30 天: 23

总计 943