跳转到主内容

Casio WK-220 Black Keys Replacement

你所需要的

  1. Casio WK-220 Black Keys Replacement, White Keys: 步骤 1 中的图像 1,2 Casio WK-220 Black Keys Replacement, White Keys: 步骤 1 中的图像 2,2
    • Place device face-down

    • Remove 23 16mm screws with Phillips #2 screwdriver

  2. Casio WK-220 Black Keys Replacement: 步骤 2 中的图像 1,2 Casio WK-220 Black Keys Replacement: 步骤 2 中的图像 2,2
    • Pry up long back panels with plastic opening tool

    • Remove panels

  3. Casio WK-220 Black Keys Replacement: 步骤 3 中的图像 1,1
    • Turn device around so keys are face-up

  4. Casio WK-220 Black Keys Replacement: 步骤 4 中的图像 1,2 Casio WK-220 Black Keys Replacement: 步骤 4 中的图像 2,2
    • Pull back panel away from keyboard and out of the way

  5. Casio WK-220 Black Keys Replacement: 步骤 5 中的图像 1,3 Casio WK-220 Black Keys Replacement: 步骤 5 中的图像 2,3 Casio WK-220 Black Keys Replacement: 步骤 5 中的图像 3,3
    • Remove speaker(s) if necessary to access desired key section(s)

    • Use Phillips #2 screwdriver to remove two 16 mm screws (circled in red)

    • Pop wires out of plastic holders so speaker can be moved out of the way

    • Move speaker out of the way

    • See speaker replacement guide for more detail on these steps

  6. Casio WK-220 Black Keys Replacement: 步骤 6 中的图像 1,3 Casio WK-220 Black Keys Replacement: 步骤 6 中的图像 2,3 Casio WK-220 Black Keys Replacement: 步骤 6 中的图像 3,3
    • Remove 4 18 mm screws (circled in red) from desired key section using Philips #1 screwdriver

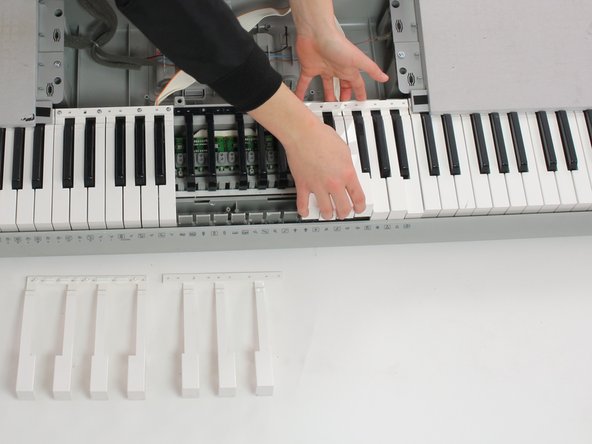
    • Gently push white keys away from screws and pull up to remove from keyboard. Repeat this with the black keys

    • Reassemble with new/cleaned keys

  7. Casio WK-220 Black Keys Replacement, Black Keys: 步骤 7 中的图像 1,2 Casio WK-220 Black Keys Replacement, Black Keys: 步骤 7 中的图像 2,2
    • Remove second white section covering desired black section

    • Remove screws using Phillips #1 screwdriver

    • Push keys away from screws and pull up

  8. Casio WK-220 Black Keys Replacement: 步骤 8 中的图像 1,3 Casio WK-220 Black Keys Replacement: 步骤 8 中的图像 2,3 Casio WK-220 Black Keys Replacement: 步骤 8 中的图像 3,3
    • Use plastic opening tool to pry up black key section

    • Remove black key section

    • Reassemble with new/clean black key section

结论

To reassemble your device, follow these instructions in reverse order.

Alexa

于01/24/17注册

687 声望

创作了6篇指南

团队

Cal Poly, Team 10-2, Banghart Winter 2017 Cal Poly, Team 10-2, Banghart Winter 2017 的会员

CPSU-BANGHART-W17S10G2

4 名成员

创作了6篇指南

0条评论

添加评论

浏览统计数据:

过去 24 小时: 0

过去 7 天: 3

过去 30 天: 9

总计 760