跳转到主内容

Caribou Coffee CC-EKV8SS7 Power Cord Replacement

你所需要的

  1. Caribou Coffee CC-EKV8SS7 Power Cord Replacement, Caribou Coffee CC-EKV8SS7  Base Disassembly: 步骤 1 中的图像 1,2 Caribou Coffee CC-EKV8SS7 Power Cord Replacement, Caribou Coffee CC-EKV8SS7  Base Disassembly: 步骤 1 中的图像 2,2
    • Unplug the unit before disassembling to avoid electrocution.

    • Remove the five (10mm) Y screws from the bottom of the base. Three are in a triangle around the center and two are on the corners of the flat edge.

  2. Caribou Coffee CC-EKV8SS7 Power Cord Replacement: 步骤 2 中的图像 1,3 Caribou Coffee CC-EKV8SS7 Power Cord Replacement: 步骤 2 中的图像 2,3 Caribou Coffee CC-EKV8SS7 Power Cord Replacement: 步骤 2 中的图像 3,3
    • Now you will need to 'unlock' the top and bottom of the base from each other. On the flat edge, there is a rectangle inset with one side cut out. Insert a metal spudger about 1/2'' in to the opening to toggle open an interior tab.

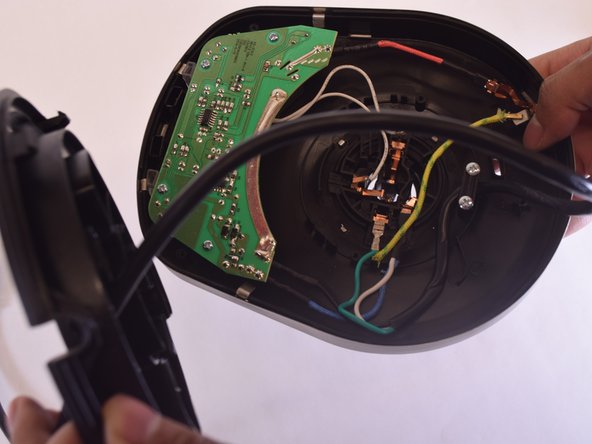
    • With the metal tool still inserted, use an opening tool between the black and silver sides to pry the base open.

  3. Caribou Coffee CC-EKV8SS7 Power Cord Replacement: 步骤 3 中的图像 1,2 Caribou Coffee CC-EKV8SS7 Power Cord Replacement: 步骤 3 中的图像 2,2
    • Once you have the halves opened at least 1/4'', remove the metal key and rotate the base a quarter turn in any direction.

    • Continue using the spudger to pry open the base at each quarter turn until the sides separate easily.

    • The black bottom will catch on the power cord plug, to prevent total dismantlement.

  4. Caribou Coffee CC-EKV8SS7 Power Cord Replacement, Power Cord: 步骤 4 中的图像 1,3 Caribou Coffee CC-EKV8SS7 Power Cord Replacement, Power Cord: 步骤 4 中的图像 2,3 Caribou Coffee CC-EKV8SS7 Power Cord Replacement, Power Cord: 步骤 4 中的图像 3,3
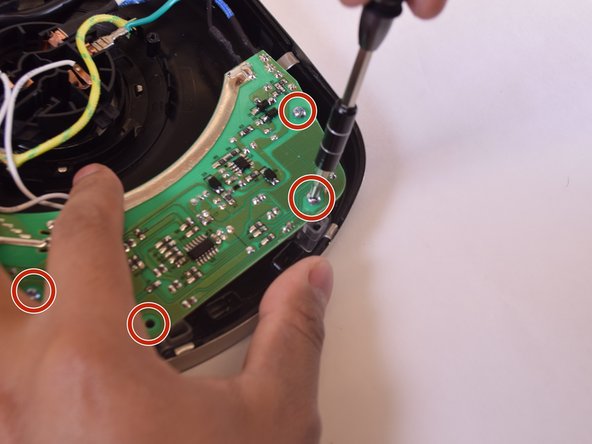
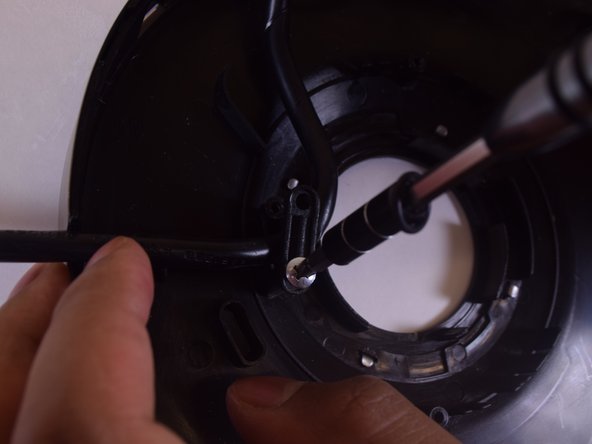
    • Begin detaching the circuit board by removing four rounded top (12mm) Philips head screws (one from each corner).

    • When removing thin metal components, hand protection is recommended to avoid small but painful slices to your fingers.

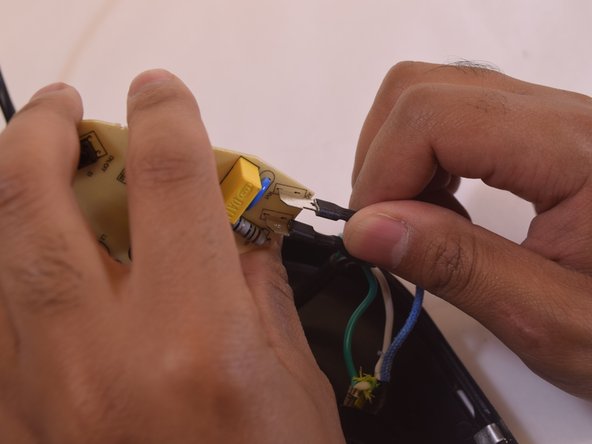
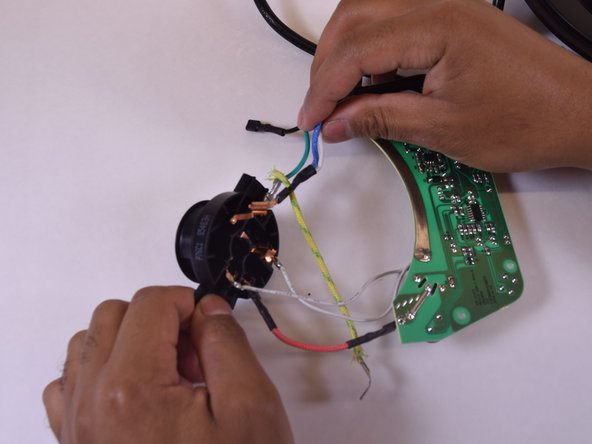
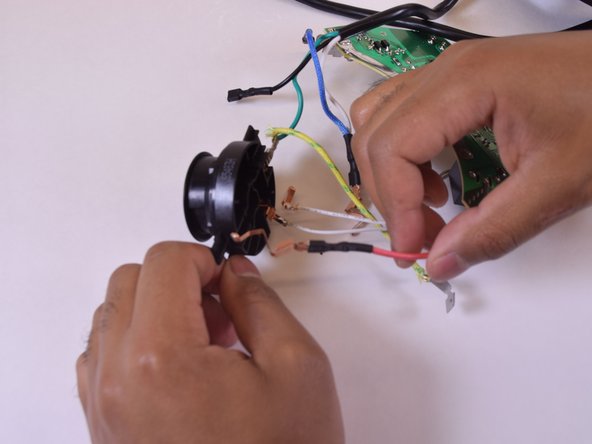
    • Find the blue and black wires that connect to the circuit board from the power cord. Using moderate force, pull them away from their silver tabs on the circuit board.

  5. Caribou Coffee CC-EKV8SS7 Power Cord Replacement: 步骤 5 中的图像 1,1
    • Detach the power cord's grounding wire (yellow with green stripes) from the edge. First unbend the silver strip, then pull upwards with a small jiggle.

  6. Caribou Coffee CC-EKV8SS7 Power Cord Replacement: 步骤 6 中的图像 1,3 Caribou Coffee CC-EKV8SS7 Power Cord Replacement: 步骤 6 中的图像 2,3 Caribou Coffee CC-EKV8SS7 Power Cord Replacement: 步骤 6 中的图像 3,3
    • Remove the two rounded top (12mm) Phillips Head screws from the 1'' bar holding down the power cord.

  7. Caribou Coffee CC-EKV8SS7 Power Cord Replacement: 步骤 7 中的图像 1,3 Caribou Coffee CC-EKV8SS7 Power Cord Replacement: 步骤 7 中的图像 2,3 Caribou Coffee CC-EKV8SS7 Power Cord Replacement: 步骤 7 中的图像 3,3
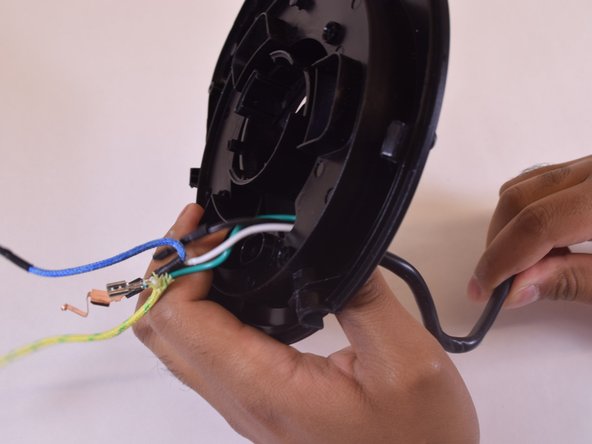
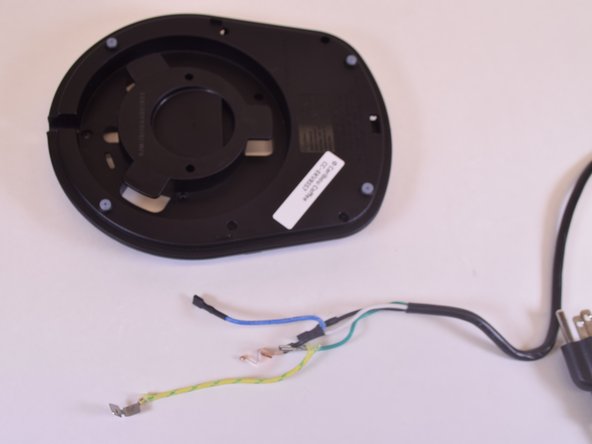
    • Disconnect five metal connectors attached to the center circle - three wires from the circuit board, and two wires from the power cord.

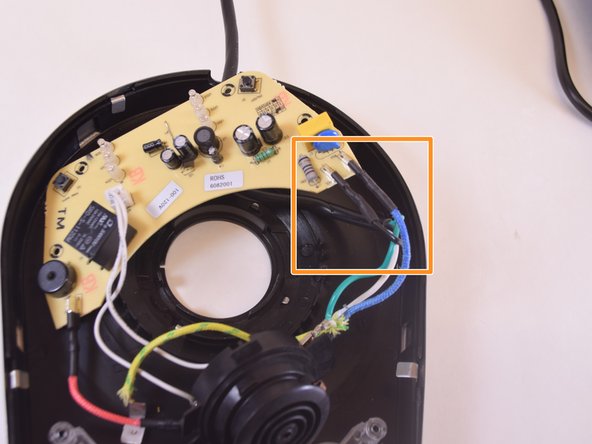
    • From the circuit board, there are two white wires and one red wire to be disconnected.

    • From the power cord, there is a green wire, as well as two wires (one blue, one white) connected with black electrical tape near the metal.

  8. Caribou Coffee CC-EKV8SS7 Power Cord Replacement: 步骤 8 中的图像 1,3 Caribou Coffee CC-EKV8SS7 Power Cord Replacement: 步骤 8 中的图像 2,3 Caribou Coffee CC-EKV8SS7 Power Cord Replacement: 步骤 8 中的图像 3,3
    • At this point, as long as all the color-coded wires at the end are straightened, the power cord can be pulled through the black base bottom.

    • Discard the old power cord and insert the new power cord by following these instructions in reverse.

结论

To reassemble your device, follow these instructions in reverse order.

2等其他人完成本指南。

Risa Hess

于06/25/17注册

167 声望

撰写一个指南

团队

UW Tacoma, Team S1-G3, Liner Summer 2017 UW Tacoma, Team S1-G3, Liner Summer 2017 的会员

UWT-LINER-SU17S1G3

4 名成员

创作了4篇指南

0条评论

添加评论

浏览统计数据:

过去 24 小时: 0

过去 7 天: 1

过去 30 天: 7

总计 310