跳转到主内容

Canon Speedlite 430EX II Diffusing Disc Panel Replacement

你所需要的

  1. Canon Speedlite 430EX II Diffusing Disc Panel Replacement, Diffusing Disc Panel: 步骤 1 中的图像 1,2 Canon Speedlite 430EX II Diffusing Disc Panel Replacement, Diffusing Disc Panel: 步骤 1 中的图像 2,2
    • At first of all: Remove Batteries!

    • Be Careful: Electronic parts need a few minutes to discharge. If you touch them you may get an electric shock or damage your device.

  2. Canon Speedlite 430EX II Diffusing Disc Panel Replacement, Remove covers: 步骤 2 中的图像 1,2 Canon Speedlite 430EX II Diffusing Disc Panel Replacement, Remove covers: 步骤 2 中的图像 2,2
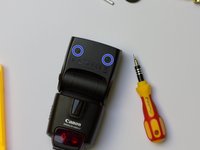
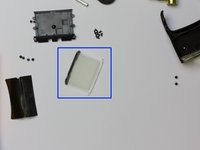
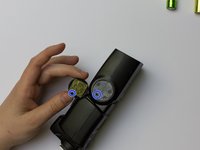
    • Open the silicone covers slowly. The're fixed with double faced adhesive tape.

    • In the worst case: You damage the covers. It's very hard to damage the flash at this step

  3. Canon Speedlite 430EX II Diffusing Disc Panel Replacement, Open the flash head: 步骤 3 中的图像 1,3 Canon Speedlite 430EX II Diffusing Disc Panel Replacement, Open the flash head: 步骤 3 中的图像 2,3 Canon Speedlite 430EX II Diffusing Disc Panel Replacement, Open the flash head: 步骤 3 中的图像 3,3
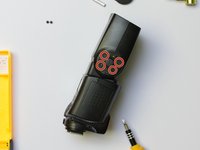
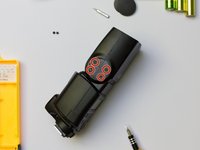
    • Remove the screws on the bottom of the flash-head

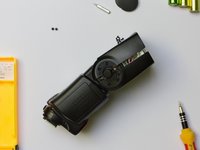
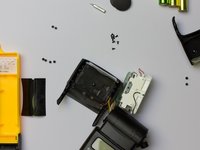
    • Remove all 8 screws which holds the outer case on the joint.

    • Separate the screws from each other - that makes the re-assembling easier

  4. Canon Speedlite 430EX II Diffusing Disc Panel Replacement, Remove the flash Unit: 步骤 4 中的图像 1,2 Canon Speedlite 430EX II Diffusing Disc Panel Replacement, Remove the flash Unit: 步骤 4 中的图像 2,2
    • Open the head slowly - attention with the cables

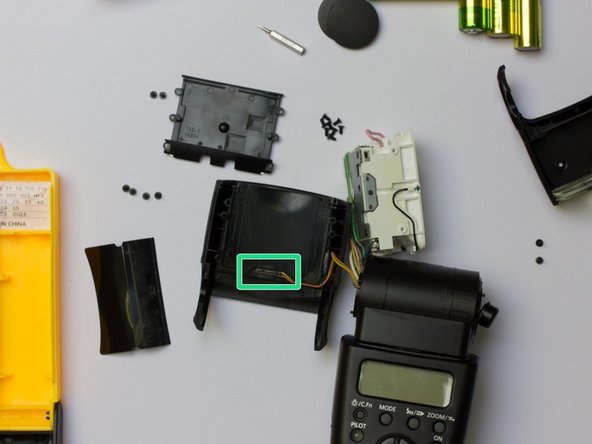
    • Remove the flash unit

    • Remember: Electric parts!

    • Remember the order of the diffusing discs

  5. Canon Speedlite 430EX II Diffusing Disc Panel Replacement, Replace the mechanism: 步骤 5 中的图像 1,3 Canon Speedlite 430EX II Diffusing Disc Panel Replacement, Replace the mechanism: 步骤 5 中的图像 2,3 Canon Speedlite 430EX II Diffusing Disc Panel Replacement, Replace the mechanism: 步骤 5 中的图像 3,3
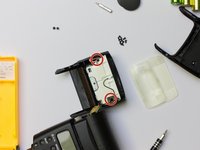
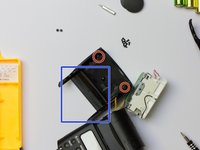
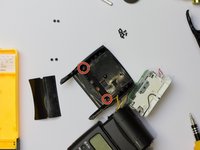
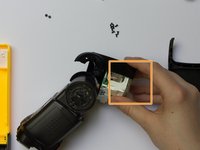
    • Remove the 4 screws of the holding plate.

    • You need to remove the plastic film - don't worry you can stick it back when you're ready and it holds fine.

    • The thing in the square is the contact which detects if the panel is in or out.

  6. Canon Speedlite 430EX II Diffusing Disc Panel Replacement: 步骤 6 中的图像 1,3 Canon Speedlite 430EX II Diffusing Disc Panel Replacement: 步骤 6 中的图像 2,3 Canon Speedlite 430EX II Diffusing Disc Panel Replacement: 步骤 6 中的图像 3,3
    • Now you're ready to install the panel

    • Hold it in the position (just to check that everything is correct and fit in the head.

    • Now you need to re-assemble backwards. Careful with the cables

  7. Canon Speedlite 430EX II Diffusing Disc Panel Replacement, Reassemble: 步骤 7 中的图像 1,3 Canon Speedlite 430EX II Diffusing Disc Panel Replacement, Reassemble: 步骤 7 中的图像 2,3 Canon Speedlite 430EX II Diffusing Disc Panel Replacement, Reassemble: 步骤 7 中的图像 3,3
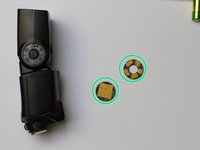
    • Hold the diffusing discs while you plug the top and bottom together

    • stick a little piece of double faced adhesive tape to the silicone covers

    • Both covers have those tiny silicone pins and the fitting hole for alignment

结论

I hope this guide is helpful enough.

If you have any questions feel free to contact me.

12等其他人完成本指南。

spark

于04/02/14注册

491 声望

撰写一个指南

5条评论

Great guide! Thank you so much for helping me fix my flash! I didn't need additional adhesive tape as it went back with the remainders of the original one and seems to hold up well. I would highly recommend using magnetic screwdriver as I had issues with those small screws going back into the tiny places they belong to. Otherwise, it was an easy fix!

PS watch out for that push button. It has a tendency to jump out :)

ritafoigel - 回复

Thanks a lot. I can only agree with the comment on magnetic screwdrivers.

Also, notice that there are two types of screws: flat head and countersunk head. They also differ slightly in length.

I had a lot of trouble with wires getting stuck but a few tries and some care help.

Further, when assembling the push button and the rotating mechanisms I needed to pay attention to two tiny taps that fit into one of the two clamshells.

Finally, the tiny switch sensing the diffusing disc panel needed to be seated in two holes. I managed to assemble the flash only to discover that the sensing didn't work.

I hope these comments will help others.

chrmikkelsen - 回复

Oh my gosh..I can't believe I actually did this..when I got the cover off, the 'push' button and spring popped off. I thought I just ought to quit while I was barely ahead. I did take it all apart- the instructions were fabulous-the screws I put in ordered piles...apparently they're not the same. I replaced the diffuser panel..it only really goes one way..put all screws back- replaced the batteries, and wa la- it worked. THANK YOU a million times over. Pam

Pam Dose - 回复

Absolutely outstanding guide! The only way it could have been easier is if you were doing it for me. As others have said, watch for the push button popping out. It took me a minute to find the spring... Thanks!

L Burk - 回复

Thank you. Easy to do with this instruction.

peterroehl - 回复

添加评论

浏览统计数据:

过去 24 小时: 1

过去 7 天: 2

过去 30 天: 14

总计 7,785