跳转到主内容

本指南有最近更改,您可查看未经巡查的最新版本

Canon Powershot SD550 Outer Case Replacement

你所需要的

  1. Canon Powershot SD550 Outer Case Replacement, Outer Case: 步骤 1 中的图像 1,1
    • In preparation for disassembly, the battery and SD Card need to be removed from the camera. You can access both the battery and the SD card through the door on the bottom of the camera.

  2. Canon Powershot SD550 Outer Case Replacement: 步骤 2 中的图像 1,1
    • While being careful to remember the original location of each screw, remove the three 0.15 inch screws on the underside of the camera.

    • Each of the screws is slightly different, so it is important that you note the original location of each screw.

  3. Canon Powershot SD550 Outer Case Replacement: 步骤 3 中的图像 1,3 Canon Powershot SD550 Outer Case Replacement: 步骤 3 中的图像 2,3 Canon Powershot SD550 Outer Case Replacement: 步骤 3 中的图像 3,3
    • Find the next two screws on the right side of the camera. One of them is hidden under the USB port cover. The upper screw is .125 inches long, while the lower screw measures .085 inches.

    • Remove both screws, then carefully lift the side panel off.

    • Underneath the side panel, there is a .07 inch screw. Remove it.

  4. Canon Powershot SD550 Outer Case Replacement: 步骤 4 中的图像 1,3 Canon Powershot SD550 Outer Case Replacement: 步骤 4 中的图像 2,3 Canon Powershot SD550 Outer Case Replacement: 步骤 4 中的图像 3,3
    • On the left side of the camera, there are two .085 inch screws. Remove these, then lift the plate from the camera.

  5. Canon Powershot SD550 Outer Case Replacement: 步骤 5 中的图像 1,3 Canon Powershot SD550 Outer Case Replacement: 步骤 5 中的图像 2,3 Canon Powershot SD550 Outer Case Replacement: 步骤 5 中的图像 3,3
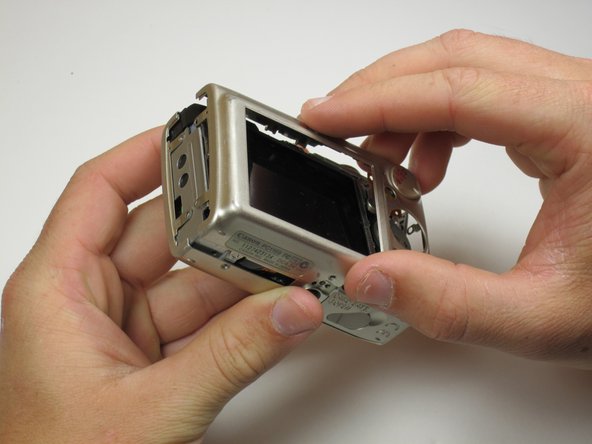
    • Now the camera body is loose. gently lift the rear of the case to remove it from the camera.

  6. Canon Powershot SD550 Outer Case Replacement: 步骤 6 中的图像 1,3 Canon Powershot SD550 Outer Case Replacement: 步骤 6 中的图像 2,3 Canon Powershot SD550 Outer Case Replacement: 步骤 6 中的图像 3,3
    • Next, remove the front of the camera body. Be sure to keep track of the rubber ring.

    • You have now successfully removed the outer case.

结论

To reassemble your device, follow these instructions in reverse order.

Matthew Theiss

于04/14/11注册

176 声望

创作了3篇指南

团队

Cal Poly, Team 18-23, Garner Spring 2011 Cal Poly, Team 18-23, Garner Spring 2011 的会员

CPSU-GARNER-S11S18G23

5 名成员

创作了7篇指南

0条评论

添加评论

浏览统计数据:

过去 24 小时: 0

过去 7 天: 6

过去 30 天: 16

总计 1,576