跳转到主内容

Canon PowerShot A540 Front Cover Replacement

你所需要的

  1. Canon PowerShot A540 Front Cover Replacement, Back Cover: 步骤 1 中的图像 1,2 Canon PowerShot A540 Front Cover Replacement, Back Cover: 步骤 1 中的图像 2,2
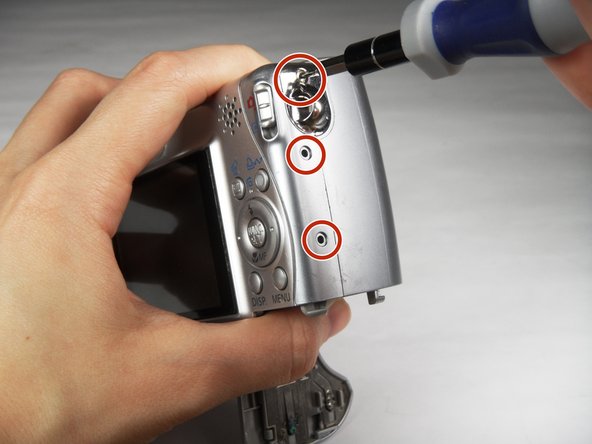
    • Turn off the camera.

    • Turn the camera upside-down and press the tab to release the battery cover. Remove the batteries.

  2. Canon PowerShot A540 Front Cover Replacement: 步骤 2 中的图像 1,1
    • Turn the camera upside down to view the "Card/Batt. Open" Cover.

    • Use a Phillips head #000 screwdriver to remove the three (3) 4.0 mm screws.

  3. Canon PowerShot A540 Front Cover Replacement: 步骤 3 中的图像 1,1
    • Open "Card/Batt. Open" Cover.

    • Remove the one (1) 5.0 mm screw with the Phillips head #000 screwdriver.

  4. Canon PowerShot A540 Front Cover Replacement: 步骤 4 中的图像 1,1
    • Turn the camera to the right side of the LCD screen.

    • Remove the three (3) 4.0 mm screws with the Phillips head #000 screwdriver.

  5. Canon PowerShot A540 Front Cover Replacement: 步骤 5 中的图像 1,3 Canon PowerShot A540 Front Cover Replacement: 步骤 5 中的图像 2,3 Canon PowerShot A540 Front Cover Replacement: 步骤 5 中的图像 3,3
    • Gently remove the back cover.

    • Start at the bottom at the corner of the "Card/Batt. Open" Cover.

    • Then move onto the other edges and the top.

    • It may be tight at the top!

  6. Canon PowerShot A540 Front Cover Replacement, Front Cover: 步骤 6 中的图像 1,2 Canon PowerShot A540 Front Cover Replacement, Front Cover: 步骤 6 中的图像 2,2
    • Turn the camera to view the front.

    • Remove the lens guard.

    • Press the lens guard's button as you turn the guard counterclockwise.

  7. Canon PowerShot A540 Front Cover Replacement: 步骤 7 中的图像 1,1
    • Turn the camera to the side left of the LCD screen.

    • Remove the one (1) 4.0 mm screw with the Phillips head #000 screwdriver.

  8. Canon PowerShot A540 Front Cover Replacement: 步骤 8 中的图像 1,1
    • Remove the front cover gently.

    • When removing the front cover, a thin, black rubber washer may fall off the lens. If it does, make sure to put it back on the lens before reassembly.

结论

To reassemble your device, follow these instructions in reverse order.

2等其他人完成本指南。

Carley Fuller

于03/23/15注册

434 声望

创作了3篇指南

团队

Baylor, Team 7-12, Williams Spring 2015 Baylor, Team 7-12, Williams Spring 2015 的会员

BU-WILLIAMS-S15S7G12

3 名成员

创作了20篇指南

0条评论

添加评论

浏览统计数据:

过去 24 小时: 0

过去 7 天: 7

过去 30 天: 26

总计 1,450