跳转到主内容

当前版本的文档还未经巡查,您可以查看最新的已查核版本

你所需要的

  1. 这个步骤还没有翻译 帮忙翻译一下

    : 步骤 1 中的图像 1,1
    • You may wish to remove the ink cartridges if you are planning a radical disassembly, though this is not necessary for the purposes of this guide. Follow the instructions in the User Manual, and place them in a polythene bag, both to prevent them drying out and to avoid ink stains on your work surface or clothes.

    • Switch off the printer if it's on, by pressing the power button and waiting for the power light to stop flashing. Now unplug the power cable and USB lead (if connected).

    • Lift the scanner lid as far as it will go. Squeeze the finger in the centre of each hinge in order to detach it.

  2. 这个步骤还没有翻译 帮忙翻译一下

    : 步骤 2 中的图像 1,1
    • Using a jimmy (or similar tool), release the clips around the edge of the control panel cover, then lift off the cover.

  3. 这个步骤还没有翻译 帮忙翻译一下

    : 步骤 3 中的图像 1,1
    • Remove 2 cross head screws from each side of the back of the printer.

  4. 这个步骤还没有翻译 帮忙翻译一下

    : 步骤 4 中的图像 1,3 : 步骤 4 中的图像 2,3 : 步骤 4 中的图像 3,3
    • Remove 2 cross head screws from the front of the printer on the right hand side.

    • Standing the printer on its left hand side, unclip the right side panel, first along the top edge and then at the back. It should now come away completely.

  5. 这个步骤还没有翻译 帮忙翻译一下

    : 步骤 5 中的图像 1,3 : 步骤 5 中的图像 2,3 : 步骤 5 中的图像 3,3
    • Unclip the rear of the left side panel.

    • Unclip the front of the left side panel.

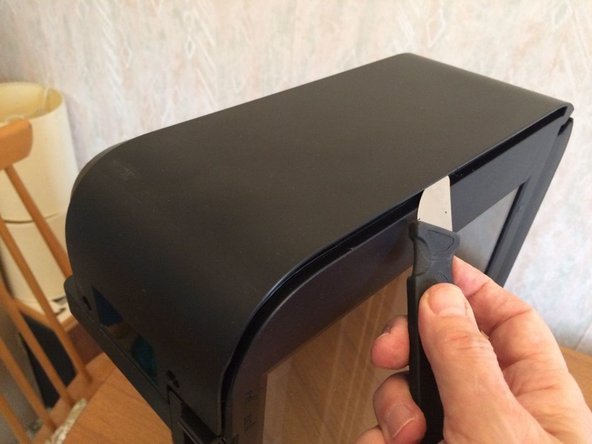
    • The side panel is still retained by a hidden clip beneath a rectangular hole near the edge of the control panel. Release it by pressing down on it with a flat screwdriver blade. The left panel should now come away.

  6. 这个步骤还没有翻译 帮忙翻译一下

    : 步骤 6 中的图像 1,3 : 步骤 6 中的图像 2,3 : 步骤 6 中的图像 3,3
    • Remove a screw from the front left hand corner of the control panel.

    • Remove a screw from the middle of the left hand side of the control panel.

    • Remove a screw from the rear of the control panel.

  7. 这个步骤还没有翻译 帮忙翻译一下

    : 步骤 7 中的图像 1,1
    • Lift off the control panel, taking care not to strain the ribbon cable, still attached.

    • Disconnect the ribbon cable.

  8. 这个步骤还没有翻译 帮忙翻译一下

    : 步骤 8 中的图像 1,2 : 步骤 8 中的图像 2,2
    • Disconnect the WiFi module ribbon from the main logic board,

    • Remove the screw holding the WiFi module bracket in place and remove the bracket and module together.

    • Note that this screw is different from all the others.

  9. 这个步骤还没有翻译 帮忙翻译一下

    : 步骤 9 中的图像 1,1
    • Disconnect a wide ribbon cable from the top of the logic board.

    • Disconnect a narrow folded ribbon from the bottom left hand corner.

    • (The connector with 2 red wires on the left hand side of the logic board does not need to be disconnected.)

  10. 这个步骤还没有翻译 帮忙翻译一下

    : 步骤 10 中的图像 1,2 : 步骤 10 中的图像 2,2
    • Remove the screw at the top left of the glass pane

    • Remove the screw at the bottom left of the glass pane

    • Then gently lift the 2 tabs of the screws you just removed, and slide the whole glass pane by about 1/4inch (5 mm) to the left

    • (Note: Avoid any dust inside the scanner unit.)

    • You can stop here if you're not interested in the printer part, or put back the glass pane and go on.

  11. 这个步骤还没有翻译 帮忙翻译一下

    : 步骤 11 中的图像 1,2 : 步骤 11 中的图像 2,2
    • Remove a screw from the well that housed the WiFi module.

    • Remove the screw from the front left of the device.

  12. 这个步骤还没有翻译 帮忙翻译一下

    : 步骤 12 中的图像 1,3 : 步骤 12 中的图像 2,3 : 步骤 12 中的图像 3,3
    • Remove a screw from the front right hand side.

    • Release a catch on the rear left hand side of the device (as seen from the rear) and lift the scanner unit off.

    • You will now be able to see the print mechanism much more easily and proceed with any further disassembly that might be needed.

终点

33等其他人完成本指南。

Philip Le Riche

于02/18/14注册

30,111 声望

创作了47篇指南

团队

Restart Project Restart Project 的会员

Local Repair Groups

19 名成员

创作了536篇指南

13条评论

Very good description. I need to empty my ink collection tank/tray. Once I have removed the scanner assembly as you describe, will I then gain access to theis container? Thanks.

John Stuart - 回复

See link to YouTube video below. You need long tweezers and be careful when replacing the pads as they can drop into the mechanism easily .. which is why I found this tutorial on how to dismantle the printer!

https://m.youtube.com/watch?v=TLN5ALnt73...

Peter King -

Hi. Where inside the printer to look in order to clear the error 5b02_ Thank you!

Horia Morariu - 回复

Hi, how can i clean my ink tank to clear the 5B02 error code? Thank you

francina erasmus -

Habe schön zerlegt, werde sicher zusammenbauen, wollte aber noch wissen warum das Papier im rechten Drittelbereich zerrissen wird.

Muß noch versuchen den Papiereinzug zu putzen bzw. den Fehler zu beheben.

Joksi

joksi - 回复

添加评论

浏览统计数据:

过去 24 小时: 6

过去 7 天: 85

过去 30 天: 514

总计 33,696