跳转到主内容

Canon FS30 LCD Screen Replacement

你所需要的

  1. Canon FS30 LCD Screen Replacement, LCD Screen: 步骤 1 中的图像 1,2 Canon FS30 LCD Screen Replacement, LCD Screen: 步骤 1 中的图像 2,2
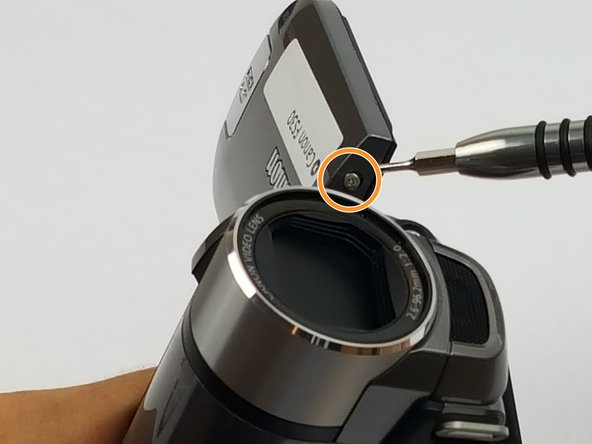
    • Locate battery compartment cover. Turn the device over and locate the battery compartment cover.

    • Place a finger or thumb on the textured section of the battery compartment cover and push forward until you hear a click. Then lift the battery compartment cover.

  2. Canon FS30 LCD Screen Replacement: 步骤 2 中的图像 1,2 Canon FS30 LCD Screen Replacement: 步骤 2 中的图像 2,2
    • Locate the grey latch and move it aside. The battery is spring loaded and will pop up.

    • Remove the battery.

  3. Canon FS30 LCD Screen Replacement: 步骤 3 中的图像 1,2 Canon FS30 LCD Screen Replacement: 步骤 3 中的图像 2,2
    • Using the Phillips #000, remove the two screws on the LCD panel.

    • Using the Phillips #000, remove two more screws near the LCD panel swivel point.

  4. Canon FS30 LCD Screen Replacement: 步骤 4 中的图像 1,2 Canon FS30 LCD Screen Replacement: 步骤 4 中的图像 2,2
    • Use the plastic opening tool to remove the plastic cover from the LCD panel.

  5. Canon FS30 LCD Screen Replacement: 步骤 5 中的图像 1,2 Canon FS30 LCD Screen Replacement: 步骤 5 中的图像 2,2
    • Locate and remove two screws on the logic board.

    • Use the plastic opening tool to open the ZIF (zero insertion force) connector. The LCD ribbon should pop up.

  6. Canon FS30 LCD Screen Replacement: 步骤 6 中的图像 1,2 Canon FS30 LCD Screen Replacement: 步骤 6 中的图像 2,2
    • Locate the LCD screen underneath the logic board and slide it out.

结论

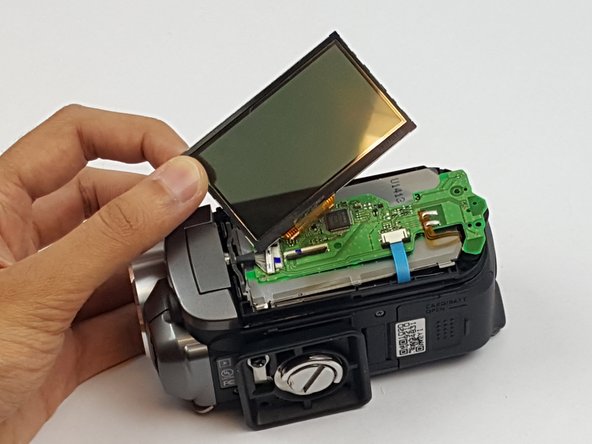
To reassemble your device, follow these instructions in reverse order.

另外一个人完成了本指南。

Emanuel Keller

于02/28/17注册

419 声望

创作了4篇指南

团队

USF Tampa, Team S1-G4, Nance Spring 2017 USF Tampa, Team S1-G4, Nance Spring 2017 的会员

USFT-NANCE-S17S1G4

4 名成员

创作了10篇指南

0条评论

添加评论

浏览统计数据:

过去 24 小时: 0

过去 7 天: 0

过去 30 天: 14

总计 321