当前版本的文档还未经巡查,您可以查看最新的已查核版本。
你所需要的
-
-
这个步骤还没有翻译 帮忙翻译一下
-
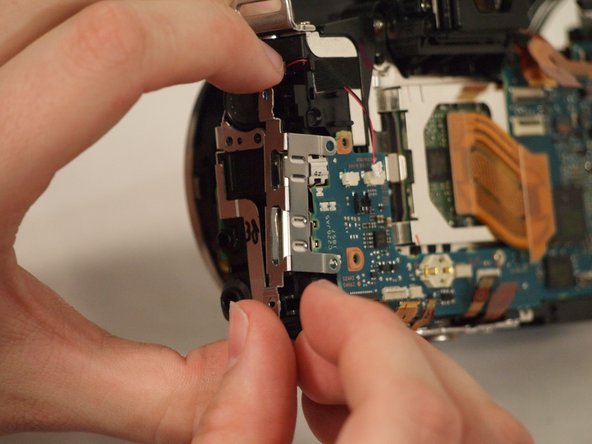
Remove the five ribbon connectors along the bottom of the assembly using either needle nose tweezers or a plastic opening tool to flip the small flaps to the "up" position.
-
Use a nylon spudger to pull each ribbon connector out of its connection using the hole in the center of the ribbon.
-
-
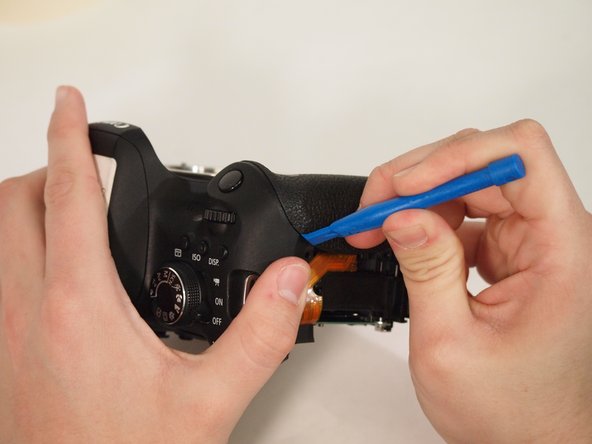
这个步骤还没有翻译 帮忙翻译一下
-
Remove the yellow and red connections on the front near the black cylinder (capacitor).
-
The yellow connector will just pop out if pried from the bottom using a plastic opening tool.
-
The red connector will pull out of the casing with either a plastic opening tool or a thin set of tweezers.
-


7等其他人完成本指南。
团队

University of Memphis, Team S2-G1, Kim Spring 2018 University of Memphis, Team S2-G1, Kim Spring 2018 的会员
UM-KIM-S18S2G1
3 名成员
创作了11篇指南
2条评论
Good tutorial! Two things I noticed on my teardown, on step 6 the white grounding wire has two black tabs on either side you can lift with a guitar pick, much better than pulling on the wire casing; on step 12 the picture is misleading as you pull the plug out towards the middle of the body. Those are very minor things, this was an extremely helpful tutorial! Not for the faint of heart aha