简介
In this guide, I describe how I replaced rechargeable batteries in my Braun Trimmer. The original batteries started losing their capacity after the first year of using the trimmer. So I decided to include a 3D-printed battery case in the trimmer to ease the process of battery replacement in the future. Plus, this approach doesn't require any soldering that could potentially harm the new batteries.
你所需要的
-
-
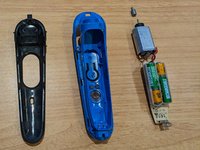
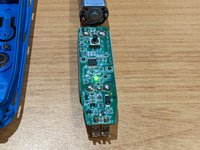
First you need to disassemble the trimmer.
-
To access the four screws you would need first to open the frontal cover. Use opening picks, starting from the bottom of the trimmer
-
For detailed disassembly refer to another article on iFixit
-
-
-
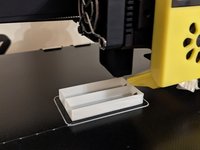
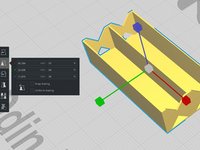
Print a holder for your new batteries on a 3D printer
-
I used a modified 3D model from ThingVerse
-
The original model is too big for the trimmer case. I modified the scale like following: X 97%, Y 84%; Z 95%
-
I stopped the printing at 60% of completion to keep the holder low enough to fit the trimmer case
-
-
-
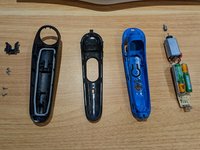
Remove the original dead batteries
-
I didn't have a soldering iron, so I used a heated knife to slowly detach the batteries from the connectors. It worked okay
-
-
-
-
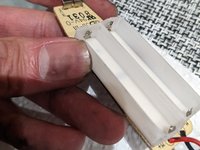
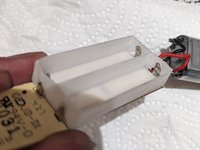
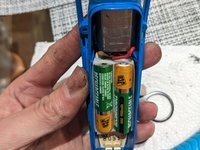
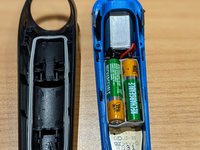
Place the 3D-printed battery case on the board so the connectors would go inside the case as you see on the pictures
-
-
-
Place the new batteries into the case. Pay attention to polarities
-
Before full assembly, you can test if the new batteries are charging
-


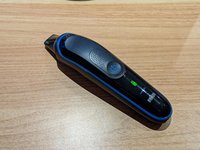


My old batteries barely lasted one minute of shaving, and never held any charge. I didn't test the full working time of the new batteries, but they allowed me to use the trimmer at least for 10 minutes.
Thanks to adding the battery holder next battery replacement would be way easier and faster.
8等其他人完成本指南。
