跳转到主内容

Blu Studio 5.5 S Screen Replacement

你所需要的

  1. Blu Studio 5.5 S Screen Replacement, Back Casing: 步骤 1 中的图像 1,1
    • In order to remove the back case, start by flipping the phone to the back side and look at it from the top.

  2. Blu Studio 5.5 S Screen Replacement, Applying Pressure: 步骤 2 中的图像 1,3 Blu Studio 5.5 S Screen Replacement, Applying Pressure: 步骤 2 中的图像 2,3 Blu Studio 5.5 S Screen Replacement, Applying Pressure: 步骤 2 中的图像 3,3
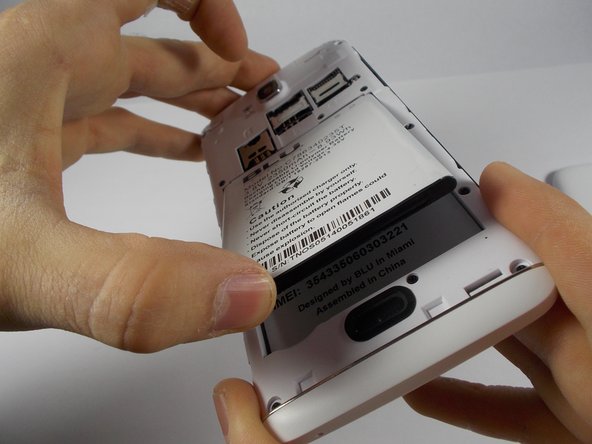
    • Place your finger in the small notch on the left side of the charging port (facing from the back).

    • Once your finger is in the notch, pull the back case towards yourself to remove it.

  3. Blu Studio 5.5 S Screen Replacement, Battery: 步骤 3 中的图像 1,3 Blu Studio 5.5 S Screen Replacement, Battery: 步骤 3 中的图像 2,3 Blu Studio 5.5 S Screen Replacement, Battery: 步骤 3 中的图像 3,3
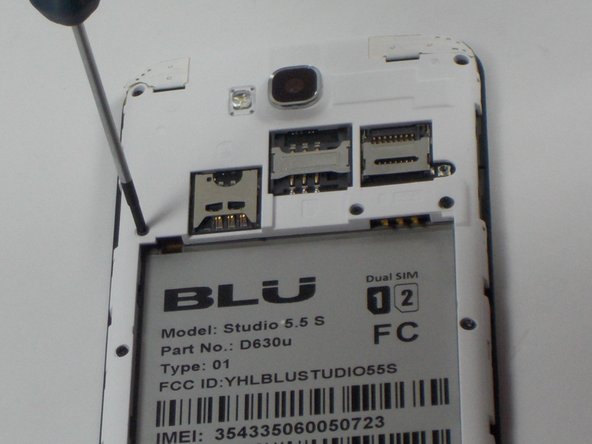
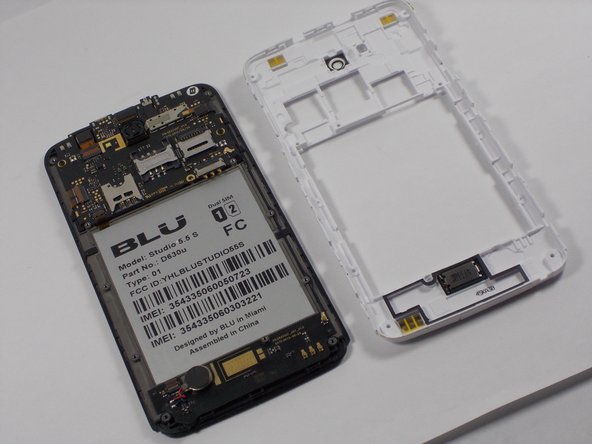
    • Once the back case is removed, locate the battery. It is the large brick embedded in the phone. It has BLU Products, a caution statement, and a barcode on it.

    • Insert your finger into the notch near the lower left of the battery, apply pressure and lift up.

  4. Blu Studio 5.5 S Screen Replacement, Midframe: 步骤 4 中的图像 1,3 Blu Studio 5.5 S Screen Replacement, Midframe: 步骤 4 中的图像 2,3 Blu Studio 5.5 S Screen Replacement, Midframe: 步骤 4 中的图像 3,3
    • The speaker is located behind the inner back case. Using a Phillips #0 screwdriver, unscrew the 10, 7mm screws.

    • Using the Phillips #00 screwdriver, unscrew the two, 10mm screws at the bottom.

  5. Blu Studio 5.5 S Screen Replacement, Aesthetic Bottom Case: 步骤 5 中的图像 1,1
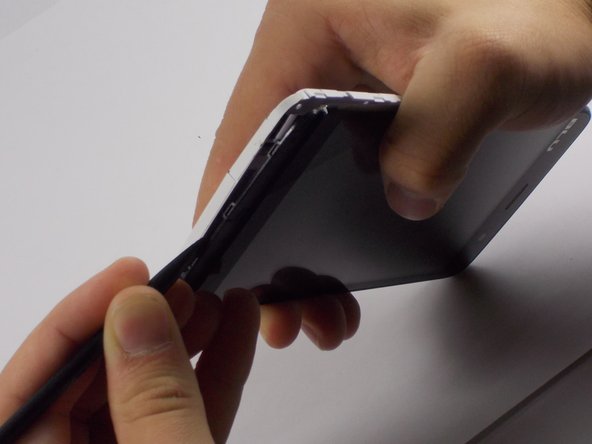
    • Apply pressure and pop off the bottom aesthetic case, being careful not to break it.

  6. Blu Studio 5.5 S Screen Replacement: 步骤 6 中的图像 1,3 Blu Studio 5.5 S Screen Replacement: 步骤 6 中的图像 2,3 Blu Studio 5.5 S Screen Replacement: 步骤 6 中的图像 3,3
    • Use the Spudger to pop the inner back casing off. Do this by lightly raising the side of the battery housing, then sliding the Spudger around the case.

    • Pick up the inner back case and flip it over.

  7. Blu Studio 5.5 S Screen Replacement, Motherboard: 步骤 7 中的图像 1,3 Blu Studio 5.5 S Screen Replacement, Motherboard: 步骤 7 中的图像 2,3 Blu Studio 5.5 S Screen Replacement, Motherboard: 步骤 7 中的图像 3,3
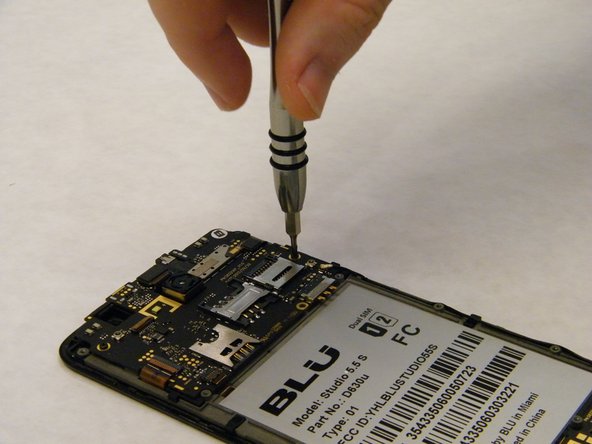
    • Remove the three 7 mm screws using the Phillips #00 Screwdiver.

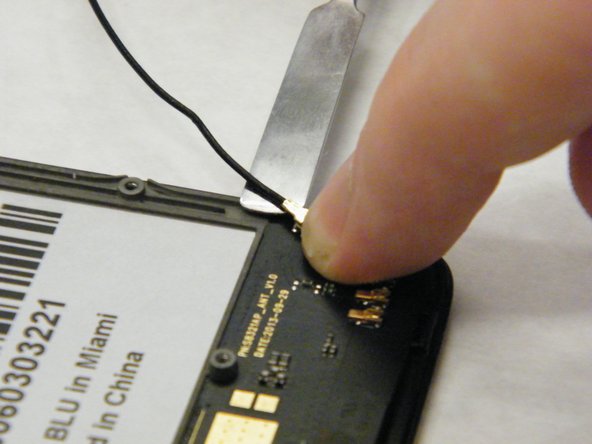
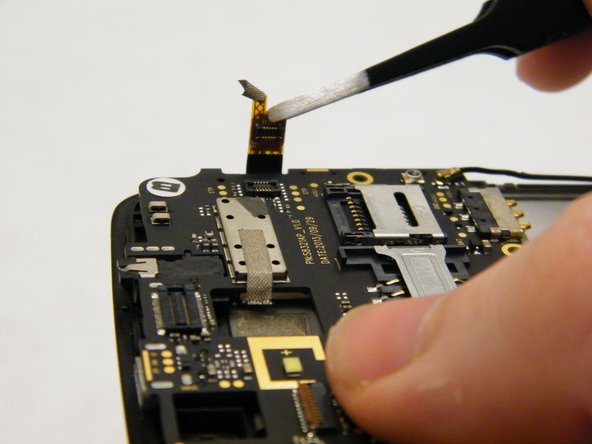
    • Disconnect motherboard plug connector near bottom right of battery using fingers to pull off the cap plug.

  8. Blu Studio 5.5 S Screen Replacement: 步骤 8 中的图像 1,3 Blu Studio 5.5 S Screen Replacement: 步骤 8 中的图像 2,3 Blu Studio 5.5 S Screen Replacement: 步骤 8 中的图像 3,3
    • Use the nylon spudger to lift the release tabs by carefully grabbing the tabs from the sides and lifting up.

    • Release the four ribbon wires from the motherboard.

  9. Blu Studio 5.5 S Screen Replacement: 步骤 9 中的图像 1,2 Blu Studio 5.5 S Screen Replacement: 步骤 9 中的图像 2,2
    • Use the tweezers to grip the bottom of the motherboard and lift up.

  10. Blu Studio 5.5 S Screen Replacement, Screen: 步骤 10 中的图像 1,2 Blu Studio 5.5 S Screen Replacement, Screen: 步骤 10 中的图像 2,2
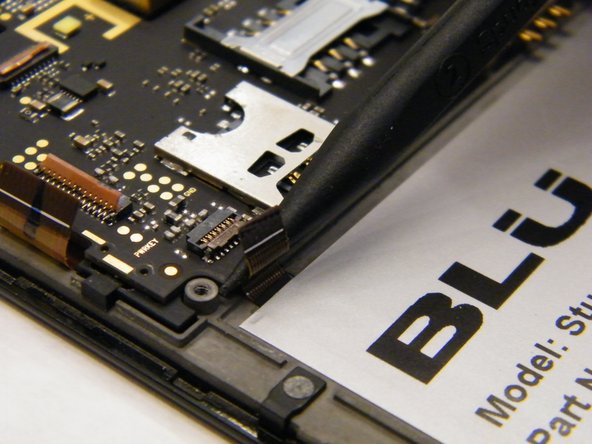
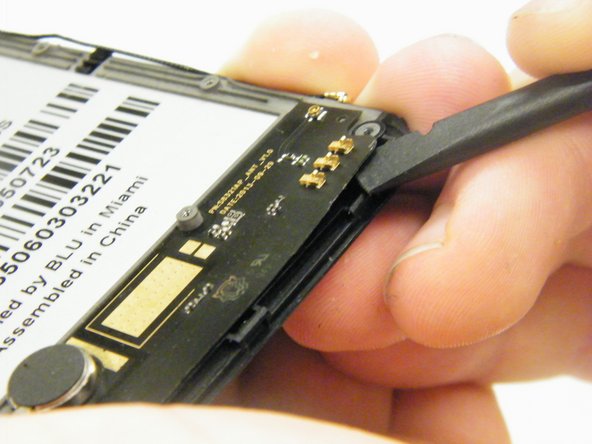
    • Remove speaker circuit board from bottom of the phone by using a Spudger to gently lift up.

    • The speaker circuit board is attached with adhesive. Be careful not to break when removing.

    • Once this piece is removed, you can replace your part with the new screen and digitizer assembly.

结论

To reassemble your device, follow these instructions in reverse order.

另外一个人完成了本指南。

Greg Cerabona

于03/04/17注册

167 声望

撰写一个指南

团队

IUPUI, Team S2-G2, Wilson Spring 2017 IUPUI, Team S2-G2, Wilson Spring 2017 的会员

IUPUI-WILSON-S17S2G2

5 名成员

创作了2篇指南

0条评论

添加评论

浏览统计数据:

过去 24 小时: 0

过去 7 天: 1

过去 30 天: 2

总计 977