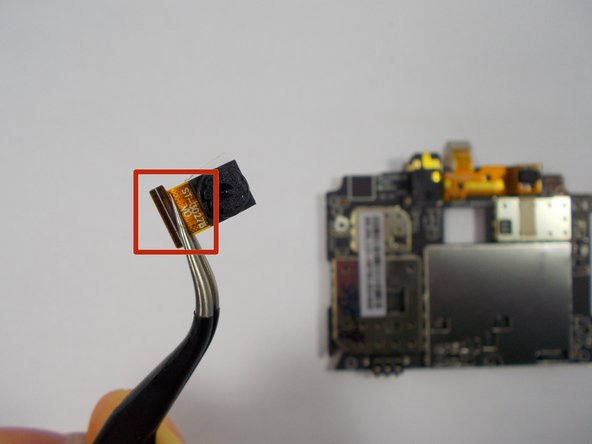
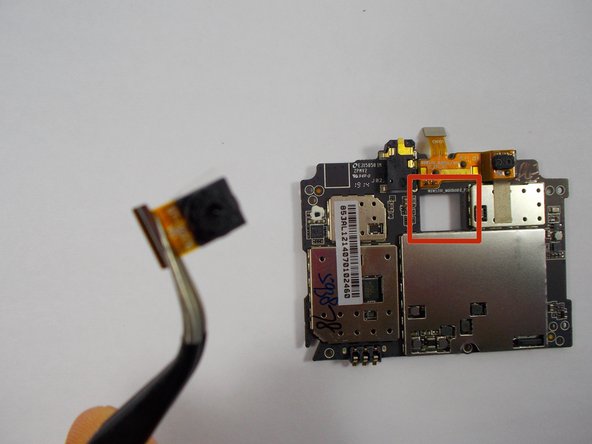
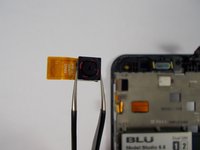
跳转到主内容

Blu Studio 5.5 Camera Replacement

你所需要的

  1. 注意:步骤 1-2 源自标记为进行中的 指南

    Blu Studio 5.5 Camera Replacement, Battery: 步骤 1 中的图像 1,1
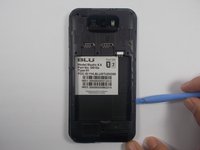
    • Flip over your Studio 5.5 so the back is facing you.

    • Use either the spudger or your fingernail to pull up on the slot in the lower left corner and remove the back cover.

  2. Blu Studio 5.5 Camera Replacement: 步骤 2 中的图像 1,2 Blu Studio 5.5 Camera Replacement: 步骤 2 中的图像 2,2
    • Place your finger in the small groove beneath the battery.

    • Push the battery toward the top of the phone and lift it out.

  3. Blu Studio 5.5 Camera Replacement, Camera: 步骤 3 中的图像 1,1
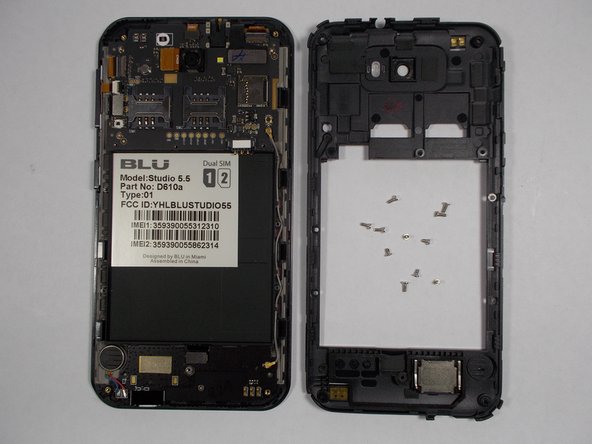
    • Begin by removing the 12 3.5mm screws along the back of the device.

    • 1 of these screws will be underneath a white sticker. Just press the screwdriver through it and remove it normally.

  4. Blu Studio 5.5 Camera Replacement: 步骤 4 中的图像 1,2 Blu Studio 5.5 Camera Replacement: 步骤 4 中的图像 2,2
    • Using your plastic opening tool, begin carefully prying the plastic shell from the phone.

    • Make your way around the edge slowly and lift the shell off when you have made a full circuit.

  5. Blu Studio 5.5 Camera Replacement: 步骤 5 中的图像 1,1
    • Locate and unplug seven connectors on the motherboard.

    • Those marked in red are pulled straight up, away from the phone.

    • The connector marked in orange is pulled out horizontally.

  6. Blu Studio 5.5 Camera Replacement: 步骤 6 中的图像 1,1
    • Unscrew the three 3.5mm screws securing the motherboard in place.

  7. Blu Studio 5.5 Camera Replacement: 步骤 7 中的图像 1,1
    • Using the plastic opening tool, you can now lift the motherboard straight up and out.

  8. Blu Studio 5.5 Camera Replacement: 步骤 8 中的图像 1,1
    • Carefully wedge the plastic remover tool underneath the corner of the camera module and slowly pry until it comes free.

  9. Blu Studio 5.5 Camera Replacement: 步骤 9 中的图像 1,3 Blu Studio 5.5 Camera Replacement: 步骤 9 中的图像 2,3 Blu Studio 5.5 Camera Replacement: 步骤 9 中的图像 3,3
    在这个步骤中使用的工具:
    Tweezers
    $4.99
    购买
    • Use tweezers to lift the camera module out, taking care not to get any fingerprints on it.

    • During reassembly, make sure the ribbon attached to the camera goes up and through the square hole on the motherboard so it is able to reconnect properly.

结论

To reassemble your device, follow these instructions in reverse order.

3等其他人完成本指南。

Brian Sullivan

于10/22/14注册

647 声望

创作了3篇指南

团队

UMass Dartmouth, Team 1-2, Shastany Fall 2014 UMass Dartmouth, Team 1-2, Shastany Fall 2014 的会员

UMASSD-SHASTANY-F14S1G2

3 名成员

创作了3篇指南

0条评论

添加评论

浏览统计数据:

过去 24 小时: 0

过去 7 天: 1

过去 30 天: 3

总计 1,093