跳转到主内容

本指南有最近更改,您可查看未经巡查的最新版本

Blu Grand M2 Display Replacement

你所需要的

  1. Blu Grand M2 Display Replacement, Display: 步骤 1 中的图像 1,2 Blu Grand M2 Display Replacement, Display: 步骤 1 中的图像 2,2
    • Before beginning the guide, be assure that this is the replacement guide you are about to begin. (figure 1)

    • After assuring the guide, begin by locating the torx screws beneath the phone, and remove them. (figure 2)

  2. Blu Grand M2 Display Replacement: 步骤 2 中的图像 1,1
    • Use the Suction Tool and pry tool, to begin by slowly removing the black plate.

    • Be Cautious, do not damage phone display and or inside components while using pry tool and suction tool.

  3. Blu Grand M2 Display Replacement: 步骤 3 中的图像 1,3 Blu Grand M2 Display Replacement: 步骤 3 中的图像 2,3 Blu Grand M2 Display Replacement: 步骤 3 中的图像 3,3
    • Once the back panel is removed, locate the connector of the display shown in figure 1 on the motherboard side.

    • There will be an orange sticker above the connector. You can gently lift up to release the connector. figure 2

    • Disconnect any remaining connectors shown on figure 3

  4. Blu Grand M2 Display Replacement: 步骤 4 中的图像 1,2 Blu Grand M2 Display Replacement: 步骤 4 中的图像 2,2
    • After removing the connectors, begin by locate the six screws on the motherboard side (figure 1).

    • After locating the screws, start removing screws (figure 1).

    • After removing screws, you can now remove the motherboard piece. (figure 2)

  5. Blu Grand M2 Display Replacement: 步骤 5 中的图像 1,1
    • Once you have removed the motherboard piece, flip the phone, and begin using the iOpener.

    • Using the iOpener from the IFIXIT kit, heat it up for 30 seconds in a microwave, and apply it on top of the screen to loosen adhesive.

    • Using the IOpener can be hot. Make sure to wear gloves and other safety wear to resist any burns.

  6. Blu Grand M2 Display Replacement: 步骤 6 中的图像 1,3 Blu Grand M2 Display Replacement: 步骤 6 中的图像 2,3 Blu Grand M2 Display Replacement: 步骤 6 中的图像 3,3
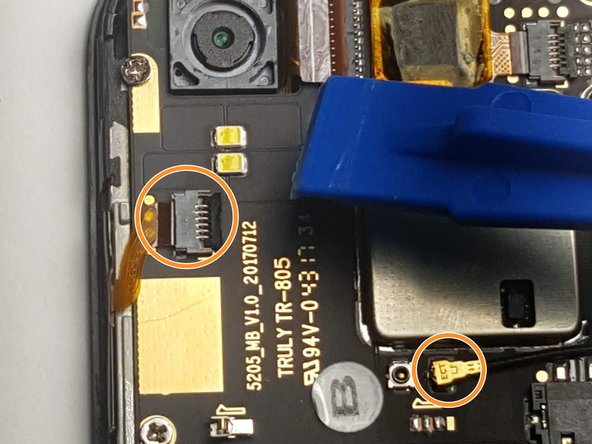
    • Using the suction tool, you can now begin by slowly pulling out the display screen show in (figure 1)

    • Use the pry tool to completely detach the display screen from the phone. (figure 2 )

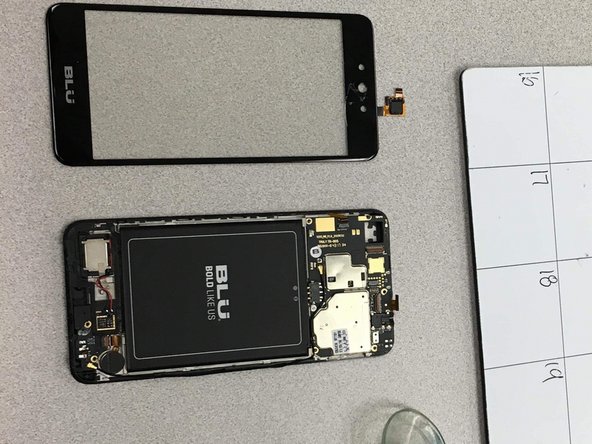
    • Finally, the display is removed and attach your new screen.

    • After applying the new screen, use the steps in reverse order to reassemble the phone.

结论

To reassemble your device, follow these instructions in reverse order.

Christopher

于09/10/18注册

192 声望

撰写一个指南

团队

Gateway, Team S1-G3, Luster Fall 2018 Gateway, Team S1-G3, Luster Fall 2018 的会员

GCC-LUSTER-F18S1G3

4 名成员

创作了4篇指南

一条评论

What type of torx screwdriver did you use?

npyles86 - 回复

添加评论

浏览统计数据:

过去 24 小时: 0

过去 7 天: 0

过去 30 天: 5

总计 1,725