跳转到主内容

Bissell SpotBot Pet Control Panel Replacement

你所需要的

  1. Bissell SpotBot Pet Control Panel Replacement, Control Panel: 步骤 1 中的图像 1,1
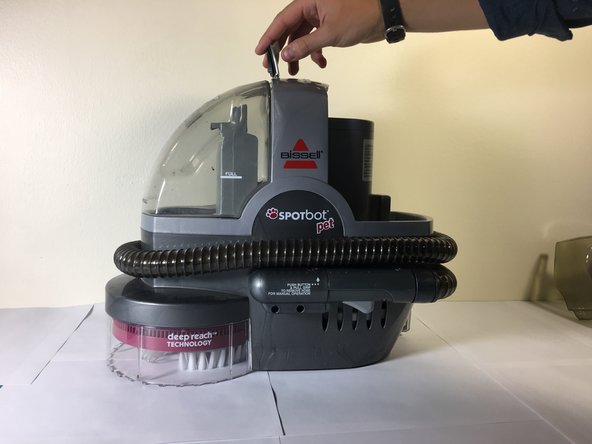
    • Start here.

  2. Bissell SpotBot Pet Control Panel Replacement: 步骤 2 中的图像 1,1
    • Remove the container on the right side of the vacuum.

  3. Bissell SpotBot Pet Control Panel Replacement: 步骤 3 中的图像 1,2 Bissell SpotBot Pet Control Panel Replacement: 步骤 3 中的图像 2,2
    • Lift the tap on top of the vacuum, and then remove the container on the left side of the vacuum.

  4. Bissell SpotBot Pet Control Panel Replacement: 步骤 4 中的图像 1,1
    • Remove the left container of the vacuum.

  5. Bissell SpotBot Pet Control Panel Replacement: 步骤 5 中的图像 1,1
    • Remove the four screws on the top of the device.

  6. Bissell SpotBot Pet Control Panel Replacement: 步骤 6 中的图像 1,1
    • Lift the top of the device off once the screws are removed.

  7. Bissell SpotBot Pet Control Panel Replacement: 步骤 7 中的图像 1,1
    • Unplug the ribbon cable from the motherboard.

  8. Bissell SpotBot Pet Control Panel Replacement: 步骤 8 中的图像 1,1
    • Separate the top piece and flip it upside down.

  9. Bissell SpotBot Pet Control Panel Replacement: 步骤 9 中的图像 1,2 Bissell SpotBot Pet Control Panel Replacement: 步骤 9 中的图像 2,2
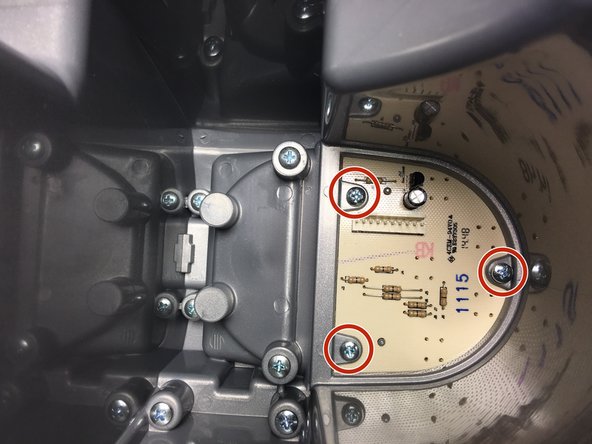
    • Remove the screws holding the motherboard in place.

  10. Bissell SpotBot Pet Control Panel Replacement: 步骤 10 中的图像 1,2 Bissell SpotBot Pet Control Panel Replacement: 步骤 10 中的图像 2,2
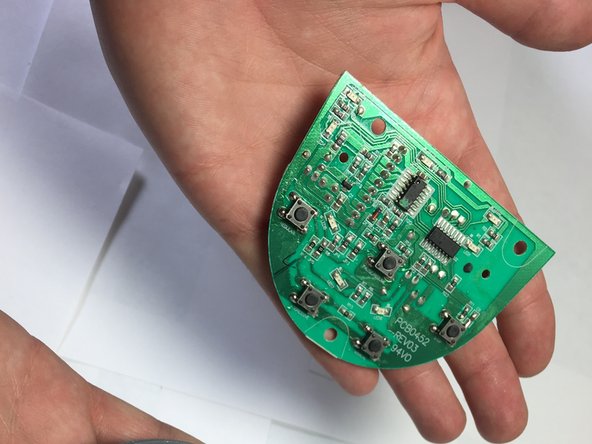
    • Remove the motherboard from the top piece. Repair or replace the motherboard if it is faulty.

结论

To reassemble your device, follow these instructions in reverse order.

4等其他人完成本指南。

团队

Cal Poly, Team S7-G3, Banghart Fall 2017 Cal Poly, Team S7-G3, Banghart Fall 2017 的会员

CPSU-BANGHART-F17S7G3

4 名成员

创作了4篇指南

一条评论

Where can I buy the part?

Sue Loberger - 回复

添加评论

浏览统计数据:

过去 24 小时: 0

过去 7 天: 1

过去 30 天: 3

总计 530