跳转到主内容

Beboncool Wireless Switch Pro Controller Motherboard Replacement

你所需要的

  1. Beboncool Wireless Switch Pro Controller Motherboard Replacement, Motherboard: 步骤 1 中的图像 1,1
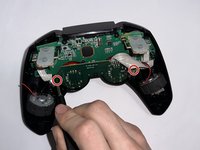
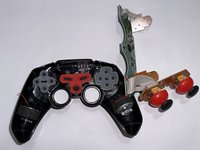
    • Use a Phillips #0 screwdriver to remove the seven 5 mm screws from the back of the controller.

  2. Beboncool Wireless Switch Pro Controller Motherboard Replacement: 步骤 2 中的图像 1,2 Beboncool Wireless Switch Pro Controller Motherboard Replacement: 步骤 2 中的图像 2,2
    • Gently separate the top and bottom halves of the controller.

  3. Beboncool Wireless Switch Pro Controller Motherboard Replacement: 步骤 3 中的图像 1,2 Beboncool Wireless Switch Pro Controller Motherboard Replacement: 步骤 3 中的图像 2,2
    • Use a Phillips #0 screwdriver to remove the two 5 mm screws holding the joystick motherboard in place.

  4. Beboncool Wireless Switch Pro Controller Motherboard Replacement: 步骤 4 中的图像 1,1
    • Carefully move the bumper buttons out of the way.

  5. Beboncool Wireless Switch Pro Controller Motherboard Replacement: 步骤 5 中的图像 1,2 Beboncool Wireless Switch Pro Controller Motherboard Replacement: 步骤 5 中的图像 2,2
    • Use a Phillips #0 screwdriver to remove the 5 mm screw holding the motherboard in place.

    • Remove the motherboard.

结论

To reassemble your device, follow these instructions in reverse order.

Tayah Appel

于03/27/23注册

529 声望

创作了5篇指南

团队

Casper College, Team 1-3, Lareau Spring 2023 Casper College, Team 1-3, Lareau Spring 2023 的会员

CASC-LAREAU-S23S1G3

3 名成员

创作了5篇指南

0条评论

添加评论

浏览统计数据:

过去 24 小时: 1

过去 7 天: 1

过去 30 天: 6

总计 59