跳转到主内容

当前版本的文档还未经巡查,您可以查看最新的已查核版本

你所需要的

  1. 这个步骤还没有翻译 帮忙翻译一下

    : 步骤 1 中的图像 1,2 : 步骤 1 中的图像 2,2
    • Remove the following pentalobe screws securing the lower case to the MacBook Pro:

    • Eight 3.0 mm

    • Two 2.3 mm

  2. 这个步骤还没有翻译 帮忙翻译一下

    : 步骤 2 中的图像 1,1
    • Lifting from the edge nearest the clutch cover, lift the lower case off the MacBook Pro.

    • Set the lower case aside.

  3. 这个步骤还没有翻译 帮忙翻译一下

    : 步骤 3 中的图像 1,1
    • Peel back the warning label covering the battery connector.

  4. 这个步骤还没有翻译 帮忙翻译一下

    : 步骤 4 中的图像 1,3 : 步骤 4 中的图像 2,3 : 步骤 4 中的图像 3,3
    • No metal tools!

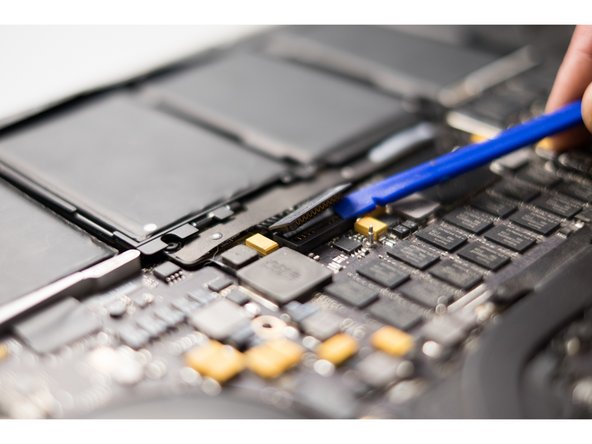
    • Using the flat end of a spudger, gently pry the battery connector straight up out of its socket on the logic board.

    • Bend the battery cables back and out of the way, ensuring that the battery connector doesn't accidentally make contact with the logic board.

  5. 这个步骤还没有翻译 帮忙翻译一下

    : 步骤 5 中的图像 1,2 : 步骤 5 中的图像 2,2
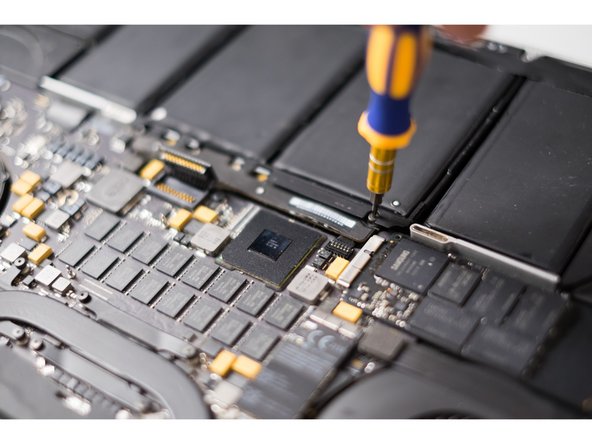
    • Remove the following T5 Torx battery screws.

  6. 这个步骤还没有翻译 帮忙翻译一下

    : 步骤 6 中的图像 1,3 : 步骤 6 中的图像 2,3 : 步骤 6 中的图像 3,3
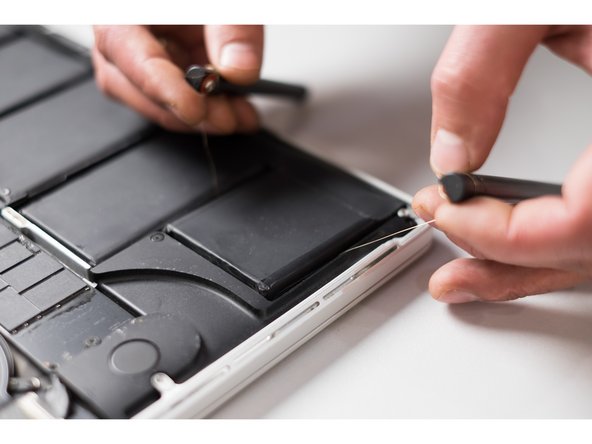
    • There is risk to damage the battery! (Do not use ANY metal tools - puncturing the battery can cause fire and possibly leak battery gel!)

    • Please note: carefully cut the duct tape layer under the battery with thin wire string. Pull back and forth slowly. Do not pry up with any metal tools.

  7. 这个步骤还没有翻译 帮忙翻译一下

    : 步骤 7 中的图像 1,2 : 步骤 7 中的图像 2,2
    • Be sure you did not damage the loopback of the track-pad!

    • Please lift up the plaque under the battery with metal spudger.

  8. 这个步骤还没有翻译 帮忙翻译一下

    : 步骤 8 中的图像 1,2 : 步骤 8 中的图像 2,2
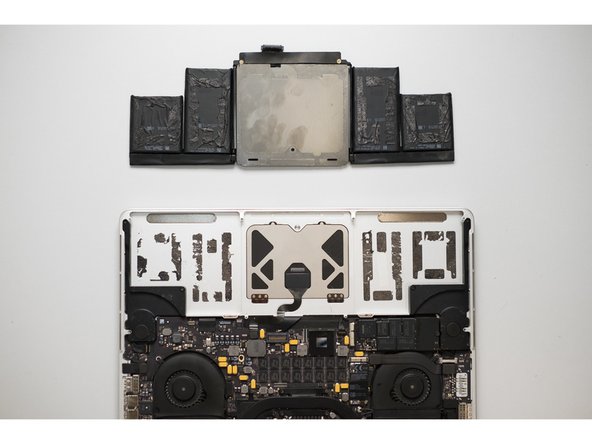
    • Remove battery

  9. 这个步骤还没有翻译 帮忙翻译一下

    : 步骤 9 中的图像 1,2 : 步骤 9 中的图像 2,2
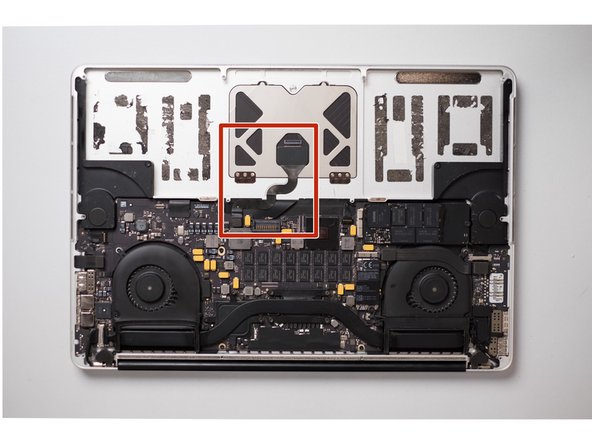
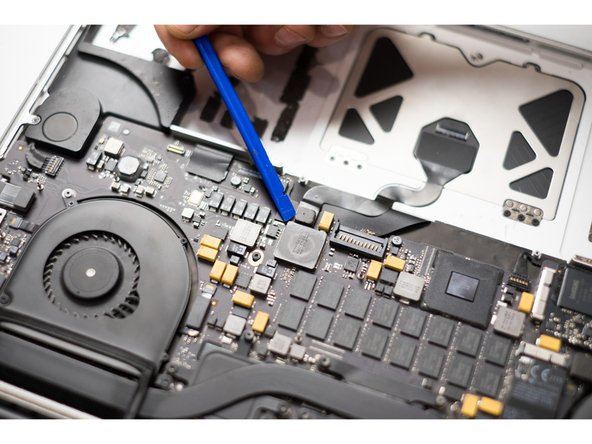
    • Using the flat end of a spudger, pry the trackpad connector.

  10. 这个步骤还没有翻译 帮忙翻译一下

    : 步骤 10 中的图像 1,3 : 步骤 10 中的图像 2,3 : 步骤 10 中的图像 3,3
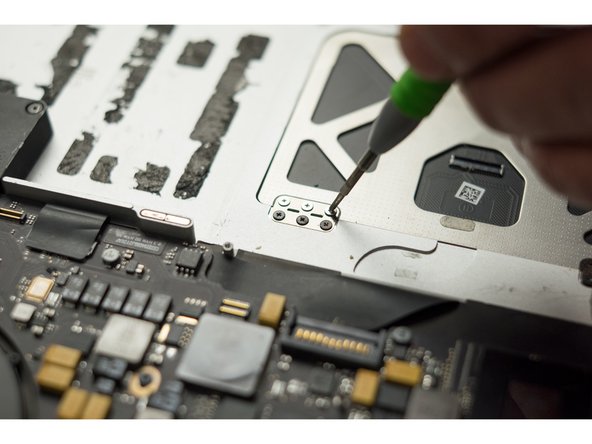
    • Unscrew the light-colored screws

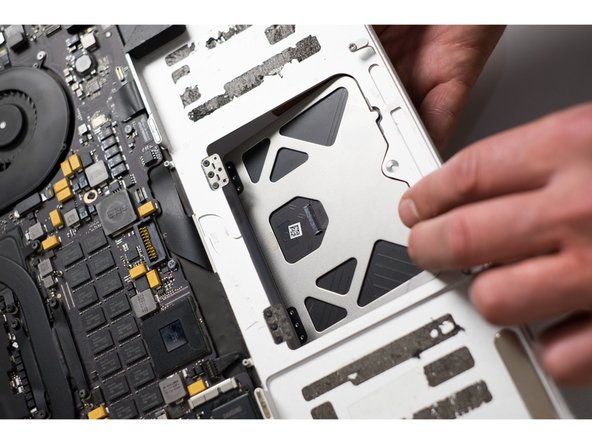
    • Remove trackpad.

  11. 这个步骤还没有翻译 帮忙翻译一下

    : 步骤 11 中的图像 1,1
    • Adjustment of trackpad touching level

  12. 这个步骤还没有翻译 帮忙翻译一下

    : 步骤 12 中的图像 1,1
    • Good luck!

终点

53等其他人完成本指南。

团队

AppleParts.PRO AppleParts.PRO 的会员

Business

1 名成员

创作了4篇指南

54条评论

Thank you! I was able to swap out new trackpad w/ these instructions.

Bobby - 回复

Hi, Could I just ask where did you get your 'Handles' for the wire string? I bought some titanium wire a while ago but literally cant grip it. I have searched ebay etc but nothing is comeing up - Maybe my search terms aren't correct.

Thanks

Aaron - 回复

Hello! You can use any strong jaws. We ordered holders in China.

Aleksandr ApplePartsPRO -

Hi, Thanks for that, sorry for the late reply. I have ordered a set from china so I'll see what they're like, in the meantime if anyone is interested I had some random parts laying around, I made a set out of a couple of plastic spudgers, some polymorph to enlarge the top which I sank a motherboard peg into which I can then screw some screws with the large heads into. Seems to do a pretty good job, i'll upload a pic if any1 is interested.

Aaron - 回复

添加评论

浏览统计数据:

过去 24 小时: 9

过去 7 天: 55

过去 30 天: 229

总计 82,805