跳转到主内容
加入维修社区 - 创建账户

Battery Disconnect

仅作为前提条件
本指南仅提供前提条件!本指南是另一个程序的一部分,不能单独使用。

你所需要的

  1. Battery Disconnect, Unfasten the lower case: 步骤 1 中的图像 1,2 Battery Disconnect, Unfasten the lower case: 步骤 1 中的图像 2,2
    • If your device has a nano‑SIM card tray on the back edge, remove it before starting your repair.

    • Use a Phillips #1 screwdriver to loosen the eight captive screws securing the lower case.

  2. Battery Disconnect, Insert an opening pick: 步骤 2 中的图像 1,2 Battery Disconnect, Insert an opening pick: 步骤 2 中的图像 2,2
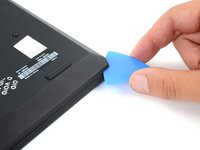
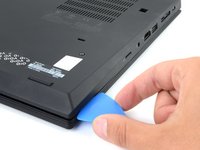
    • Insert an opening pick between the lower case and the chassis on the front right edge.

  3. Battery Disconnect, Release the front clips: 步骤 3 中的图像 1,3 Battery Disconnect, Release the front clips: 步骤 3 中的图像 2,3 Battery Disconnect, Release the front clips: 步骤 3 中的图像 3,3
    • Angle the pick down at about 30 degrees.

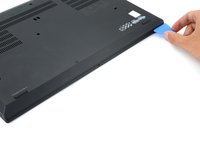
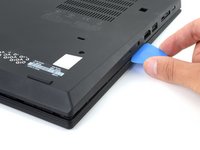
    • Slide the pick along the front edge to release the clips securing the lower case.

  4. Battery Disconnect, Release the USB clip: 步骤 4 中的图像 1,2 Battery Disconnect, Release the USB clip: 步骤 4 中的图像 2,2
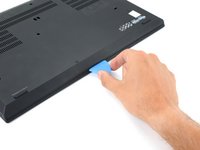
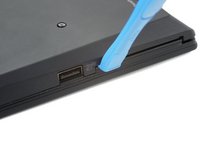
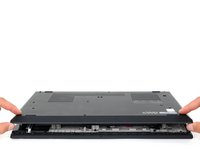
    • Insert an opening tool between the lower case and the chassis, just to the right of the USB port on the left edge.

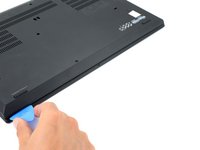
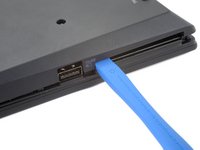
    • Pry the opening case up to release the clip next to the USB port.

    • It may take significant force and multiple attempts to release the clip. You will hear a popping noise when the clip releases.

  5. Battery Disconnect: 步骤 5 中的图像 1,2 Battery Disconnect: 步骤 5 中的图像 2,2
    • Insert an opening pick on the left edge above the USB port. Slide the pick all the way up to the ethernet port to release the clips.

  6. Battery Disconnect: 步骤 6 中的图像 1,2 Battery Disconnect: 步骤 6 中的图像 2,2
    • Insert an opening pick on the right edge near the corner.

    • Slide the pick along the right edge all the way to the HDMI port to release the rest of the clips.

  7. Battery Disconnect: 步骤 7 中的图像 1,3 Battery Disconnect: 步骤 7 中的图像 2,3 Battery Disconnect: 步骤 7 中的图像 3,3
    • Lift the lower case from the chassis and remove it.

    • During reassembly, this is a good point to power on your laptop and test all functions before sealing it up. Be sure to power your laptop back down before you continue working.

  8. Battery Disconnect, Disconnect the battery: 步骤 8 中的图像 1,3 Battery Disconnect, Disconnect the battery: 步骤 8 中的图像 2,3 Battery Disconnect, Disconnect the battery: 步骤 8 中的图像 3,3
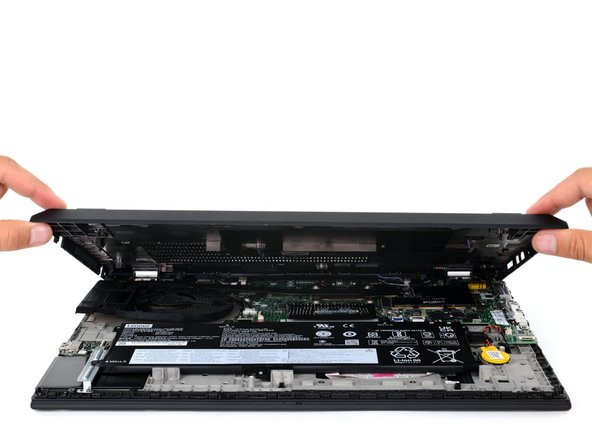
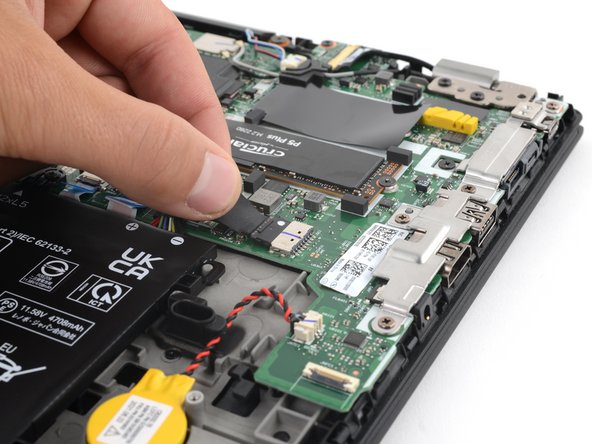
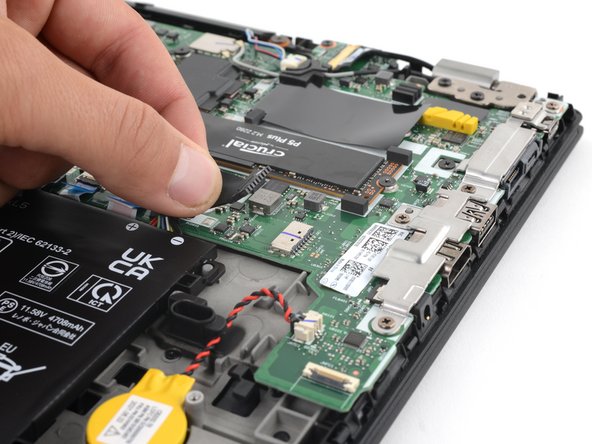
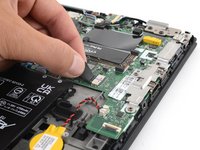
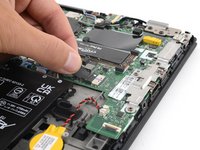
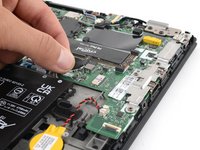
    • Grip the pull tab on the battery connector with your fingers and gently pull away from the socket to disconnect it.

结论

To reassemble your device, follow these instructions in reverse order.

Spencer Day

于09/14/22注册

162,103 声望

创作了1,043篇指南

团队

iFixit iFixit 的会员

Staff

124 名成员

创作了24,129篇指南

0指南评论

添加评论

浏览统计数据:

过去 24 小时: 0

过去 7 天: 0

过去 30 天: 5

总计 68