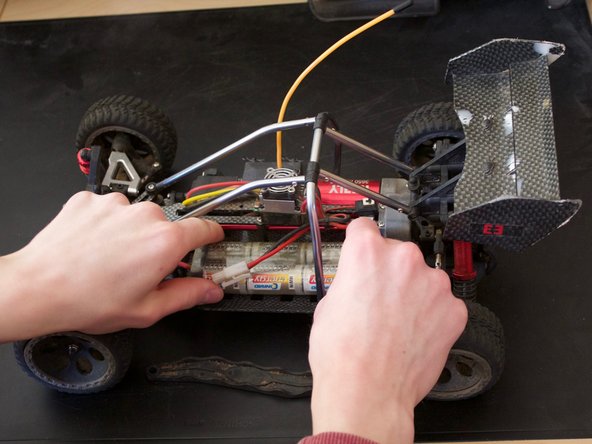
跳转到主内容

Batterieausabau

你所需要的

  1. Batterieausabau, trim loss: 步骤 1 中的图像 1,1
    • These two pins must be removed.

  2. Batterieausabau: 步骤 2 中的图像 1,1
    • Here, a screwdriver or other stable thin object (in the picture: letter opener) can be helpful

  3. Batterieausabau: 步骤 3 中的图像 1,2 Batterieausabau: 步骤 3 中的图像 2,2
    • TIP: if you remove the cladding more often (for example, for thorough cleaning), it may be helpful to provide the splints with some insulating tape, so the use of tools is unnecessary

  4. Batterieausabau: 步骤 4 中的图像 1,1
    • The panel is now dismantled

  5. Batterieausabau, Batterieausabau: 步骤 5 中的图像 1,1
    • These two pins must be removed

  6. Batterieausabau: 步骤 6 中的图像 1,1
    • TIP: Since this work has to be done more often, it is recommended to provide the cotter pins with some insulating tape so that they can be removed without tools

  7. Batterieausabau: 步骤 7 中的图像 1,1
    • The battery holder can now be pulled off upwards

  8. Batterieausabau: 步骤 8 中的图像 1,1
    • Now the battery connection is disconnected

  9. Batterieausabau: 步骤 9 中的图像 1,2 Batterieausabau: 步骤 9 中的图像 2,2
    • And the battery can be removed upwards

  10. Batterieausabau: 步骤 10 中的图像 1,1
    • The battery can now be charged

结论

Repeat the steps in order to reassemble your device.

由衷感谢以下译者:

de en

100%

Israel正在帮助我们修复这个世界! 您也想加入吗?
开始翻译 ›

Leonard Kesting

于08/14/16注册

1,229 声望

创作了9篇指南

0条评论

添加评论

浏览统计数据:

过去 24 小时: 0

过去 7 天: 6

过去 30 天: 13

总计 302